
Top 24 Essential School Bus Conversion Tools

So if you’re wanting to see what tools we’re using to convert our school bus, wrapped up in a convenient list, then this is for you. We’ve also included links to them so that if you need one, you can find them easily.
Check out the skoolie tools we have in our toolbox as we convert our school bus into our tiny home on wheels.
Jump To:
- Tape Measure
- Marking Instruments
- Angle Grinder
- Oscillating Tool
- Reciprocating Saw
- Circular Saw
- Compound Miter Saw
- Table Saw
- Jigsaw
- Router
- Pocket Hole Jig
- Welding Machine
- Metal Shears
- Clamps
- Impact Driver & Drill
- Shop Vacuum
- Air Compressor
- Pneumatic Rivet Gun
- Builder’s Square, Combination Square & Speed Square
- Orbital Sander
- Rivnut Tool
- Crescent Wrenches
- Socket Set
- Locking Pliers
AFFILIATE DISCLOSURE: Note that we are affiliated with products and services we use and trust. If you click a link and make a purchase, we’ll earn a small commission at not extra cost to you. This helps us to continue producing content and we hope that you use our links if our blog posts or videos have helped you in any way!
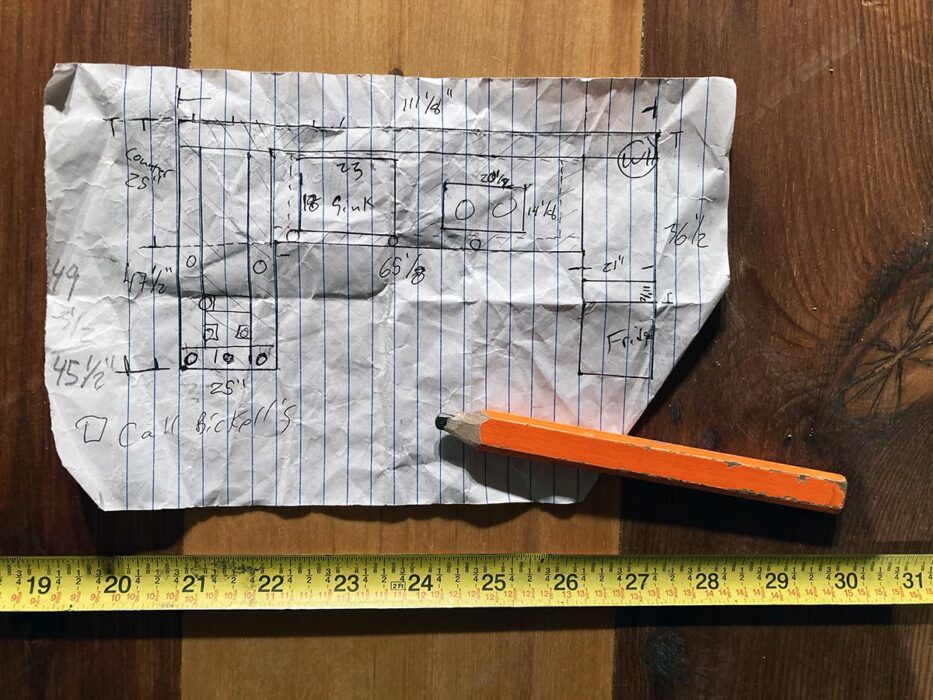
1. Tape Measure

To get things to fit right as we were building, we found that having a tape measure helped out a ton. We tried out many different kinds of tape measures and the one that stuck out as being the most awesome are the ones that have fractions printed on the tape measure blade. Although tape measures have the lines indicating the various increments of 1/8″ and 1/4″, we found that having the fraction printed on the tape measure made seeing those measurements easier.
There are different types of tape measures for different tasks. When measuring our bus, we found that having a 40 ft. tape measure was perfect because we’d be able to measure from the front to the back in one go. While building inside the bus, usually a 25 ft. tape measure was sufficient.
One feature we enjoy on our 25 ft. tape measure is that it is self-locking. This means that when the tape is extended, it stays out until a button is pressed causing the tape measure to retract.
2. Marking Instruments
Another school bus conversion tool that is inexpensive and indispensable are marking instruments. There are a few different ones that we use depending on the material we’re working with. Not all of them work for each project, yet a few are multi-purpose.
Right out of the toolbox, a carpenter’s pencil is one of our all-around go-to marking instruments. Carpenter’s pencils are sturdy and can take a beating because of how thick they are as well as they won’t roll off our project because of the shape. They mark on various materials like paper and wood, making them easy to use for taking notes or marking a cut line.
A Sharpie would be our next favorite marking tool as it’s good for drawing quick sketches for cut lines, marking plastics, and metal. We use Sharpies for labeling tape and marking on the framing indicating various information pertinent to the area we’re building in.
An awl is the last marking tool we use frequently. Using a sharp awl, which looks like an ice pick, is great for marking sheet metal cut lines because it has a sharp point and can scribe a scratched line for making precise cuts.
3. Angle Grinder
If you’re converting a school bus into a motorhome or tiny home on wheels, there’s no question on IF you need an angle grinder, because you gotta have one. There’s no escaping it. The angle grinder is a pertinent school bus conversion tool because it is extremely versatile. We’ve used our angle grinder with wood, metal, and plastic. With the correct blade, disk, or wheel, an angle grinder can cut through metal, smooth out welds and even artfully sculpt wood.
Various projects we’ve used our angle grinder for are things like cutting the steel hat channel to make room for bigger windows. Using the angle grinder allowed us to shape the edge of our kitchen countertop. The angle grinder also makes it easy to cut the heads off stubborn, old, stripped out bolts.
4. Oscillating Tool
The oscillating tool is one of those skoolie tools that, once you have one you think, “Why have I waited this long to get this?” Quite frankly, this tool can make cuts that other cutting tools cannot because the blade doesn’t really move much. The oscillating tool works by moving a blade or attachment at extremely high speed in either a circular or back and forth motion, Doing this allows very precise cuts in confined space without needing the range of motion required by tools like a reciprocating saw or circular saw.
Depending on the blade, we’ve been able to make flush cuts in wood using the wood toothed blade, cut off bolt heads with the metal blade, scrape off and even cut through grout to easily remove one block of glass without destroying the rest around it.
In our book, an oscillating tool is a must-have in skoolie tools.
5. Reciprocating Saw
A school bus conversion tool that we use quite often is the reciprocating saw. This saw also goes by the name SAWZALL which is by Milwaukee. The reciprocating saw is useful when cutting metal, wood, and plastics. What’s cool about a reciprocating saw is that the blades come in varying lengths, which makes cutting through multiple layers of materials all at the same time possible.
An example of use is when we were cutting out the bus skin on the skirt area of the bus to create a space for the doors for our underbody storage, the angle grinder blade diameter was not long enough to cut through the skin, AND the vertical hat channel. However, the reciprocating saw easily cut through all of it in one go.
Because of the versatility and strength, having a reciprocating saw in your skoolie toolbox is a no-brainer when it comes to school bus conversion tools.
6. Circular Saw
There are some instances during a skoolie build when cutting a straight line may benefit you. As an example, as we were building our cabinet boxes in the kitchen, we needed straight lines for connecting the pieces together. Although this is possible with a jigsaw, a circular saw is far superior at this task.
Besides cutting wood, using different blades on a circular saw allows for cutting through metal, plastics, and tiles too!
7. Compound Miter Saw
Cutting square or angle pieces of lumber has never been easier or more precise with a compound miter saw. When framing up the walls, or needing to batch cut lumber, having a compound miter saw in our school bus conversion toolbox not only saves us time but also increases efficiency and safety.
The compound miter saw we use also has a slide on it, which makes cutting boards up to 12” thick, and leaves a nice crisp cut when using a sharp blade. With the hundreds of boards needing to be cut for our upcycled barn wood floor, the compound miter saw was excellent in making fast, accurate cuts.
8. Table Saw
Using a table saw in our skoolie build made milling reclaimed barn wood a lot easier than trying to make the same cuts with a circular saw. With longer boards needing to be a consistent width, setting the fence on the table saw allowed us to cut an entire row of boards the same width a breeze. A table saw can be used not only to cut wood but ripping panels of foam board is quick and easy as well.
9. Jigsaw
With versatility in mind, a jigsaw checks that box quite nicely. With a variety of blade types, a jigsaw can cut straight or curved designs easily through most materials including metal, wood, and plastics. Where a benchtop scroll saw or band saw won’t work, a jigsaw can be used in various applications, which is why we have it in our skoolie toolbox.
As an example, Erin was cutting some swirly designs into plywood for the end piece of our bedroom closet clothes rack. The jigsaw made cutting those curves easy peasy.
10. Router
Creativity is spawned through imagination and clever tool usage. The router is one of those tools that seems like it has a limited use to rounding edges for finished pieces until mounting the router to a table or a jig increases its functionality.
We used our router to cut tongue and groove ends in our reclaimed barn wood to mill our floor joints.
In another project, we used our router mounted to a board so as to create a 360-degree circular rotational jig to carve out our shower’s dome skylight frame.
11. Pocket Hole Jig
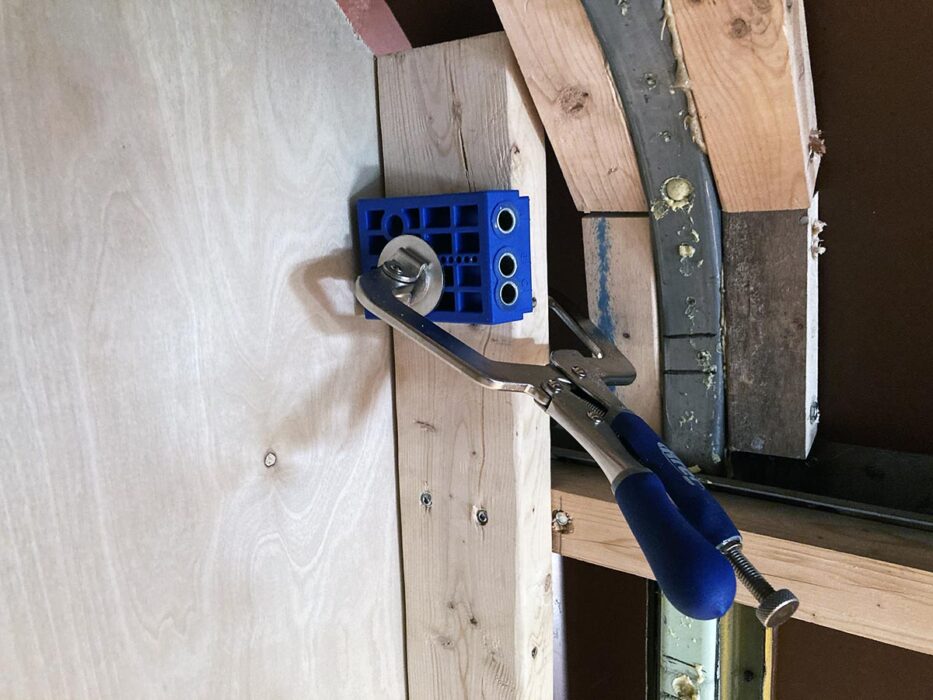
Joining wood at right angles to each other has never been easier since the advent of the Kreg Jig. Once upon a time, becoming a cabinet maker was one of those trades that took years to hone one’s skills to make sturdy cabinets. All this changed when the Kreg Jig hit the market. Now, making cabinets is as easy as following the guide on the Kreg Jig and screwing them together.
We use the Kreg Jig to screw together our 2×2 and 2×4 wall framing along with joining plywood as thin as 1/2″ thick. The resulting joints are strong and easy to put together. All this is why we have the Kreg Jig in our school bus conversion toolbox.
12. Welding Machine
While bolting together metal is strong and easy to visually know the pieces are joined together, using a MIG welder has changed how we fabricate steel projects. Where bolts are not possible or make building difficult, joining steel together with a weld is strong, sleek, and relatively easy to do.
We use the Lincoln Electric POWER MIG 210 MP which has multiple weld settings for various sizes of metal making welding up the hat channel for around the windows quick. In other projects, we find that welding angle iron together is quicker than using bolts, which is why this welding machine is in our skoolie toolbox.
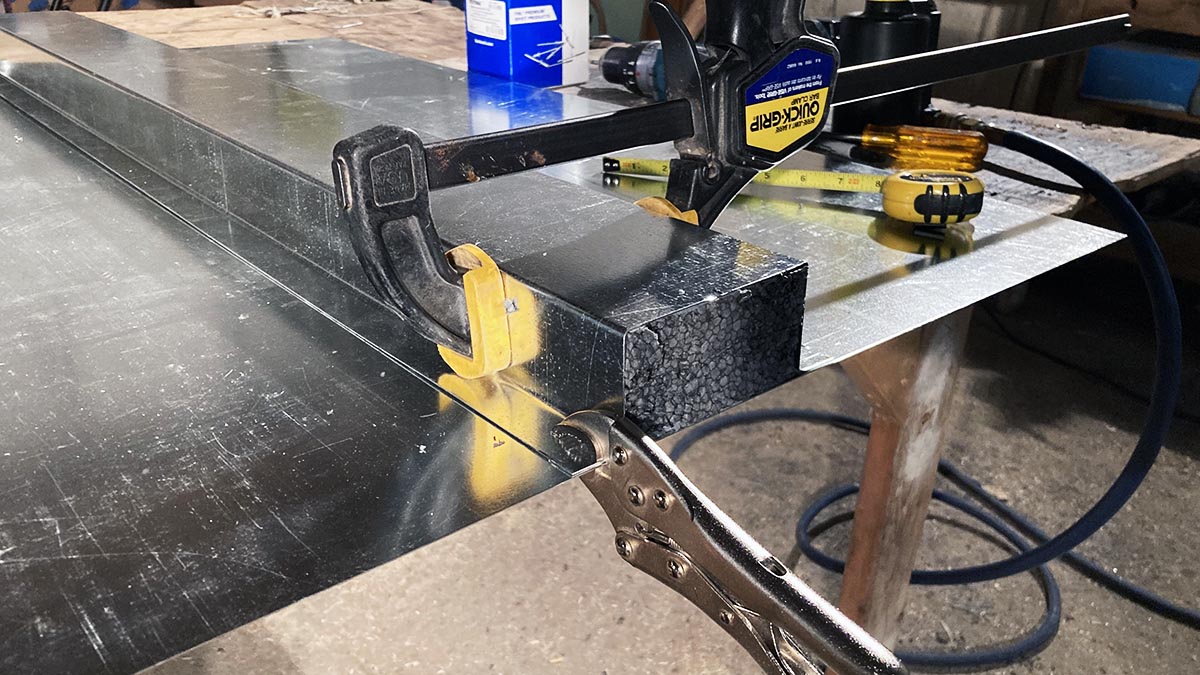
13. Metal Shears
When cutting sheet metal, using metal shears makes quick, accurate work of the task. Although some pieces a quick snip with a hand shear works fine, for longer cuts, using metal shears is substantially easier and cuts cleaner than using tin snips.
14. Clamps
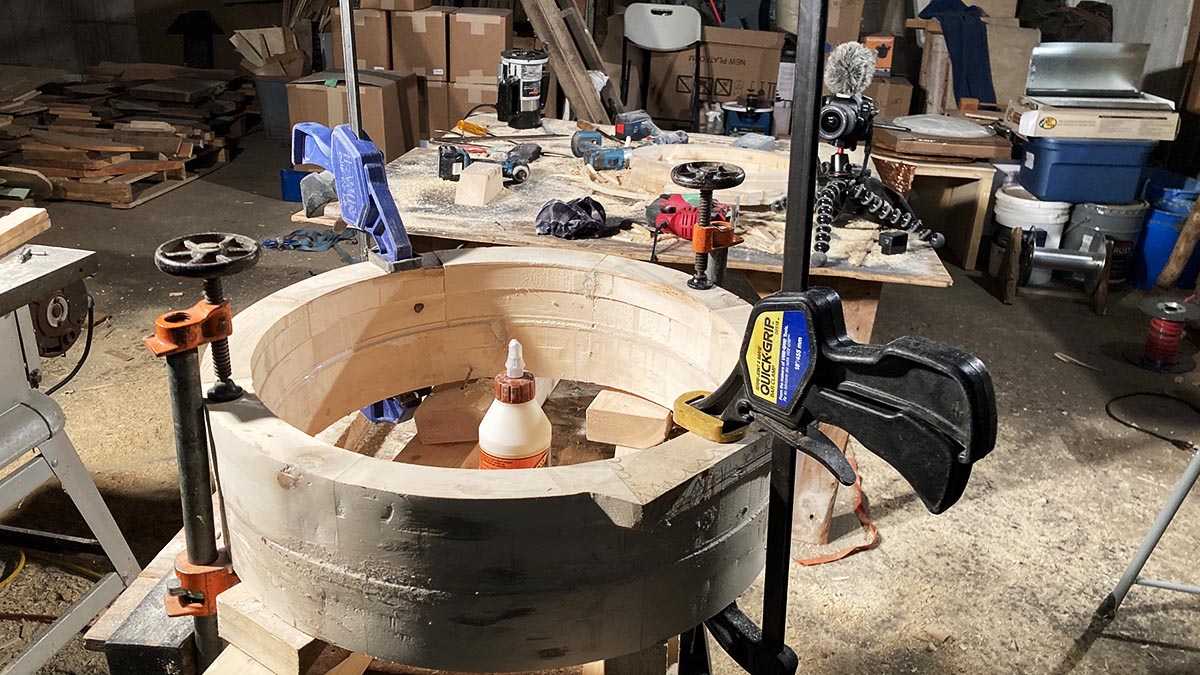
Holding pieces of material together with clamps is far superior to using our handgrip strength in most cases. There are all sorts of clamps that we use, such as quick grip clamps, c-clamps, spring clamps, and pipe clamps to name a few, there is a purpose for all the different types.
Overall, we use the Irwin Quick-Grip clamps more than any of the other ones, but there are some situations that the other types work better than the quick-grip clamps, which is why we have an assortment in our school bus conversion toolbox.
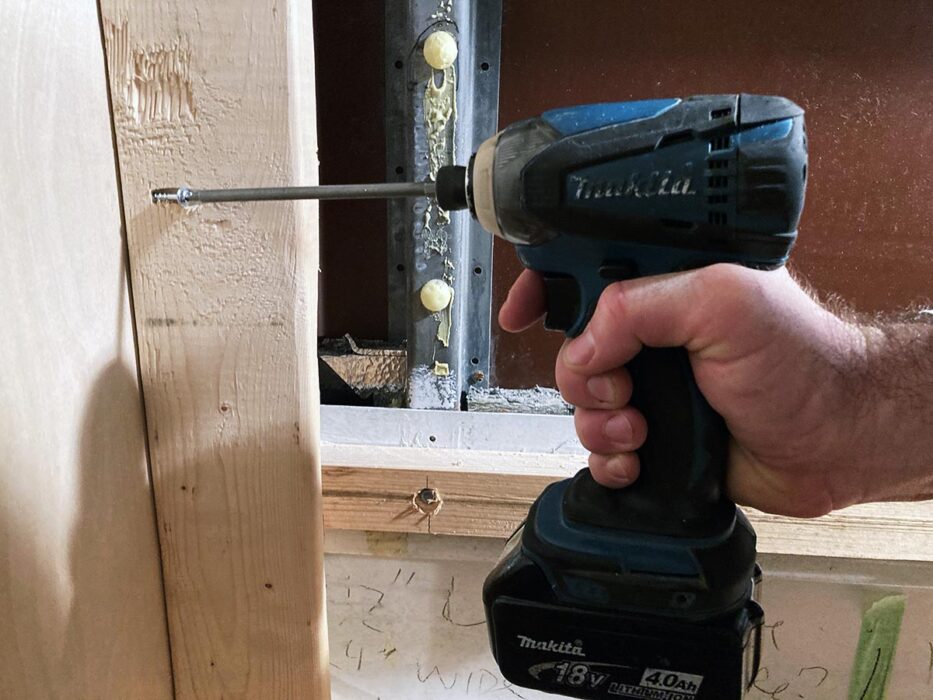
15. Impact Driver & Drill

Every day… Each project… Regardless of what we’re working on… An impact driver and drill are essential for screwing things together and drilling holes. We’ve used both Bosch and Makita drills and impact drivers. The Bosch feels lighter than the Makita, but the Makita has more torque and longer battery life than the Bosch.
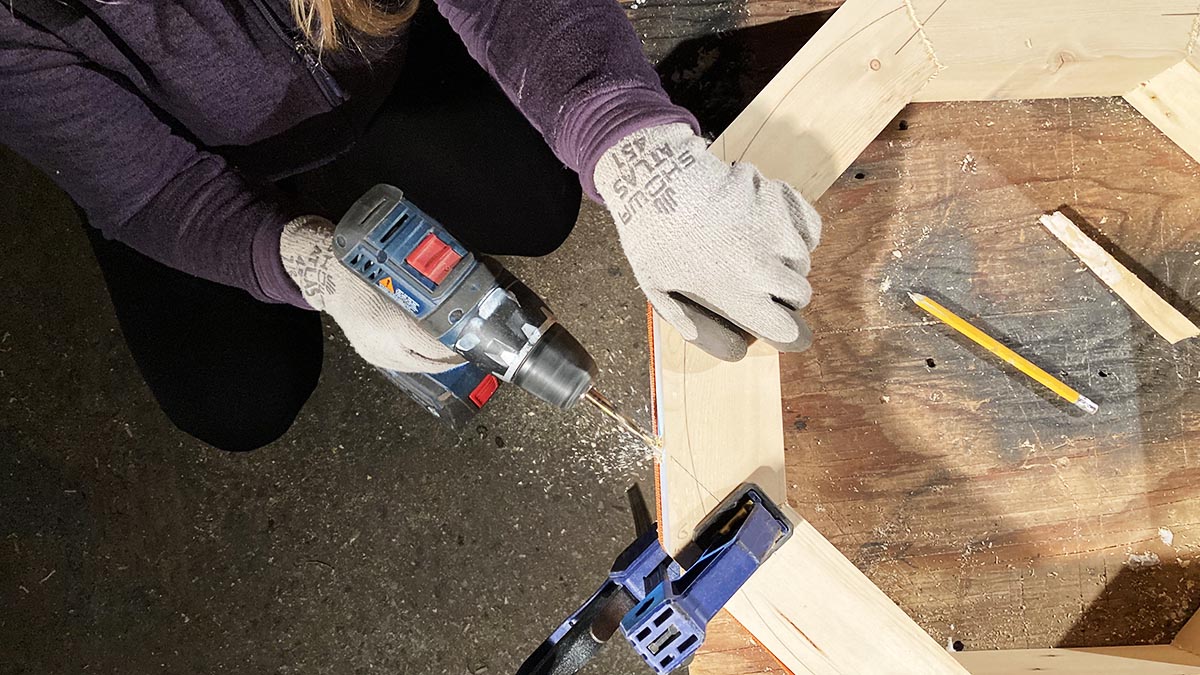
For some stubborn bolts that the Bosch impact driver couldn’t loosen, the Makita broke the nut free from the bolt without a problem. However, when it comes to hours of drilling in wood screws for projects like our reclaimed barn wood floor, the Bosch impact driver is lighter, meaning we had longer endurance before our forearms were smoked from holding onto the impact driver longer.
16. Shop Vacuum
Dirt, dust, and debris gets everywhere, every day, with every project. Using a broom helps a ton, but to get all the dust and debris up without sweeping it into the air, a good shop vacuum is essential in keeping workspaces clean.
We use the shop vacuum every single day to suck up sawdust, metal shavings, and dirt that we trek into the bus from outside. When choosing a shop vac, we had to get one that really sucks! The more suction it has, the better it will remove dust and debris from wherever we point the wand hose.
17. Air Compressor
Although the air compressor is something that most don’t rant and rave about, without one, surfaces are harder to keep clean. We use a 15-gallon air compressor in the barn shop every day with a pistol-grip blowgun attachment hooked to a 25 ft. long hose. With that setup, we keep surfaces cleared. As sawdust builds up on the table saw or compound miter saw, we blow it off. As our workbench accumulates sawdust or metal shavings, we blow it off. If a piece we’re working on has debris in a drilled hole, the blower attachment comes to the rescue!
What’s cool about air compressors is that there are a TON of attachments that can be connected to them including cut-off wheels, drills, air chisels, impact drivers, and tire inflators, just to name a few.
18. Pneumatic Rivet Gun
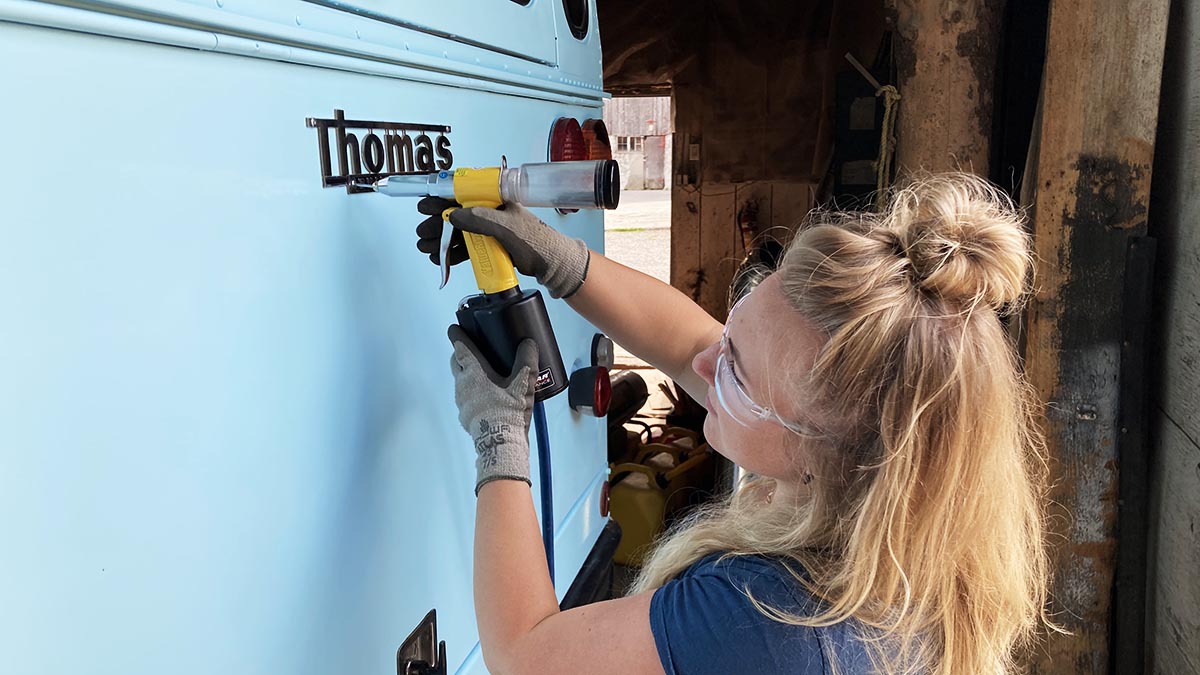
When doing sheet metal work, fastening two sheets together at the seam sometimes requires rivets, which are a fun fastener. By drilling a quick hole and popping a rivet in, the two sheets become one quickly.
Now, there are a couple of types of rivet guns. One is manual where we would have to squeeze a handle and use our hands’ strength to pop the mandrel on the rivet. The second is our favorite, which is the pneumatic rivet gun. This style is hooked up to the air compressor and a trigger is gently pulled, which causes the rivet gun to do the work for you (which is why we have this one in our skoolie toolbox)
19. Builder’s Square, Combination Square & Speed Square
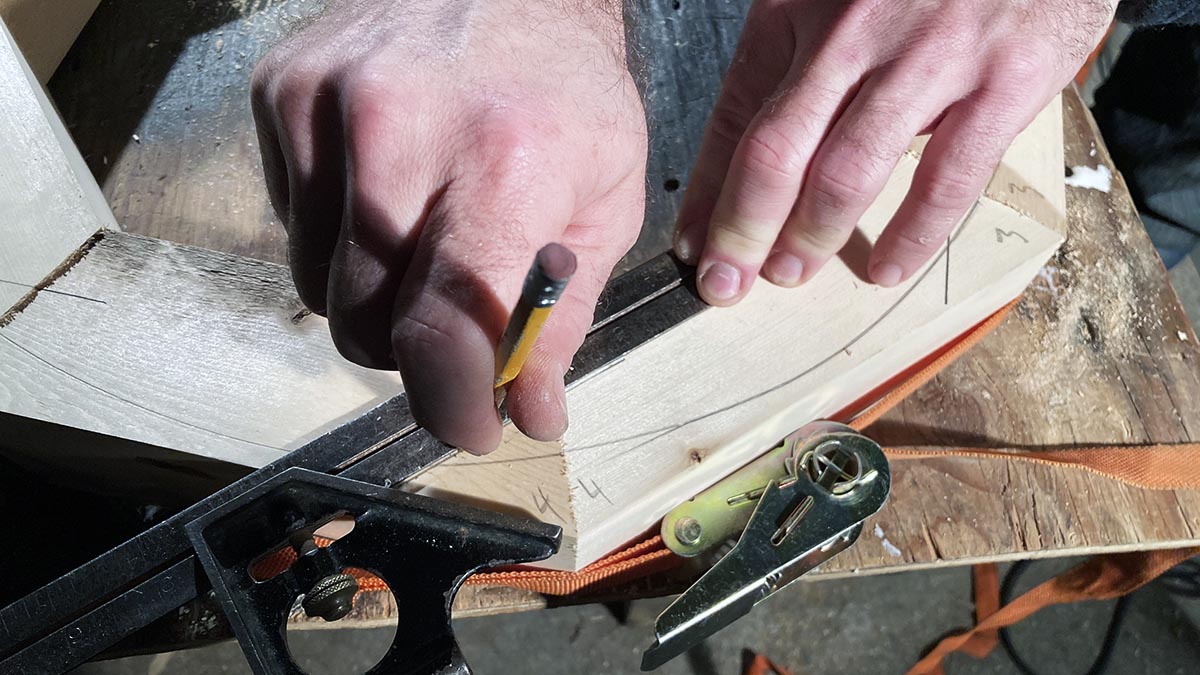
What’s funny about using a square edge of any kind in a bus build is that the bus itself is not square. The walls going up the side to the curved ceiling across the top of the ceiling and down the other side… Not square.
However, when building stuff inside a skoolie, it’s nice to have square edges for things like lining up the studs in the walls, squaring up cabinet walls, faces, backs, and bottoms, or even laying out reclaimed barn wood floor.
Regardless of what we need to be square, we always have either a builders square, combination square, or a speed square available.
20. Orbital Sander
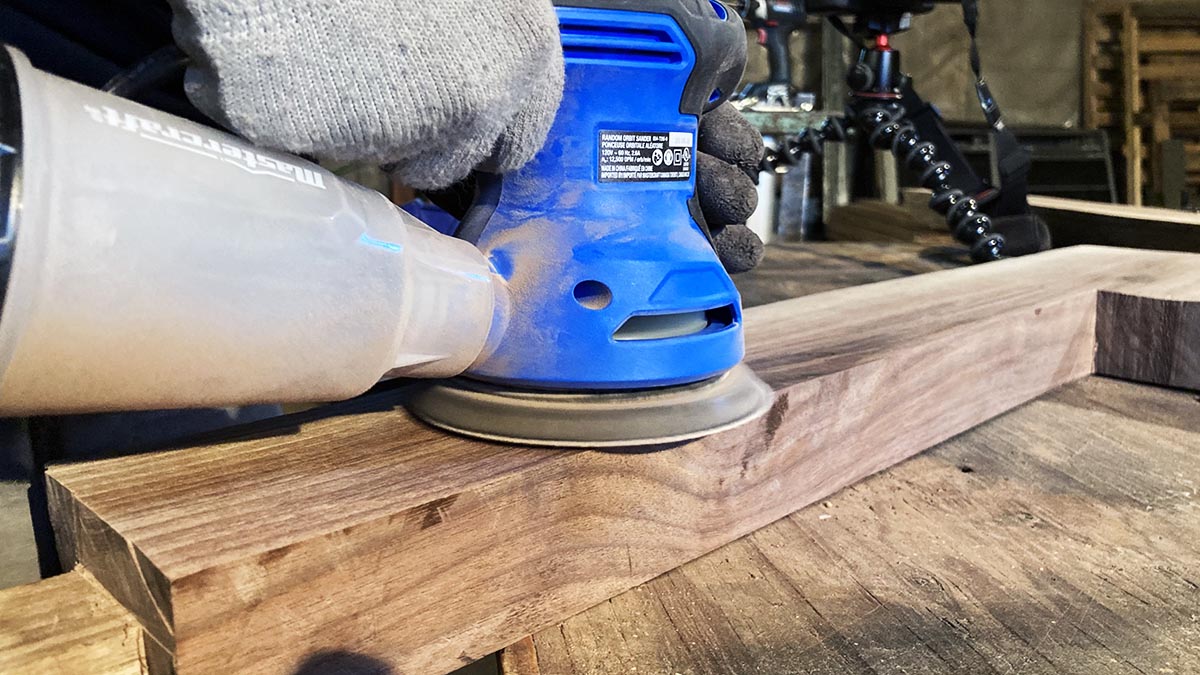
Rough edges on the wood are tough to clean and nobody wants a splinter, which is why we love having an orbital sander. A sander, in general, is a nice accompaniment to a skoolie tool cache. However, an orbital sander is superior to most non-orbital sanders.
Why we like an orbital sander so much is because the random pattern at which the orbital sander moves seems to smooth out wood better than a sander that just vibrates. If we put on a coarse grit of sandpaper, the orbital sander takes down bulk quickly. While when we use a finer grit, the finish ends up being like butter. This is why we have an orbital sander in our school bus conversion tool arsenal!
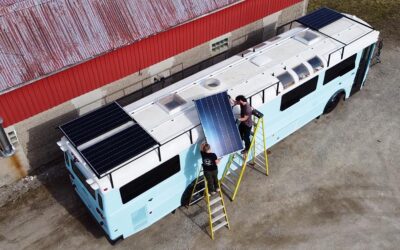
21. Rivnut Tool
When rivets are fun fasteners, rivnuts take building to a whole other level! Rivnuts are blind fasteners which means that you can drill a hole into a metal surface, insert a rivnut hooked to a rivnut tool, pop it in place and now there’s a threaded machine screw or bolt hole ready for attaching something else too.
We used rivnuts on our roof to affix the strut channel in place for our rooftop decking and solar panel setup. The tool is simple enough to use by screwing a rivnut to the end, then squeezing the two handles together.
22. Crescent Wrenches
There are more nuts and bolts on a bus being converted into a tiny home than we can even count. Having a solid set of crescent wrenches helps hold on to the hex head bolts or nuts. We have a sturdy set of crescent wrenches because the cheaper ones tend to bend or disfigure the ends. Definitely worth having heavy-duty open-ended and box ended crescent wrenches.
23. Socket Set
Like crescent wrenches, going with a heavy-duty socket set will not disappoint. Something to consider is that there are different types of sockets. Deep sockets are longer and can fit over a rod while regular depth sockets can only take the nut so far. Another consideration is will the socket be used with either an impact drill or an impact driver? If so, then getting a set that is multipurpose and can handle the forces of an impact drill or driver will keep the sockets in working order for years to come.
24. Locking Pliers
Along with clamps, vice grips or locking pliers are essential! We’ve used locking pliers to hold onto pieces of wood and metal, clamp something in place, or even hold onto a stripped bolt or nut. We have quite a few pairs of vice grips because often we use multiple pairs at a time.
In Conclusion
This is not an all-inclusive list of tools we use for our school bus conversion. Although, this list will allow most people to get the majority of projects completed. When building a skoolie there a quite a few tools that are helpful to have in your skoolie toolbox and we hope that this list gets you going to building the tiny home on wheels of your dreams! If there are any other tools you like to use that we didn’t mention here, drop them in the comments below and let us know what you use them for. We may even add them to this list!
Happy building!

Until Next Time… Adventure On!
– Brian Garcia

Hey, we're Brian + Erin. Currently, we're workin' on our bug out bus. Lucky the proverbial $hit hadn't hit the fan yet when we picked up this 40-foot beauty in Phoenix AZ and drove it up to Canada to convert it. Hopefully, we all still have time...
Honestly, this bus conversion has been the only sane thing in this insane world lately. We can't tell you how good it feels to BE working on something that lights our souls up and has such potential for a life that is entwined with nature, love, and happiness.
Our main goal is to inspire people to get off-grid and become self-reliant. We are well on our way and are super excited to talk about solutions with others who are shooting for a similar way of living.
Did This Blog Post Help You? If so, we would greatly appreciate it if you comment below and share it with a friend.

Check out our must-read articles about Skoolie Conversion

Texas Couple Accidentally Won School Bus Auction | Registering & Building A Skoolie In DFW
Joeseph & Jennifer Davis from DFW, Texas accidentally won an online auction to buy a school...
DIY Skoolie Solar System To BE Off-Grid Longer
When designing & building a DIY skoolie solar system, there are quite a few considerations....

Steps To Import A Bus From The USA To Canada (Or Vice Versa)
Yvan & Sylvie from Québec have successfully imported not just one, but TWO buses from the USA...
0 Comments