
DIY Skoolie Solar System To BE Off-Grid Longer

When designing & building a DIY skoolie solar system, there are quite a few considerations. Quite frankly, this topic was one of the toughest ones for me to grasp because neither Erin nor I are an electrician. There are a lot of variables that contribute to building a skoolie solar system. Erin and I wanted to design a system that would power all of our appliances, camera gear, and tools while traveling indefinitely off-grid.
Because there’s not a one-size-fits-all system, we had to figure out how all the pieces fit together. This article is the one I wish we had read when we started our research. We hope our journey and months of research helps you understand how to begin designing your own DIY skoolie solar system to BE off-grid longer. Enjoy!
This article is going to explain how to begin designing a DIY skoolie solar system.
AFFILIATE DISCLOSURE: Note that we are affiliated with products and services we use and trust. If you click a link and make a purchase, we’ll earn a small commission at not extra cost to you. This helps us to continue producing content and we hope that you use our links if our blog posts or videos have helped you in any way!
Not gonna lie, designing a safe solar system is not that exciting (for Erin, at least… For me, I thought it was going to be an excellent adventure & I was up for the challenge!) When designing an RV solar system for a skoolie, like most people, I used to think that we needed to start by figuring out how many solar panels and batteries we needed to acquire. Come to find out, that’s not the best way we found to begin our solar system design research. The best way to begin designing a skoolie solar system is by calculating the solar system energy load.
![]() ELECTRICAL HAZARD WARNING
ELECTRICAL HAZARD WARNING
Electricity is useful but can be deadly when not handled properly. Practice caution when working with electrical systems. BE Adventure Partners assumes no liability for anyone’s actions resulting from the use of the information contained in this article or on our website. The content on this page is for entertainment purposes only and should not be used as professional advice. Please consult a licensed electrician if you’re unsure of what you’re doing. Have fun & BE Safe, y’all!
Calculating Solar System Energy Load
When it comes to building a skoolie solar system, back when we got started we should have begun by documenting the appliances and energy-using devices that the solar system would supply. We did not, and that led to a massive amount of confusion. Luckily, we endured the pain because the reward of off-grid power generated from the sun is so much sweeter!
So let’s clear the clouds out of the sky now and shed some sunshine on this soon-to-be clear as a summer day topic.
To begin calculating solar system size, we first begin by writing out a list of devices that consume energy.
Here’s a list of the appliances we plan to use with our skoolie solar system:
- Laptops
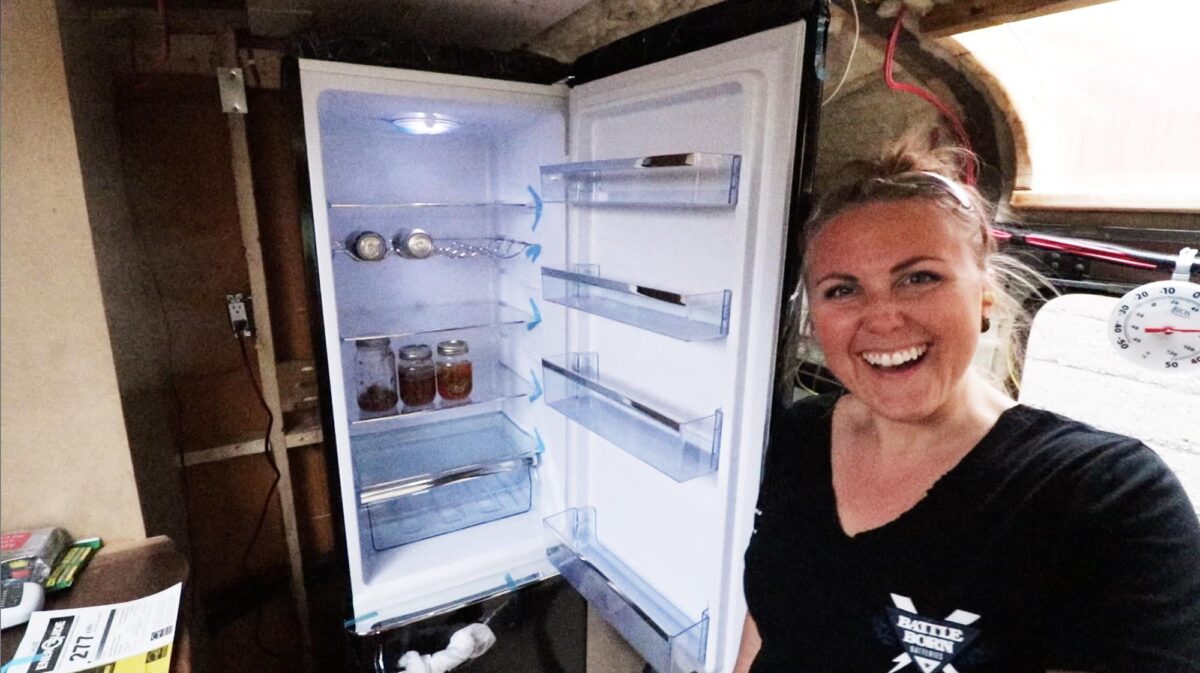
- Refrigerator
- Induction Cook Top
- Toaster Oven
- Water Heater
- Washing Machine
- LED House lights
- Hair Dryer
- Dehydrator
- Blender
- Hand Mixer
- Himalayan Salt Lamps
- MaxxAir Fan
- Coffee Grinder
- Camera Battery Chargers
Now that we’ve made a list of the energy guzzlers… excuse me, energy-consuming devices, it’s time to figure out how much energy they guzzle!
Take the list of appliances you just wrote down, and make a set of columns that include things like:
- Quantity of each item
- How many hours a day you plan on using them?
- Voltage
- Amps
- Watts
The results of the list you just created are all that’s needed to get a rough estimate of daily energy usage.
With this information, formulas can then be applied to each row to determine the Watt Hour Rating for each device. Amps, Volts, and Watts for a device can usually be located on the energy label affixed to the device. These numbers are usually the highest rating for the device, which may not be actual usage.
![]() FORMULA: Calculating Daily Watt-Hour Rating
FORMULA: Calculating Daily Watt-Hour Rating
- Amps x Volts = Watts/hour
- Watts/hour x Hours/day = Watt Hour Rating/day
Keep in mind that this is the ROUGH estimate.
To get a more EXACT estimate, we used this kilowatt meter, plugged in our appliance/device, and used it like we normally would. The result of using the kilowatt meter was a precise measurement of energy consumption that made our calculations closer to real-life use.
Instead of writing all this information down, I created a spreadsheet that allowed me to type in all the numbers and the formulas would automatically calculate the results. If you’re not the mathy type, and our plug-n-play spreadsheet would help, it comes as a download with our online course called Get Your Skoolie On.

After calculating each line item of appliances, adding up the individual totals will give you the total daily energy usage the skoolie solar system would have to provide.
Now comes the parts that most people skip to – Skoolie Battery Bank!
Skoolie Battery Bank Considerations
The previous step is probably the most time-consuming because it took us several days to run through all of our appliances to test their consumption and record their results. But that step is probably one of the most important because without knowing how much energy the appliances are using on a daily basis, it’s impossible to accurately calculate any other part of the skoolie solar system.
Now’s the time to figure out which type of battery is going to be used in the off-grid skoolie solar system.
There are two main types of batteries suitable for skoolie solar systems:
- Lead-Acid (or AGM) Batteries
- Lithium Iron Phosphate (or LiFePO4) Batteries
I know that there are more types of batteries with various different chemistries, but these are the main two that are used in rv solar systems, which is why we’re just going to chat about them.
Lead-Acid Batteries Pros & Cons
Lead-acid batteries (aka AGM batteries) are cheaper but come at a cost. It’s not advisable to discharge lead-acid batteries more than 50% of its capacity. So if you have a 1,200 Watt AGM battery, you can only safely use about 600 Watts of its rated capacity (what a jip, right?)
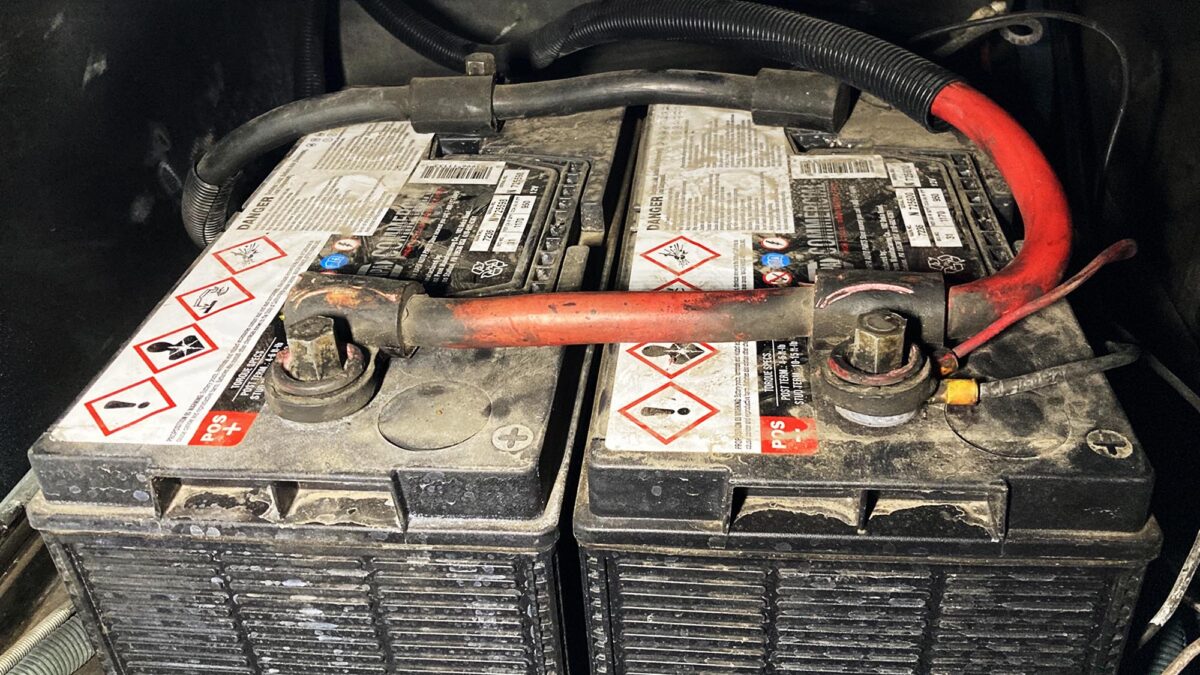
Any further discharge below that 50% capacity threshold could damage the battery cells, therefore reducing the life of the battery. Also, lead-acid batteries don’t perform well in freezing cold temperatures. There is fluid inside the battery that can freeze and crystalize, which can cause components within the battery to fail. Lead-acid batteries are also about twice the weight of one Lithium Iron Phosphate battery.
The only pro I could see with lead-acid batteries is that they are cheaper in price. However, even though they appear to be cheaper, to get the same capacity as a Lithium Iron Phosphate battery, we’d need twice as many batteries!
Lithium Iron Phosphate Batteries
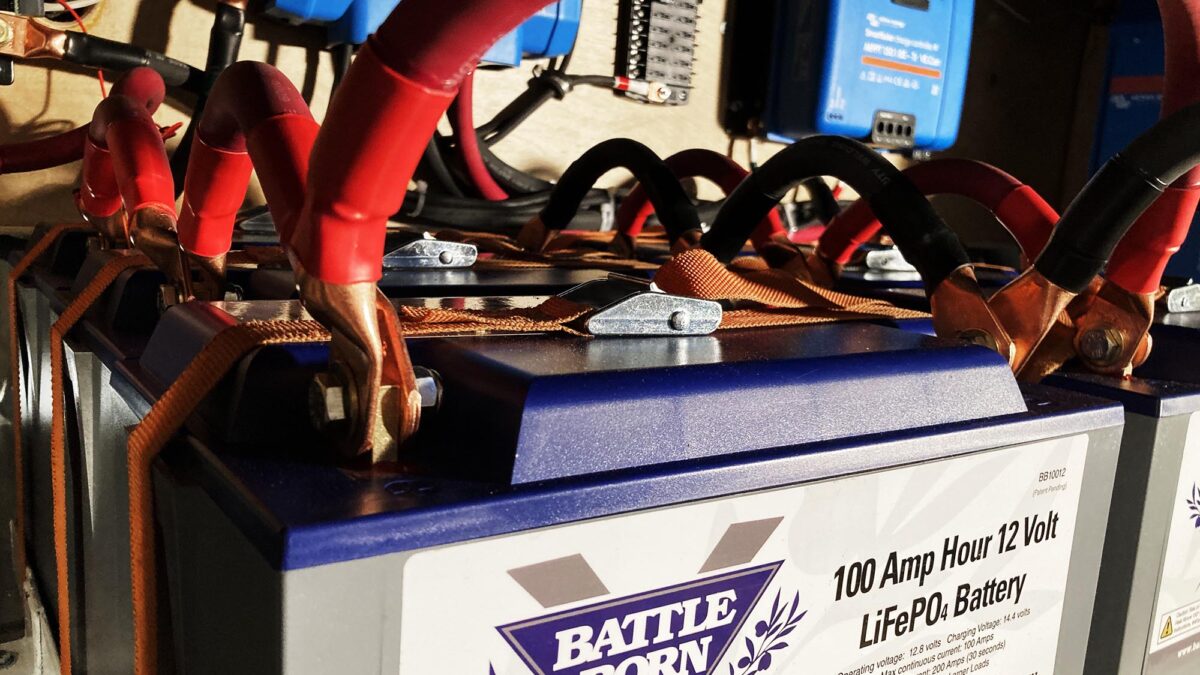
Lithium Iron Phosphate Batteries, which also go by their periodic table of elements name combination, LiFePO4, are the type of batteries we have in our motorhome solar system.
Right out of the gate, the only con we found is that they are typically more expensive than lead-acid batteries. However, some LiFePO4 batteries outperform lead-acid batteries so much, the cost is quickly thought of as a no-brainer. Battle Born Batteries did some side-by-side comparisons with lead-acid batteries and the results are quite impressive.
Read Battle Born’s Lead is Dead White Paper: Cold Charging Study »
In a nutshell, LiFePO4 batteries capacity can be used nearly 100%, which means that we only need one battery for every two AGM batteries. This alone is a space and weight saver. LiFePO4 batteries also recharge super quick. The batteries weigh about 33 lbs each and are the approximate same dimensions as a typical AGM battery making their output twice as much in half the footprint of two AGM batteries.
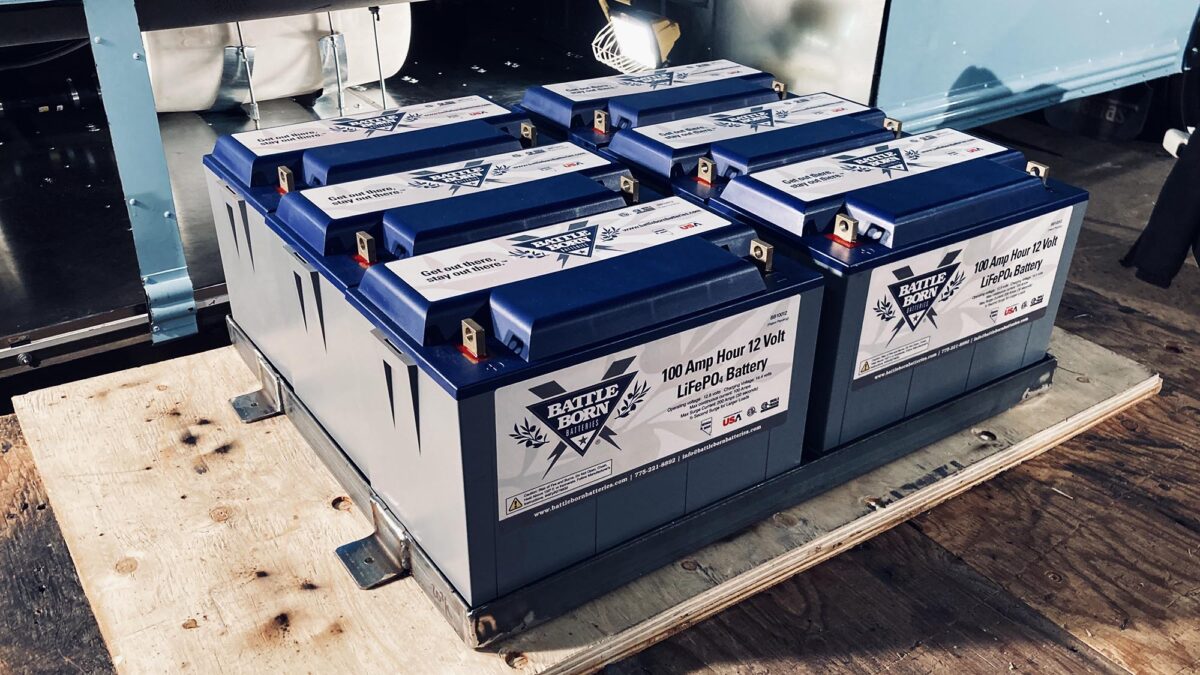
After calculating our energy consumption, we have determined that we needed 6 Battle Born Batteries LiFePO4 BB10012 which are 100Ah and 1,200 Watts apiece.
To figure out how many batteries we needed, we divided the total Watt Hour Rating/day by 1,200 (which is the number of Watts each battery has in its capacity.)
![]() FORMULA: Number of Batteries Needed In The Battery Bank
FORMULA: Number of Batteries Needed In The Battery Bank
- Total Watt Hour Rating/Day ÷ 1,200 = Minimum # of batteries needed for the battery bank
Now that we know how many batteries we need for our system, the next thing to calculate is how many watts of solar panels are needed to charge that battery bank.
Choosing Skoolie Solar Panels
Solar panels come in a variety of rated capacities & sizes. Just because a panel’s rating is 100 Watts doesn’t mean that it will produce that much. Most of the time, the rated capacity is achieved by having the solar panel at the perfect tilted angle to the sun, optimum operating temperature, and crystal clear atmospheric conditions. All of which are rare realities.
A few factors contributed to finding the right solar panels for our skoolie solar system’s application.
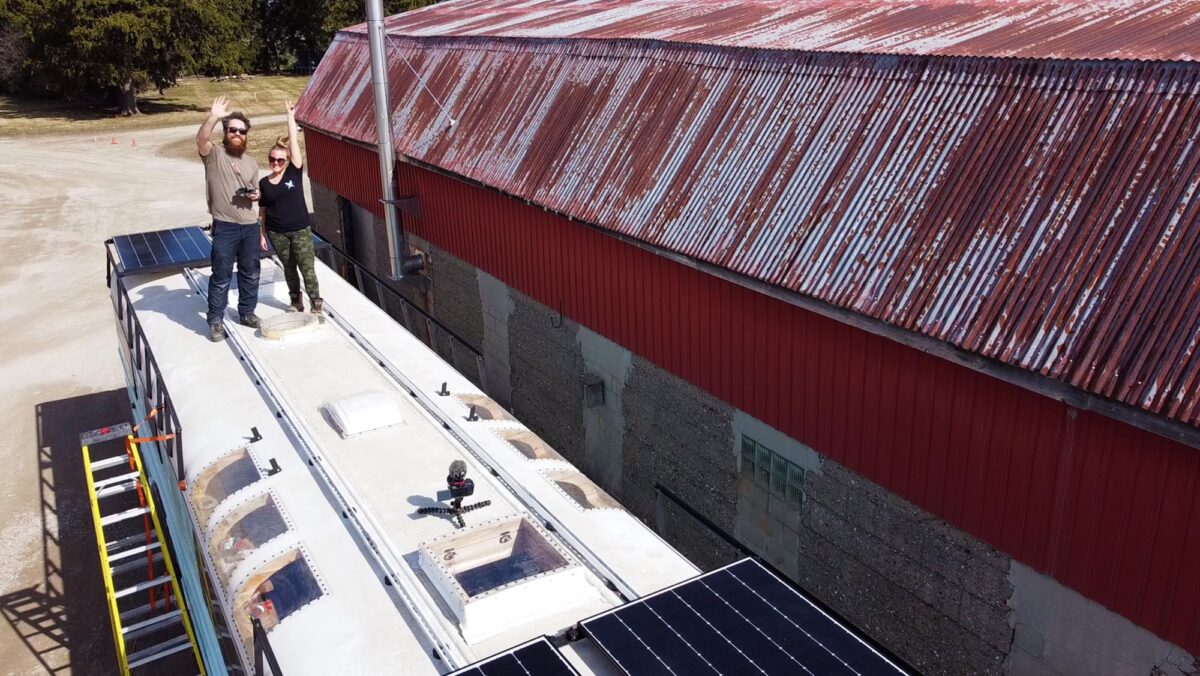
The first factor was space on our roof. With solar panels on our skoolie roof, we wanted to be able to get up there to clean them when necessary, which is why we started to layout a floor plan on the roof (or would that be a roof plan?) The proposed roof plan helped us decide where we could mount the panels and how we could create a rooftop deck so that walking up there wouldn’t be a life safety hazard.
Besides creating a rooftop layout plan, we also had to figure out how many panels we needed to charge the battery bank and to work into that layout. To do this, we took our calculations for total daily Watts and divided them by 6 because 6 hrs is the minimum number of hours the panels might receive in a day. This is when knowing WHICH battery you plan on using comes in handy.
![]() FORMULA: Calculating Minimum Number Of Solar Panels
FORMULA: Calculating Minimum Number Of Solar Panels
- Total Daily Watt Hour Rating ÷ 6 hrs = Solar Panel Watts Needed To Charge Battery Bank
- Solar Panel Watts Needed To Charge Battery Bank ÷ Watt Rating of Desired Panels = # of Panels Needed
As you can see, the system is starting to take shape. Next, divide the number of Watts of solar needed to charge the battery by the Watts of each panel, and that’ll give you the starting number of solar panels needed of that particular size.
If you are looking at 100 Watt panels and you need 1,200 Watts of solar on the roof, that would be 10 panels.
However, if you had 330 Watt panels, and you need 1,200 Watts of solar on the roof, that would be just 4 solar panels (which would equal 1,320 Watts of solar and that’s at least meeting or exceeding the 1,200 Watt minimum that is in our example).
For our rooftop layout plan, we ended up getting 4 of the 330 Watt Canadian Solar monocrystalline panels. Once deciding on the panels, it’s now easier to further develop the rooftop layout plan because now we have the dimensions of the panels.
The next question is how do the solar panels connect to the rest of the skoolie solar system? That’s done partly through the solar charge controller.
What Does The Solar Charge Controller Do?
In a skoolie solar system, the solar panels collect the sun’s rays and converts those rays into energy in the form of electricity. That electricity then gets passed through the wires connected to the panels, into a combiner box and then over to the solar charge controller. The solar charge controller then turns that electricity into a stable usable source of electricity to charge the battery bank.
There are a ton of different-sized charge controllers that are rated for various solar panel array configurations. Because there are so many, we’re going to just say that the easiest way to know which charge controller you need is to work with a company that will help customize a system with you.
However, there’s a formula for everything, and here’s one that could help guide you to getting a ballpark idea of which sized solar charge controller to begin looking at.
![]() FORMULA: Calculating Solar Charge Controller Amperage Rating
FORMULA: Calculating Solar Charge Controller Amperage Rating
- Combined Solar Panel Rated Watts ÷ Battery Bank Volts = Minimum Solar Charge Controller Amperage Rating
This formula should get you close to the right solar charge controller. However, before buying any of your equipment, we advise creating a diagram of what products you plan on using and then consult with the manufacturer to make sure their products are within specifications for your particular application.
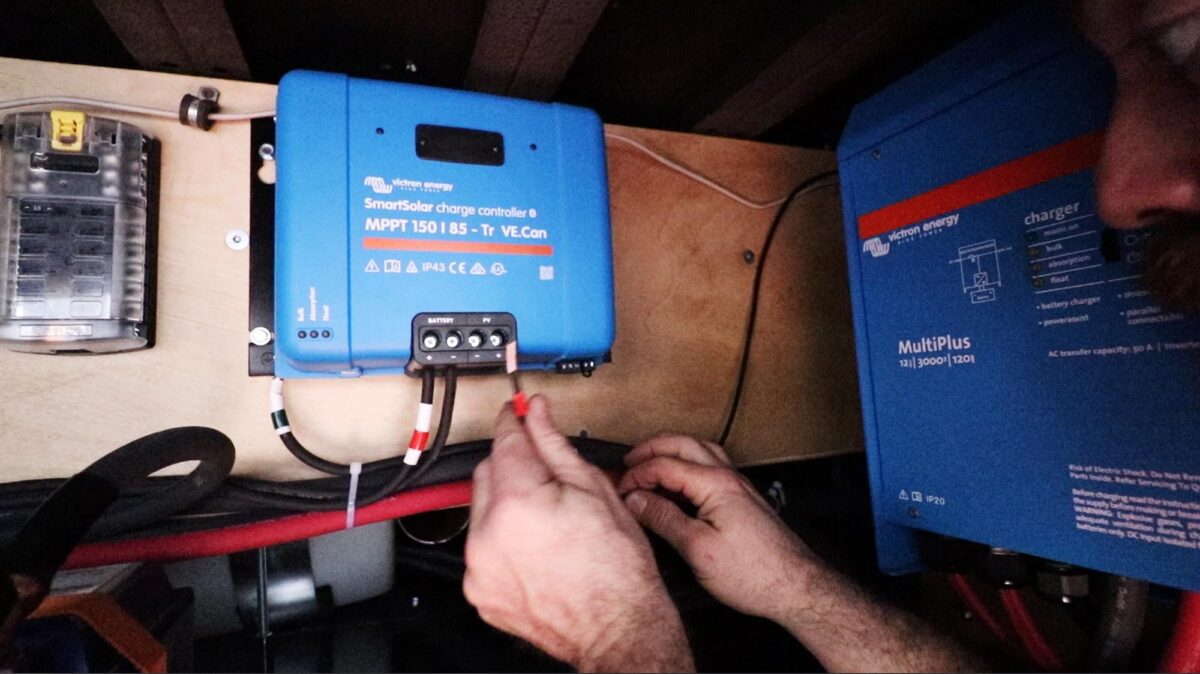
To match or exceed our solar panel’s output, we installed the Victron Energy SmartSolar MPPT 150/85 TR VE.Can Charge Controller with Bluetooth.
Here’s a low-resolution version of our Skoolie Solar System Diagram:
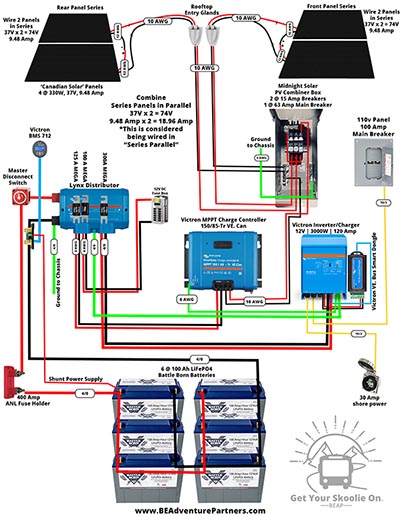
Want the high-resolution version to download? It along with all of our downloads and detailed videos comes with our online course, Get Your Skoolie On.
Solar System Inverter
Now that the solar panels are harvesting power, the solar charge controller is feeding the battery bank, how do you use that electricity to power your laptop, TV, or refrigerator? A device called an inverter is connected to the battery bank. The inverter steps up the 12V power stored in the batteries and outputs 120V of power to the breaker panel.
Inverters come in various Wattage capacities and is typically selected based on the load requirements of the system. In most situations, not ALL of the appliances from our list are used simultaneously. Therefore, having an inverter capable of running everything at once is not too common. However, there may be a couple of devices running at the same time that would require a beefy inverter.
In order to choose the size of inverter that would work well with our skoolie solar system, we went back to our original list of appliances and started to look at what appliances would run at the same time. Adding up the wattages will get you close to the inverter specification that will work best for your skoolie solar system.
Besides operating wattage, be sure to check to see if the equipment being used has what’s called a “Start-Up Wattage.” This is when the appliance uses an initial spike in energy above the rated run wattage. A perfect example of this is a microwave. Even though the microwave may be rated for 1,000 Watts, in order for the microwave to get started, it uses a spike in energy up to about 2,000 Watts. So finding an inverter that can handle the higher spikes is essential not only to the equipment’s safety but also to your’s! (Ain’t nobody likes equipment failures!)
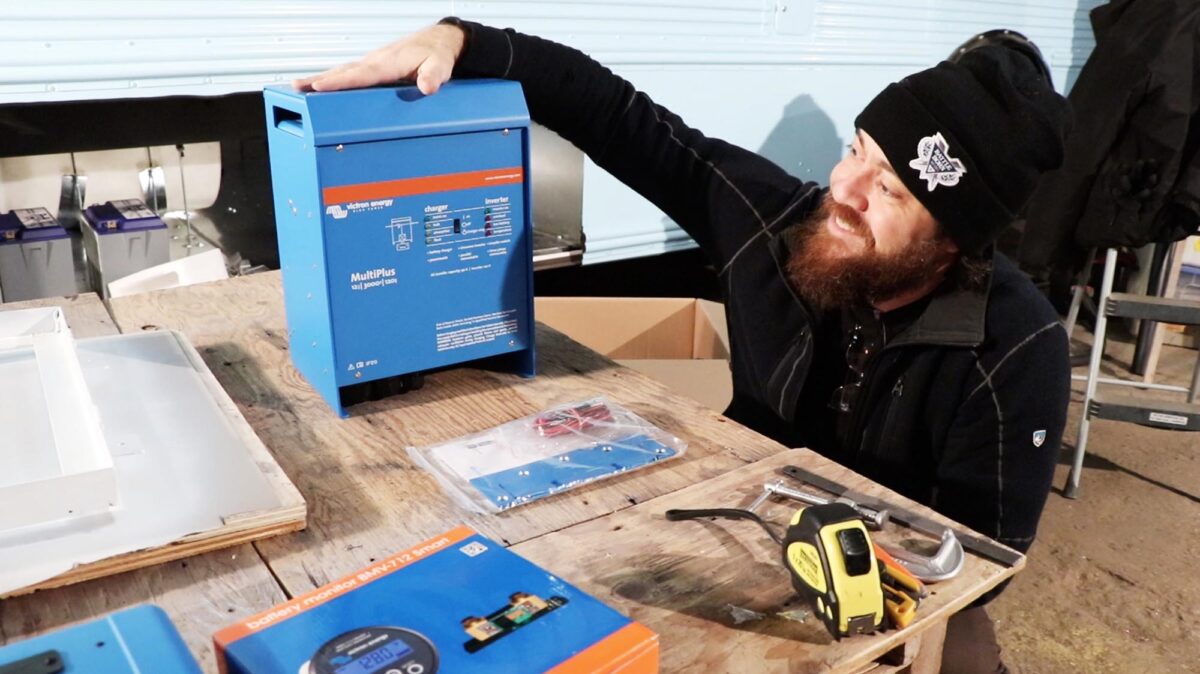
We ended up going with the Victron Energy MultiPlus 3000VA 12-Volt Pure Sine Wave Inverter 120 amp Battery Charger, which has been working well in our skoolie solar system. One thing we really like about this inverter is that it has a battery charger built into its system. When we need to hook up to shore power or a generator, it’s this device that will turn those inputs into the battery bank charger.
Another thing to note about inverters is that there are TSW, True Sine Wave aka Pure Sine Wave Inverters, along with MSW, or Modified Sine Wave Inverters.
The Pure Sine Wave Inverters produce cleaner energy. This is important to take into consideration because most laptops, microwaves, medical equipment and electric blankets will not work on MSW inverters. Although MSW inverters are cheaper in price, the long-term peace of mind from having a Pure Sine Wave Inverter makes the equipment well worth it.
12V Fuse Block & 120V Breaker Panel
Once the solar panels are collecting the sun’s rays, the charge controller is taking those rays and charging the skoolie batteries, there are two ways to use energy from the battery bank with appliances.
The first way power is distributed into the skoolie is a 12V Fuse Block that is connected to the batteries.
Using a 12V Fuse Block allows appliances to be attached to the skoolie solar system that are powered by 12V. Each appliance gets a spot on the fuse block and a blade fuse is inserted to protect that equipment from potential energy spikes.
Below is a list of the 12V components we have on our skoolie:
- MaxxAir Fan
- Freshwater Pump
- Water Holding Tank Heating Pads
- Off-Grid Cell Booster
- Underbody Storage LED Lighting
The second way power is distributed into our skoolie is through our 120V breaker panel.
The Victron Inverter has an AC Out terminal block connection that allows us to connect a cable from the inverter to the 120V breaker panel. From the breaker panel, we have various circuits to power normal plug outlets and lighting. Most of our appliances use 120V AC, which makes having an inverter that can handle a high amount of Wattage & Amps essential.
Here’s a list of the various appliances run from our 120V breaker panel:
Generator & Shore Power
The last piece of the skoolie solar system puzzle that had us stumped was how do you connect a generator or shore power to juice up the system in the event of prolonged cloud coverage, shade, or darkness?
That answer lies within the Victron Inverter.
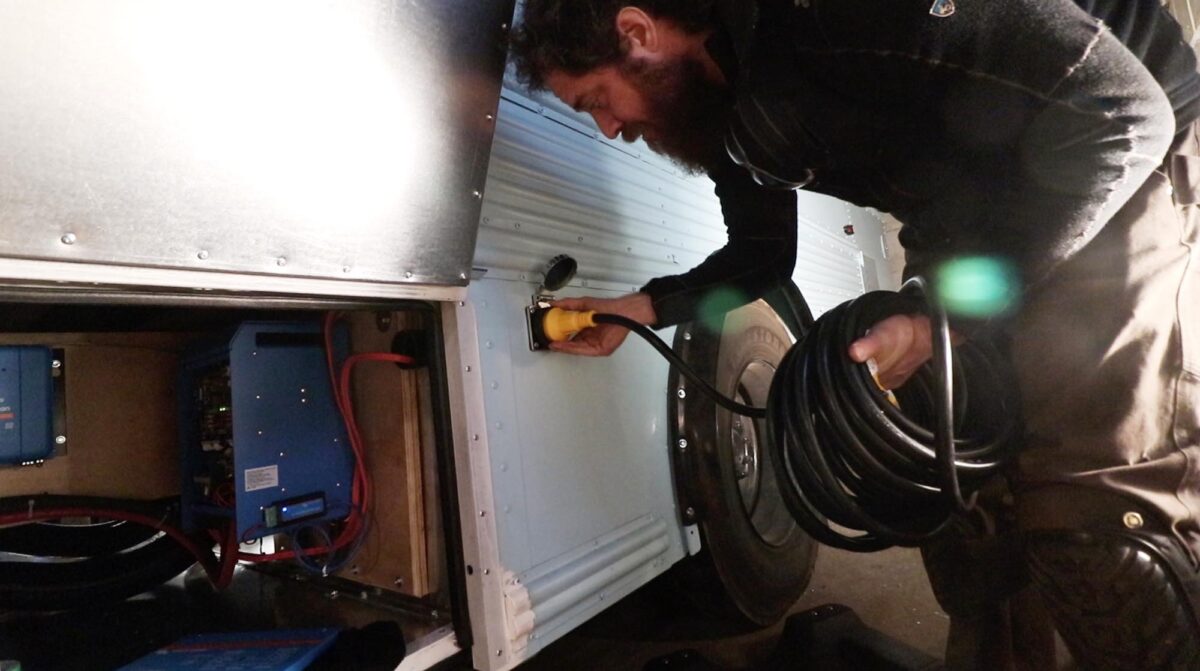
On our Skoolie, we installed a 30 Amp exterior receptacle that is wired to the “AC IN” terminal block inside the Victron Inverter. The inverter then takes the incoming energy and sends it to the batteries and the 120V breaker panel simultaneously.
From that 30 Amp receptacle, we can plug into any electrical source (shore power), up to 30 Amps, or even turn on a generator and plug in to do what we call “juice the system” which is basically topping up the battery bank during prolonged durations of inclement solar gathering.
Originally, we were talking about getting a vehicle-mounted diesel generator until we saw the price tag. Those things are SUPER pricy. So instead, we opted to get a little backup generator that runs on gasoline. If we ever have a long period of low solar production, we’ll be able to plug-in and juice the system to get us through in a pinch!
Our Skoolie Solar System Component List
Although we just mentioned the major components to our skoolie solar system, we wanted to put them in the list below along with their quantities so that they are all in one place for you to start shopping for your skoolie solar system.
Skoolie Solar System Component List
- 6 @ Battle Born 100 Ah 12V LiFePO4 Deep Cycle Battery
- 4 @ Canadian Solar 330W Monocrystalline Solar Panels
- 1 @ Victron Energy SmartSolar MPPT 150/85 TR VE.Can Charge Controller with Bluetooth
- 1 @ Victron Energy MultiPlus 3000VA 12-Volt Pure Sine Wave Inverter 120 amp Battery Charger
- 1 @ Victron Energy Lynx Distributor
- 1 @ Victron Energy VE.Bus Smart Dongle (Bluetooth)
- 1 @ Victron Energy BMV-712 Smart Battery Monitor & Shunt Kit
- 1 @ Midnite Solar Photovoltaic Combiner
- 1 @ 100 Amp MEGA Fuse
- 1 @ 125 Amp MEGA Fuse
- 1 @ 300 Amp MEGA Fuse
- 1 @ 400 Amp ANL Fuse
- 1 @ ANL Fuse Block Holder
- 1 @ Blue Sea Systems 300 Amp m-Series Battery Switches
- 1 @ 12V Blue Sea Systems ST Blade ATO/ATC Fuse Blocks
- 1 @ 120V Square D Homeline 125 Amp 12-Space 24-Circuit Indoor Breaker Panel
- 25’ Red @ 4/0 Gauge 100% Copper Premium Industrial Grade Extra Flexible Welding Cable 600 Volt
- 25’ Black @ 4/0 AWG 100% Copper Premium Industrial Grade Extra Flexible Welding Cable 600 Volt
- 10’ Black @ 6 AWG 100% Copper Welding Lead & Car Battery Cable
- 25’ @ 10/2 with ground Romex residential indoor electrical wire
- 250’ @ 12/2 with ground Romex residential indoor electrical wire
- 120’ @ 10 AWG Solar Cable
- 8 @ 6 AWG 5/16 Ring Crimp Copper Wire Ring Lugs
- 36 @ 4/0 AWG 5/16 Ring Crimp Copper Wire Ring Lugs
- 4′ Red, 4′ Black @ 3/4” Heat Shrink Tube 3:1 Adhesive-Lined
- 1 @ 3:1 Dual Wall Adhesive Heat Shrink Tubing kit 2 Colors 7 Sizes
- 1 @ 30A 125V Locking Stainless Steel Shore Power Inlet
- 1 @ Generac Gp2200I Generator
Some of these components were not mentioned herein, because this article is a brief overview of the main skoolie solar system components and their relationship to one another. If you’d like a complete video walkthrough of our skoolie solar system, our downloadable hi-resolution solar diagram, step-by-step tutorials on how we put our entire skoolie solar system together, and access to us in our private community, then you’ll want our online course called Get Your Skoolie On where all the details are included.
Conclusion (TLDR)
Building a DIY Skoolie Solar System To BE Off-Grid Longer can be as simple or complicated as you want it. That’s the beauty in designing your own skoolie solar system. To get started fast, start off by calculating your system’s anticipated load. Then figure out your battery bank type and size (we went with 6 Battle Born 12V 100Ah LiFePO4 batteries). Now that the battery bank is designed, the 12V fuse block is connected here. It’s now time to choose the solar panels that can handle charging those batteries in less than one day (we installed 4 Canadian Solar 330W Monocrystalline panels). From there you’ll be able to decide which size of solar charge controller can handle the incoming solar watts, amps and voltage. After that, go back to the original appliance load list and see what size of inverter will be needed for your specific application and connect that to the 120V breaker panel. You could stop there and have a functioning system. However, if there are ever multiple days of low amounts of solar production, having a way to connect to shore power or run a generator to juice the system is essential.

Until Next Time… Adventure On!
– Brian Garcia

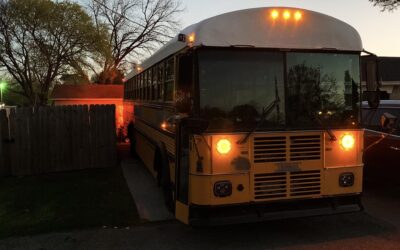
Hey, we're Brian + Erin. Currently, we're workin' on our bug out bus. Lucky the proverbial $hit hadn't hit the fan yet when we picked up this 40-foot beauty in Phoenix AZ and drove it up to Canada to convert it. Hopefully, we all still have time...
Honestly, this bus conversion has been the only sane thing in this insane world lately. We can't tell you how good it feels to BE working on something that lights our souls up and has such potential for a life that is entwined with nature, love, and happiness.
Our main goal is to inspire people to get off-grid and become self-reliant. We are well on our way and are super excited to talk about solutions with others who are shooting for a similar way of living.
Did This Blog Post Help You? If so, we would greatly appreciate it if you comment below and share it with a friend.
6 Comments
Check out our must-read articles about Skoolie Conversion
Texas Couple Accidentally Won School Bus Auction | Registering & Building A Skoolie In DFW
Joeseph & Jennifer Davis from DFW, Texas accidentally won an online auction to buy a school...

Steps To Import A Bus From The USA To Canada (Or Vice Versa)
Yvan & Sylvie from Québec have successfully imported not just one, but TWO buses from the USA...

How To Register An Old School Bus & Get RV Insurance In Ontario Canada
Nolan Reid dove through the Service Ontario hoops, leaped over the Insurance hurdles, and achieved...
Hey guys! I follow you on IG. @get_real_world. Getting the floors done on our 2008 Bluebird up in Orillia, ON.
Just curious how much your solar setup cost you? I hope my family bumps into you on the road come the summer 🙂
I’m guessing I’ll have 6x 100w panels, which means I’ll need 600 amp hours to power our Vitamix, hair dryer, washer/dryer combo, fridge (or Iceco) and water supply. So daughnting!!
All the best
Hey there Jesse! Thanks for following us on IG! Congrats on the floor install! That makes walking around so much nicer and the bus starts to feel like it’s on the way!
Solar cost is an interesting question as the wires cost a ton. LOL! The longer the runs, the more it costs. Also, the components are not that cheap either. If you were to put together the exact system we have, you’re looking at a little over $10k CAD.
As for the amount of solar panels on the roof… We have 4 panels that are 330 Watts each wired in two groups of series parallel, which gives us 1,320 Watts of charging. Gotta say, that with 600 Ah of Lithium batteries, we only get a full charge if there are no clouds out. Having only 600 Watts of solar on the roof, we’d be pressed to say if there was a situation that you’d ever be able to completely charge your batteries in a single day. Also, if you have 600 Ah of lead acid batteries, the rated capacity on lead acid is only 50%, which means there’s only 300 Ah of usable energy storage. Lithium Iron Phosphate batteries, however, would give you 100% of usable capacity. Just something to think about!
We’re putting all the detailed information, videos & diagrams on how it’s all put together in “Get Your Skoolie On” if all that would help you.
Happy building & we look forward to seeing y’all on the road!
– Brian + Erin
Hi Brian and Erin!
We are working on building our solar plan for our skoolie and I am VERY overwhelmed. Our bus is strangely comparable in size and load to yours. Does “Get Your Skoolie On” include any chat support or planning help from you guys if we need it? I am struggling with all the options and using the DIYSolarForum and the Will Prowse videos. Just wondering if you are a resource I should tap into – since this is the main support I could use at the moment.
We love your YT Channel and Instagram. Follow us on Instagram: the_kobayashi_vroom
Thanks!
Amanda
Hey there Amanda and Nathan! Ohhh! Solar is exciting and can be confusing. We do have a private community (off of social media) that you’d get access to ask detailed questions. We’re happy to help and answer questions as best we can. In GYSO, there is the solar calculator that’ll help figure out what size of system you’d need. Considering we’ve been in our bus using our system for a few months now, we can definitely give you real-life answers on how it all works. Thanks so much for following!
– Brian + Erin
Since you are in Missouri, could you help me install solar on my bus
Hey there Dustin. We could help install your solar system. Saw your email a while back and responded. Just sent you another email. Chat soon! – Brian + Erin