
The School Bus Conversion Guide | Building a Tiny Home On Wheels

Doing a school bus conversion is one of the most fulfilling yet challenging things that Erin and I have ever done together. This guide is designed to take you through the order we completed all the projects.
If you’re in the research stage to see if converting a school bus into your own tiny home on wheels is right for you, this article will give you a good idea of what to expect. What’s cool is that with creativity, you can take some nuggets you learn about here and apply them to your own build.
And if you’ve already bought a school bus to convert into a motorhome and are scratching your head on what to do first, this article will lay out a solid starting point so that you can be successful in your build.
Keep in mind that this article will provide a highlight of what we did in what order. Throughout, we’ll be linking to other, more detailed articles we’ve already written so that you can dive in even deeper. Also, we’ll be adding more information to this article, adding even more articles to our blog and videos on YouTube, so be sure to subscribe & turn on notifications so you don’t miss anything.

ATTENTION: This article is for informational and entertainment purposes only. Working with powertools can be dangerous when not handled properly, so take care. Also, building & vehicle codes and regulations are not the same in every region or country. When in doubt, always seek out a local professional to make sure you’re completing your projects safely as you are ultimately responsible for your own actions.
This School Bus Conversion Guide is the grand overview of building your own unique tiny home on wheels.
Last updated: April 14, 2021
Jump To:
- What Is A Skoolie?
- Why Do A School Bus Conversion?
- Where To Buy A School Bus To Convert?
- Our Skoolie Specifications
- Who Insures Skoolies?
- How To Convert A Skoolie
- Major Appliance Purchases
- How much does a School Bus Conversion Cost?
- School Bus Conversion Materials & Tool List
- Now it’s time to Get Your Skoolie On!
- In Conclusion
Not a reader? Watch our Skoolie Conversion Playlist on YouTube!
What Is A Skoolie?
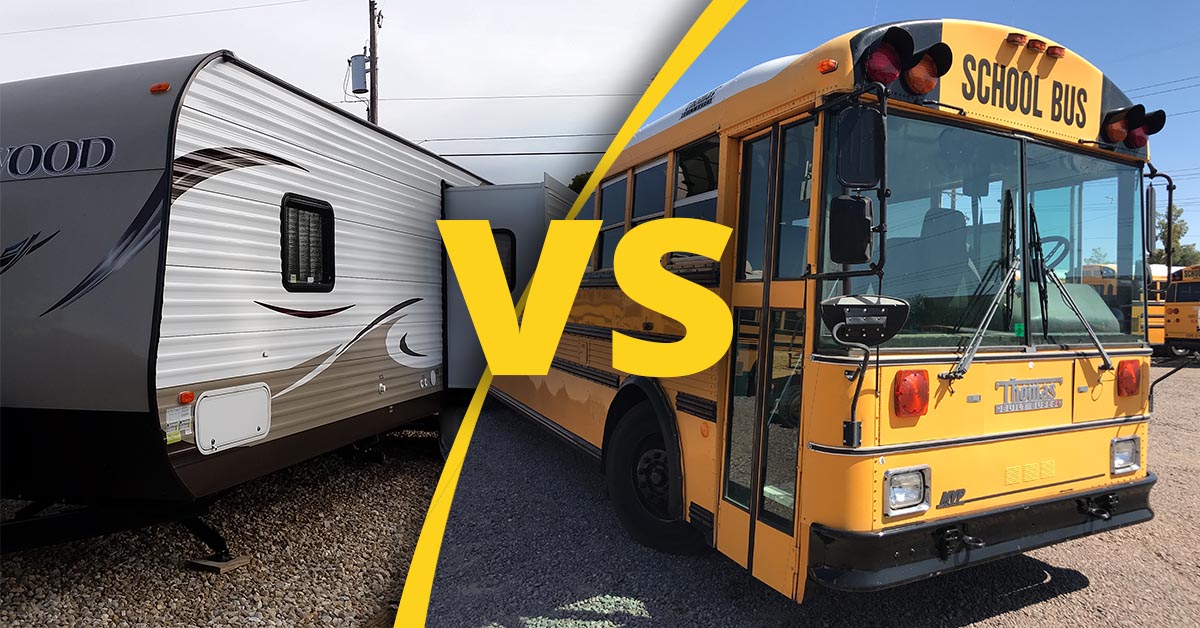
In a nutshell, a skoolie is a school bus that has been retired and decommissioned from use on a school route and then been converted into a recreational vehicle. Converting a school bus into a motorhome is not a new idea and has been around for decades. However, only in the last few years have people been more intrigued with the freedom that living in a skoolie could provide.
Skoolie Definition
A retired school bus repurposed by means of converting it into an RV or recreational vehicle. Skoolies are also known as a motorhome or a tiny home on wheels.
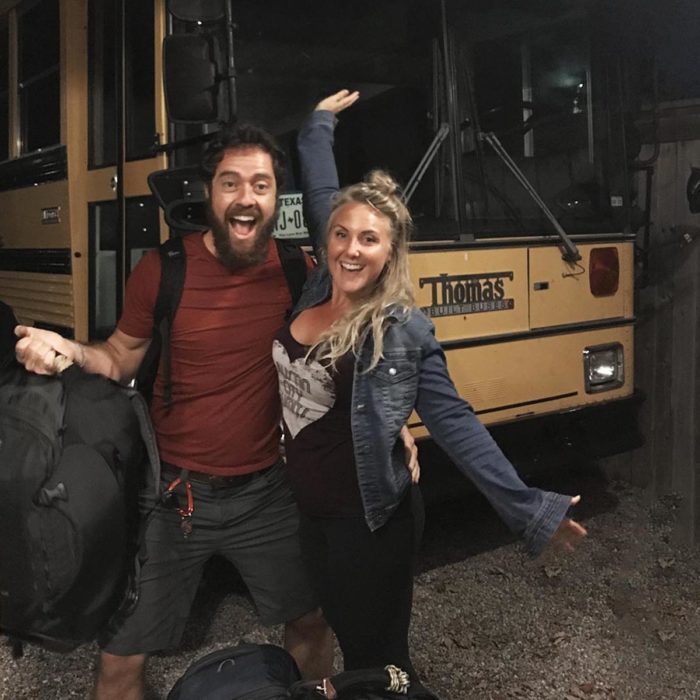
It was the end of 2018 when Erin and I had been looking for some way to travel around while having a home at the same time. After doing research, we found out that people were converting Mercedes Sprinter vans into RVs. Initially, we liked that idea, but then we thought we may be too cramped because of the tight living conditions and the price was out of our budget.
While we continued to travel through Colombia, Ecuador, Galapagos and Bonaire, we kept dreaming of having our own place together. That’s when we ran across people converting school buses into motorhomes.
Now that we had started to see other people converting school buses into RVs, we looked at each other and had to do it!
Skoolies have the amenties and space we want to be able to still travel, run our business online and launch our next research project. Things we were looking for in a skoolie were things like a comfy bed, a small living room, a kitchen to cook amazing meals in and space to tote around our camera gear.
As you’ll see, skoolies are not a one-size-fits-all sort of adventure vehicle. Although many skoolies have similar components, converted school buses are completely customized based the needs of the people doing the customization.
As you explore the idea of doing a school bus conversion, this guide we put together for you will help to structure a plan so that you avoid overwhelm during the experience. There are a TON of things to consider while doing a school bus conversion. This article is laid out to show you what we did in what order so that you can make it through the conversion and onto the road to adventures!
Why Do A School Bus Conversion?
One of the first questions we asked ourselves is why on earth would we want to do a school bus conversion vs. buy an RV that’s already manufactured?
For everyone, the answer is different.
- Some people want the challenge of a massive undertaking.
- Others might want to ditch the rent or mortgage and live full-time.
- While some people may just want a doomsday bug-out vehicle loaded to the gills with survival gear that could allow them to live off the grid.
We actually fall into ALL of those categories!
But why a school bus vs manufactured RV?
The honest truth? If you ever searched RV crashes on Google, you’d see that those things explode on impact as if a tornado hit them. School buses are made to protect precious cargo (children) and can hold thousands of pounds more than an RV due to a school buses’ commercial strength chassis. This is why an unrusted school bus platform is one of the best vehicles to use for your future tiny home on wheels.
For Erin and I, we wanted a reliable vehicle that would take us from North America to Central and maybe even South America. This vehicle would be the thing that would connect us with people living off-grid, being self-reliant, growing organic gardens and practicing permaculture, as well as connecting with those who are homesteading and living self-sustainable lifestyles.
Basically, people who are more integrated with nature. Because that’s the life we want to live, so why not learn from those already doing it before we dive in head first?
In the future, we plan on finding property and building a homestead. Seeing how others are doing it and interviewing how they got started will help us share their message so that this sort of lifestyle is in closer reach to more people. Heck, we may even publish their interviews on our YouTube channel.
If that sort of content is something that interests you, jump on our Week In A Nutshell email list where we update everyone with what’s going on once a week.

Where To Buy A School Bus To Convert?
It makes sense to buy a car from a car dealership, but when was the last time anyone saw a school bus dealership? That’s because school bus dealers are few and far between. However, there are a few ways to buy an old school bus.
Although I’m about to tell you about the different places to buy a school bus, we don’t necessarily endorse one over the other. The reason being is that we all come from different backgrounds and some of you may even be vehicle mechanics or engineers. To say one way to buy a used school bus is better than another would be of one’s personal preference.
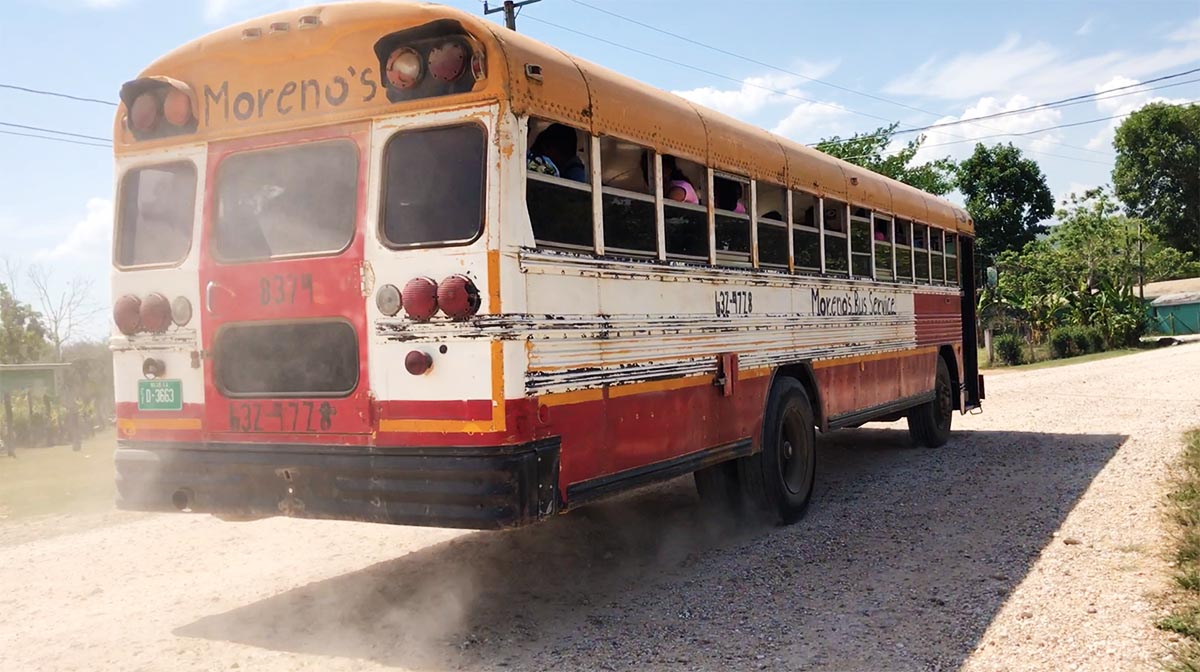
While we searched high and low to buy our Skoolie, The BEAP Mobile (aka Our Golden Beauty), we just so happened to stumble upon these…
7 ways to find a retired school bus for sale
- Online Auction Sites (e.g. GovDeals)
- You know a guy (who knows a guy) with one
- Online Classified Listing Sites (e.g. Craig’s List or Kijiji)
- Skoolie Social Media Groups (e.g. Facebook, Reddit)
- School Districts Fleet Yards (e.g. local school districts)
- Brand new from the dealer (e.g. Thomas, Bluebird, International, Gillig, IC, etc…)
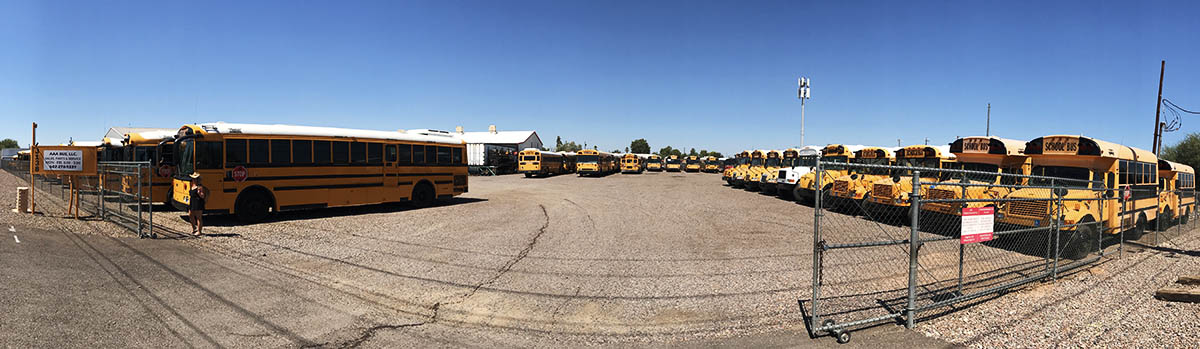
- From a used school bus dealer (e.g. AAA Bus in Phoenix)
Those are a lot more choices than we thought there were going to be. That’s when we started to explore each of them.
As a few months went by, we had our feelers on the various sites to see if anything looked OK from the pictures. The problem we saw with each of the online sites was that the school buses for sale could be anywhere from Alaska to Florida. Another huge problem was that most of the time we weren’t able to visit a bus until winning the auction. We didn’t like that because we wanted to be able to climb around it and feel its energy.
At the time we started looking in 2019, we were on the little island of Bonaire, so we could only search while online.
Being on that island made us realize that we wanted to go all-in on a school bus conversion. We jumped onto a plane to fly to Ontario to visit family & call up some school districts.
Being the beginning of the school year, we didn’t know if any school buses were going to be available. Come to find out, the beginning of the school year is one of the best times to shop for a used school bus from a school district because the school’s fleet mechanics are checking out the buses for the year and seeing which ones need to be retired.
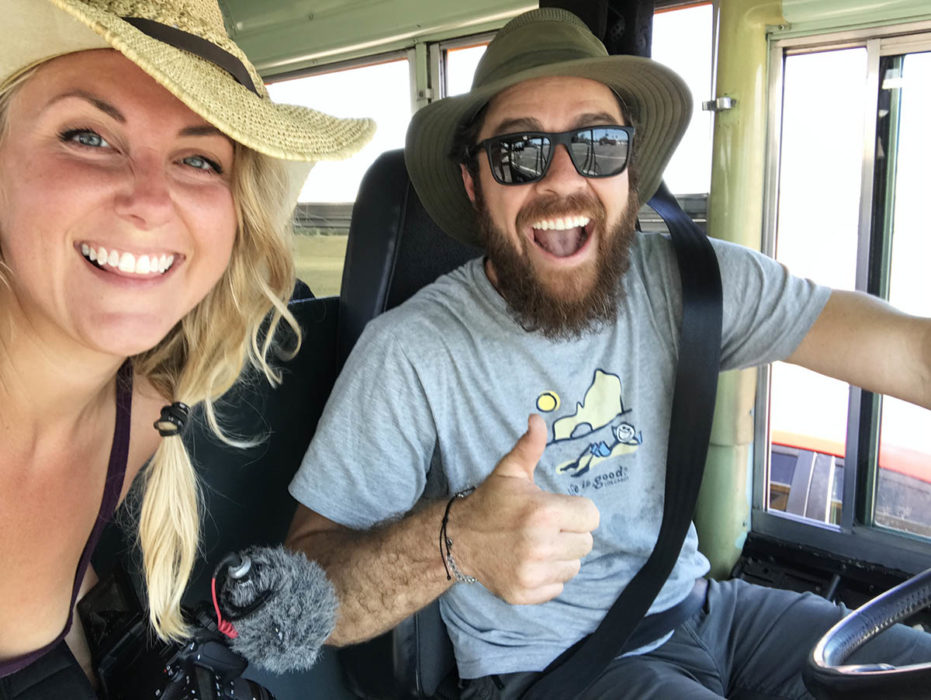
Unfortunately, all the buses we visited in Ontario were rusted so badly that we abandoned the idea of buying one from the local school district. However, we were happy that we were able to walk around the buses, start them, go on a ride and use our school bus pre-purchase checklist to make sure we didn’t miss anything while inspecting.
Ready to get the ball rolling, we decided to go to an actual used school bus resaler and that changed everything.
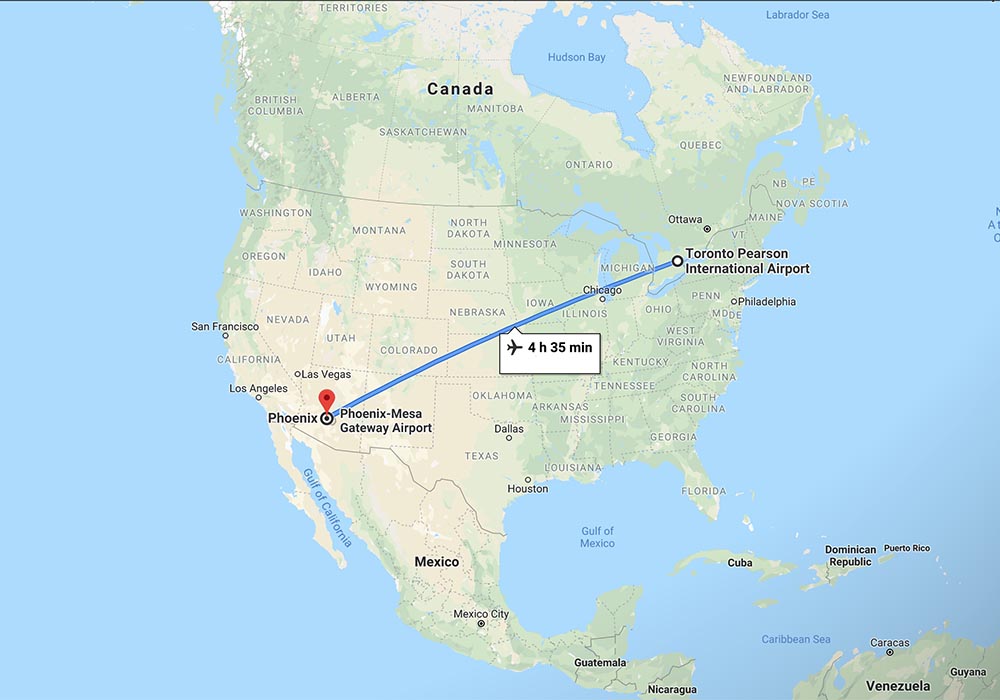
We jumped on a one-way flight from Toronto to Phoenix to visit Tony from AAA Bus Sales where we ultimately bought our retired school bus.
In a nutshell, Tony was impressed with our pre-purchase checklist and said that no one else has had such a thorough list of essential things to inspect before buying a bus.
I think the reason why the checklist is so thorough is that I was a firefighter for nearly 9 years. During that time, I inspected the fire trucks I road on, which have systems that are substantially more complicated than a school bus. This experience resulted in Erin and I transforming a fire apparatus inspection sheet into one that would work perfectly for a school bus.
Want our used school bus visual inspection form? Get It Free
Working with Tony and Joe at AAA Bus made the purchase experience better than just viewing pictures on a website. The reason being is that they took time to find out what we wanted in a bus and to narrow down the 54 available school buses they had on the lot to the perfect bus for us.
Read More: Why We Bought A Used School Bus In Phoenix, Arizona »
When shopping for a school bus for conversion, we found that going to a dealer was better for us because we wanted to be hands-on, crawl around underneath and feel it driving down the road before making a decision.
Start With A Solid Platform (no rust)
If you get anything from this article, take note of this: Do not buy a rusty bus.
Being that neither Erin or I have had experience with metalwork, buying an old used school bus that is riddled with rust was completely out of the question.
We wanted to start with a solid platform to reduce the amount of prep-work we had to do before starting our school bus conversion.
In my opinion, there are different levels of rust.
The first level is no rust.
That’s right, there is not a speck of rust anywhere. Retired school buses from hot, dry places have the least amount of rust on them (which is why we went to Arizona to buy our bus). The downside to that is that rubber components, plastics and caulking may be dried out. However, they are significantly easier to replace than rusted metal pannels.
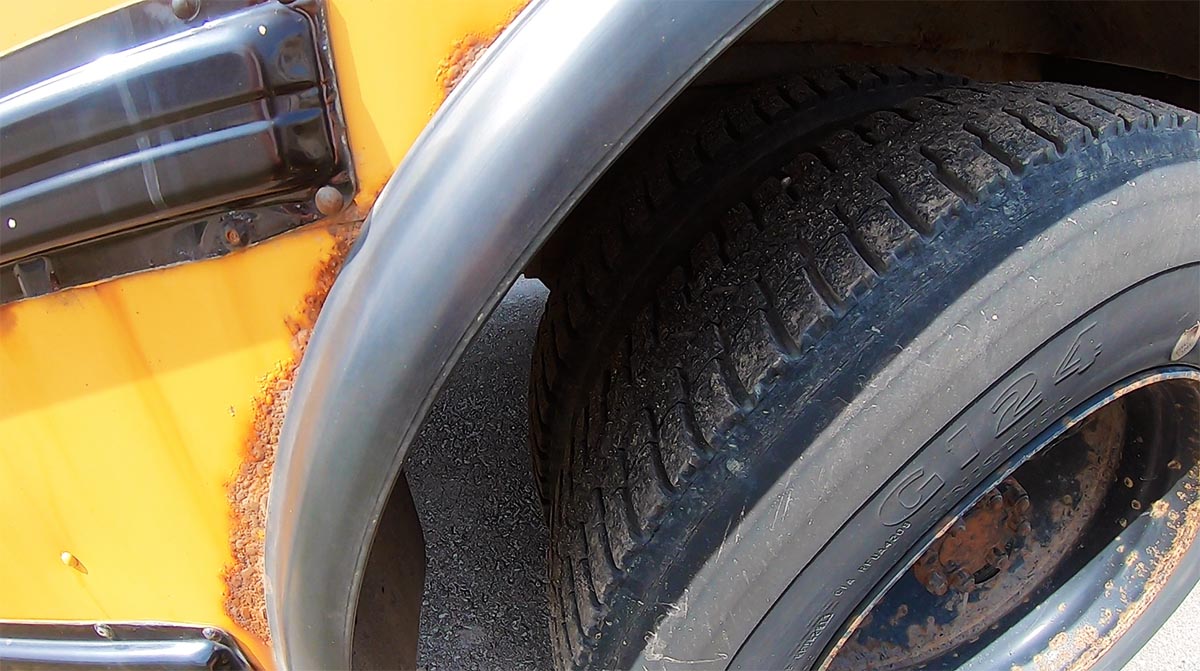
The second level is a bit of surface rust.
Surface rust can be seen even in dry places like Arizona and presents itself with multiple colors of red, yellow, brown and even black. Surface rust is fairly easy to sand down and paint over. Let’s say a kid drops his juice box or bottle of water on the bus and it pours out all over the floor and into the cracks. That liquid may not evaporate quickly, which may start a small rusty spot. This is not a big issue (but can become a big issue) and can also be remediated by using a rust inhibitor.
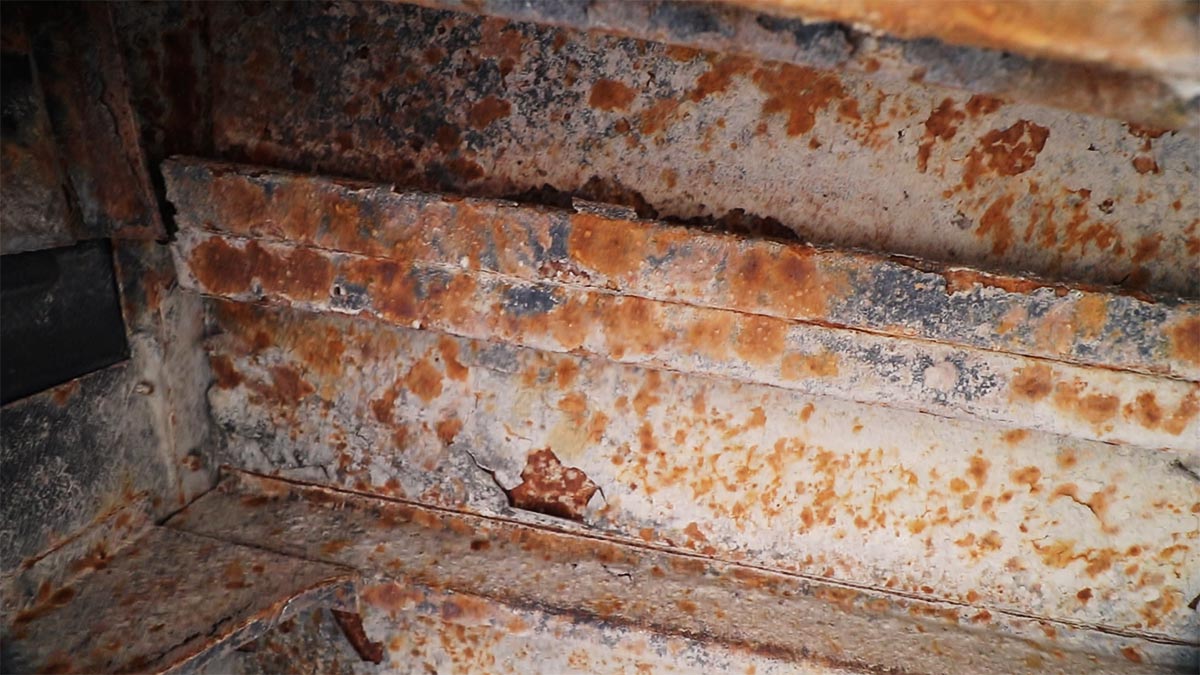
The third level is deep-seated corrosive rust.
This is where the rust is so deep in the metal that flaking can occur, holes in sheet metal are easily punched through with a screwdriver and structural members fall apart if taped with a hammer. If you see this rust, do not buy that school bus (unless you’re an awesome metal worker who knows what you’re doing). Buying a rusty bus can become a nightmare of chasing rusted out metal to find where it ends. Rust or corrosion is like an iceberg. You may only see a little bit on the surface, but, like an iceberg, the majority of the damage is below surface level. Rust and corrosion destroy the structural integrity of the metal.
One of the main things to think about regarding building a skoolie is the weight added during the school bus conversion. The platform needs to be solid, without any weak spots so that years of enjoyment can be had once the build is complete. If rust is left because of laziness or negligence, all that hard work may end up falling through the floor, which would be a bigger disappointment than taking care of it before spending the time to build the interior or exterior.
Read More: Old School Buses For Sale In Ontario – What To Consider Before You Buy »
Do you need a special driver’s license to drive a skoolie?
While doing our research, we started to wonder if we needed a special driver’s license to drive a skoolie. To drive a school bus in the capacity of hauling around 80 kids, you would need to have a special license.
But we were buying the bus to convert into a skoolie motorhome, so having a school bus chauffeurs license wasn’t really applicable.
If we were to go to an RV dealership to buy a diesel pusher motorhome, we wouldn’t need a special license in Texas or in Canada. As long as we had a Class C License in Texas or a G Class License in Ontario, we were good to go to drive a motorhome.
When you think about it, although the bus looks like it should cart kids to their schoolhouse, as soon as we purchased our skoolie, we were given 30-day window to switch the title over to be classified as a motorhome.
How To Title & Register A School Bus As A Motorhome In The USA Or Canada
Titling and registering an old school bus as a Skoolie is one of the most difficult things we’ve found in this whole process.
Why?
Because regulations are different in every country, state, province and even city.
Because Erin is from Ontario, Canada, and I’m from Texas, United States, we had to decide WHERE we were going to title and register our school bus as a motorhome.
We ended up getting our school bus registered and titled as an RV in Texas because it was going to be the easiest process without having to import our school bus into Canada.
What’s cool is that we researched the entire title and registration process for both Ontario and Texas. This research helped us to decide which way we were going to go.
Because this process is pretty involved, we went ahead and documented exactly how to register our school bus as a motorhome in Texas. As a bonus, we put our research notes for The Ontario School Bus Title Method to give our Canadian friends a starting point, as well.
Both Texas and Ontario have similar requirements for registering a school bus as a motorhome. In order to be successful with the title change, certain components need to be removed to qualify as an RV along with a list of motorhome components need to be installed. After this, then getting the title switched over ended up being a breeze!
In our article, How To Title & Register A School Bus As A Motorhome In The USA Or Canada we cover exactly how we made the title change.
And if you’re not getting your school bus titled in either Ontario OR Texas, the lingo and loopholes alone could give you a starting point for researching what needs to be done in your particular location.
How To Title & Register A School Bus As A Motorhome In Other Locations
As we collect Skoolie title & registration stories, we’ll post the details in articles here on BEAdventurePartners.com. Below is a list of places we’ve collected Title & Registration information from people who have submitted their stories & detailed information.
NOTE: Articles we have collected & published are linked in BLUE below.
We need your help! If you do not see your location linked and you know someone who has successfully switched their school bus title to motorhome or RV please share this page with them and ask them to share their story! We look forward to having a complete list so that this makes it easier for others to get their school bust titled as a motorhome!
CANADA – Skoolie Title & Registration Information
- Alberta
- British Columbia
- Manitoba
- New Brunswick
- Newfoundland and Labrador
- Northwest Territories
- Nova Scotia
- Nunavut
- Ontario
- Prince Edward Island
- Quebec
- Saskatchewan
- Yukon
USA – Skoolie Title & Registration Information
- Alabama
- Alaska
- Arizona
- Arkansas
- California
- Colorado
- Connecticut
- Delaware
- Florida
- Georgia
- Hawaii
- Idaho
- Illinois
- Indiana
- Iowa
- Kansas
- Kentucky
- Louisiana
- Maine
- Maryland
- Massachusetts
- Michigan
- Minnesota
- Mississippi
- Missouri
- Montana
- Nebraska
- Nevada
- New Hampshire
- New Jersey
- New Mexico
- New York
- North Carolina
- North Dakota
- Ohio
- Oklahoma
- Oregon
- Pennsylvania
- Rhode Island

Your skoolie story matters
We know it’s kind of a dry topic, but your skoolie insurance & RV title story could really help someone in your area get going on their dream machine.
Our goal is to gather stories from people from all over Canada & the US who have successfully gotten their school bus titled as an RV, and their insurance story too. The goal is to curate stories from each state and province to make it easier for people to confidently jump into this adventure.
If you want to share your story with us, please fill out this short survey! We will happily feature you on our blog! This info needs to be known! Some people will quit their tiny home on wheels dream because this step seems too daunting! BUT with everyone’s help, it doesn’t have to BE.
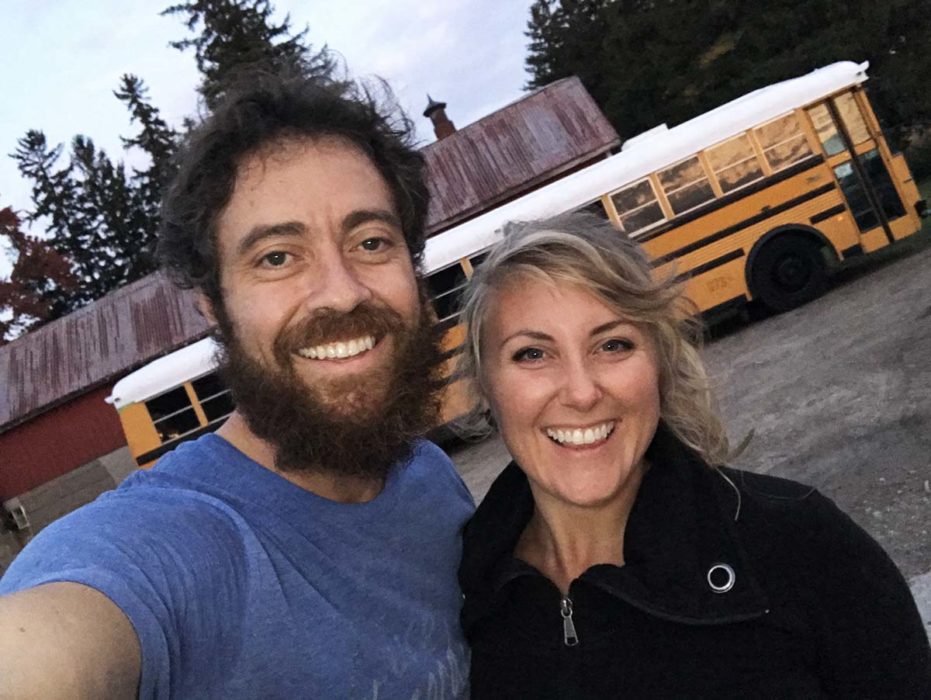
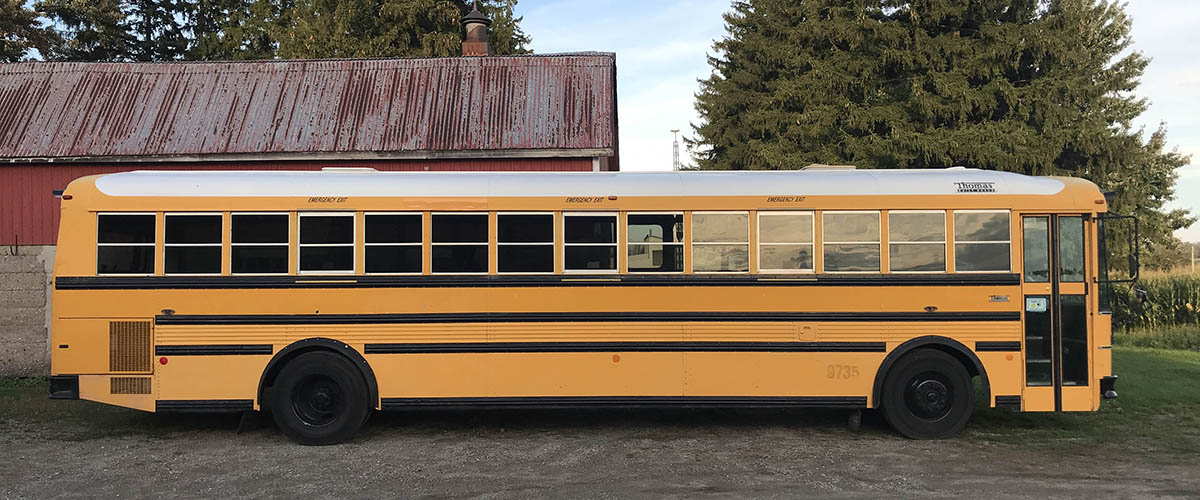
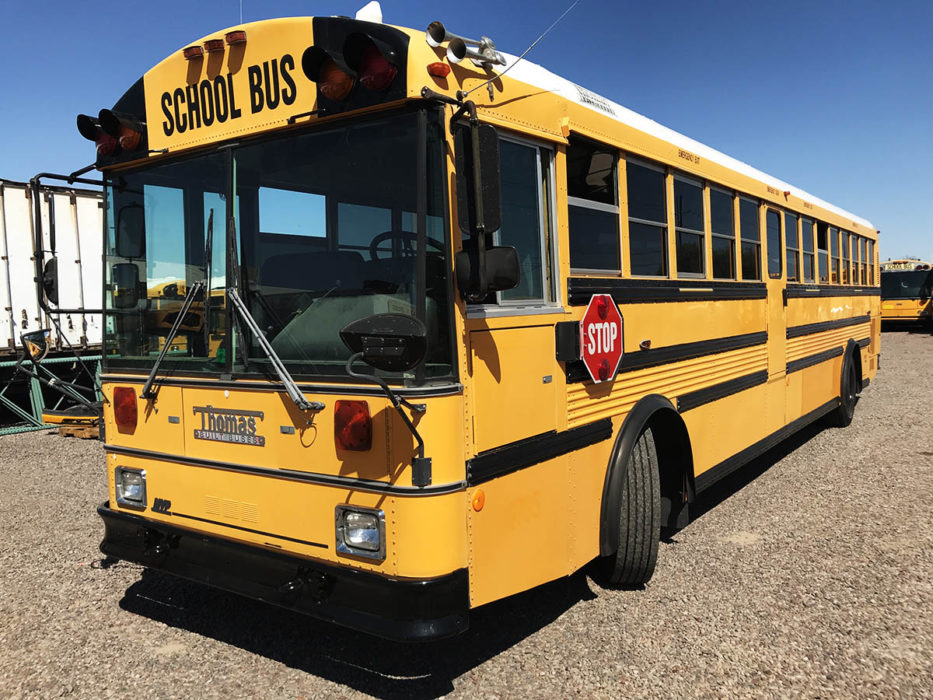
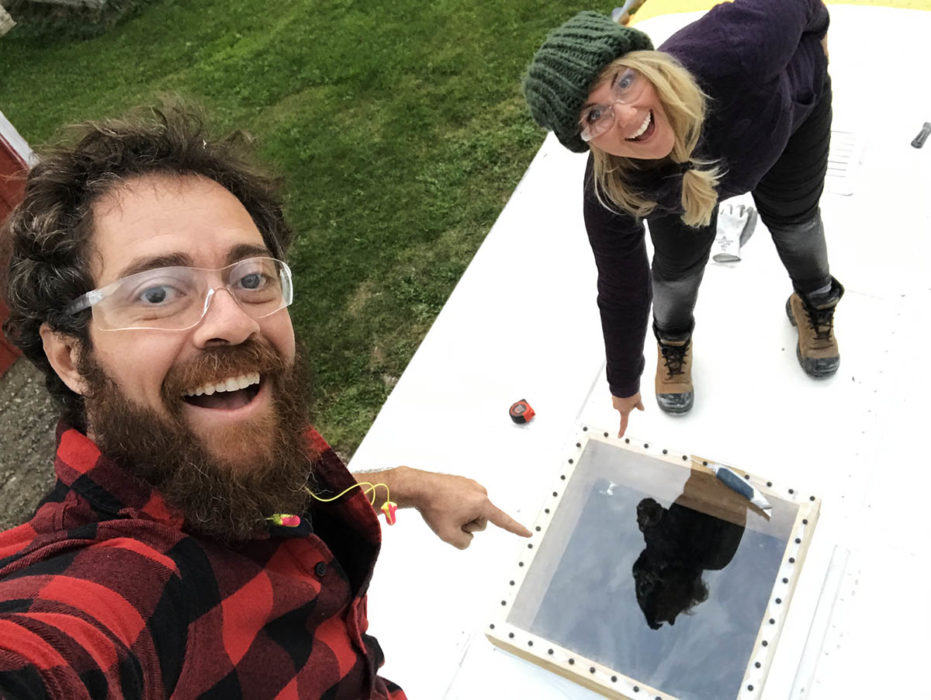
Our Skoolie, The BEAP Mobile, Specifications
The first time we stepped into the school bus we bought to convert, the vibes were wonderful! Spacially, the ceiling is tall enough, the length is plenty long so as to prevent claustrophobia and the simplicity of it mechanically was highly desirable.
- Year: 1997
- Vehicle Type: Flat Front School Bus
- Make: Thomas Built Buses
- Model: Saf-T-Liner
- Passenger Capacity: 87
- Miles at the time of purchase: 255,592
- GVWR: 34,200 lbs
- Engine: Rear Engine CAT 3126
- Transmission: Allison MD3060 Automatic
- Fuel Tank Capacity: 60 Gallons
- Fuel Type: Diesel
- Average MPG: 10 Miles/Gallon at 55 MPH
- Brakes: Air
- Length: 40’
- Width: 8’6”
- Height: 10’6”
Who Insures Skoolies?
After buying our used school bus, the next question we had was who insures skoolies?
The simple and snarky answer would be, “Insurance companies insure skoolies…” However, when calling an insurance company for skoolie insurance, most of them have no idea what you’re actually wanting because “Skoolie” is not a typical vehicle, while motorhomes are widely accepted (especially in Canada at the time of this writing).
In a nutshell, we ended up getting insurance on our skoolie as a pre-converted motorhome. In order to do this, we had to prove “intent of future conversion” which meant we had to show proof that we were in fact on our way to doing the major conversion.
Here’s a list of what the insurance company wanted to see to qualify for intent of conversion:
- The school bus has been decommissioned
- Pictures of exterior showing no markings of school bus wording, no stop sign, no crossing arm, load/unload lighting changed to all amber lights on the front and all red lights on the back
- All passenger seats removed except for one or two rows (proves there is no intent on making this a “party bus”)
- Blow-up mattress showing a place to “sleep”
- Pictures of the interior from driver compartment towards the back
- Pictures of the interior from the back towards drivers compartment
- Copy of the bill of sale and documents from the dealer showing the school bus was sold as a private vehicle
By doing the things from the list above, we qualified in less than 24 hours for recreational vehicle liability insurance.
Skoolie Insurance Companies
One of the companies that we learned about who know of the skoolie trend is National General Insurance. They were the first company we went with, and as of this writing, they are our current insurance provider. However, we have heard that other companies provide insurance such as:
- National General
- Progressive
- Farmers
- Nationwide
- Allstate
- Pretty much any insurance company that offers “RV/Motorhome Insurance”
Any insurance company the insures RVs and motorhomes could technically insure a skoolie. Although, not all insurance companies want to take on the liability of a used school bus that is about to be converted into a Skoolie.
In Canada, there are even more insurance companies that we have not listed.
Now, if calling an insurance company for the first time and the agent doesn’t want to insure you, it wouldn’t hurt to call another agent in the same company. Partly because not all agents have had experience with insuring a skoolie, while other agents have.
How To Convert A Skoolie
Now that we crossed our T’s and dotted our I’s, bought our school bus to convert and drove it up to Ontario, let the conversion begin!
But where should we start?
After searching tirelessly online, we found that there has not been a “holy grail” of showing what to do in what order. Although we did find many websites and YouTube channels showing how to do skoolie conversion projects, there was not a school bus conversion guide set up like a roadmap.
While we do our conversion, we’re going to document the highlights on this article you’re reading right now, along with making more detailed articles, which we’ll link to in the appropriate sections. So consider this article you’re on right now the bus conversion guide overview.
Before beginning a school bus conversion, it’s a good idea to plan out what you’re going to do to avoid costly mistakes.
Read more: How Planning School Bus Conversion Ideas Helps Save Money »
Start With Demolition
A clean slate makes a solid starting point, but most school buses have parts that should be removed rather than just building on top of it.
First off, depending on how you bought your bus “decommissioning” the school bus should be the first step. To do this, remove the following items that are not required on a motorhome’s exterior:
- Stop sign
- Crossing arm
- School bus wording & decals
- Reflective tape
After decommissioning the school bus, removing the seats, ceiling, walls and floor from the interior is what we did next.
Removing the interior components in that order allowed us to see what was under everything and assess the condition of the metal hat channel and sheet metal. What we’re doing is looking for signs of rust, corrosion and covered up damage.
The goal in this step is to expose what’s underneath everything so that we can see if there’s anything that needs to be fixed before building out the custom skoolie interior.
Rust remediation (if you got it)
Now that the surfaces are revealed, did we find any rust? Yep! A little bit of surface rust on the floor, none in the walls or ceiling (thankfully!) This surface rust needs to be addressed before we move forward.
AFFILIATE DISCLOSURE: Note that we are affiliated with products and services we use and trust. If you click a link and make a purchase, we’ll earn a small commission at not extra cost to you. This helps us to continue producing content and we hope that you use our links if our blog posts or videos have helped you in any way!
To fix our surface rust issue, we simply put a wire wheel on our cordless drill and brushed it off followed by painting the entire floor pan with a rust protective paint called Beauti-Tone Rust Coat (this is Canada’s version of Rust-Oleum)
Had the wire wheel not been enough to completely remove the rust, we would have painted the rust with a rust converter first followed by rust-inhibiting paint.
Besides rust on the interior, looking around the bottom edge of the window and door openings, around the wheel wells, and around the chassis underneath the school bus are all spots where we saw rust while inspecting buses we didn’t end up buying.
The more rust you find, the more work it’ll be to fix before any sort of building begins.
Interior Layout And Design
Now that we have a clean slate, it’s time to measure the bus and draw out a tentative floorplan. At first, we used paper and pencil to take down our measurements.
Areas we measured include:
- Floor dimensions remembering to measure wheel well protrusions and anything jutting out
- Walls
- Windows
- Ceiling
- Driver’s compartment
- Entrance stairwell
- Emergency exit doors
- Emergency exit ceiling hatches
These measurements gave us the foundation for 3D modeling using a program called Adobe Dimension.
Even though drawing on paper works great and we use paper for most of our drawings, sometimes using a program that can use accurate dimensions along with 3D modeling makes things easier.
With our measurements, we were able to figure out framing the ceiling, walls, floor, closets and organization structure. This is crucial especially when you’re tall like I am. I’m 6’2” and Erin is 5’ 1-3/4″. The interior height is something that I was concerned about because if we built the floor up to high and the ceiling too low, then I would not be a happy camper.
Accurate measurements will help to avoid costly mistakes and allow us to mock-up the space with cardboard boxes to see if the space feels right with that footprint.
Read More: Insulating & Installing Skoolie Subfloor | Smart & Simple Flooring Method »
Read More: Century-Old Reclaimed Barn Wood Turned Into Stunning Skoolie Floor »

Exterior Modifications
Modifying the exterior is inevitable. In the end, our school bus could not look like a “school bus” so as to not confuse the public.
Painting the Roof & Exterior
One of the modifications we’ve done so far to the exterior is sealing the roof with an elastomeric paint here in Ontario called COOLFLEX By DuROCK (In the U.S. there is Henry Tropi-Cool) Both are elastomeric silicone-based paint that reduces heat conduction and increases reflection from the roof.
Besides painting the roof, we will also be painting the exterior of the bus so as to change the color from school bus yellow to another color. Painting the exterior alone will completely transform the visual look of our Skoolie into our own tiny home on wheels.
Replacing Windows
We found that our original school bus windows lacked the ability to seal off the elements efficiently. Our windows were drafty and loose AF. While driving, they opened on their own. We also found that the caulking was in rough shape on the exterior.
Consequently, we removed all the windows and are replacing them with larger ones so that we can have a panoramic view. These bigger windows are the same ones you see on Mercedes Sprinter vans.
🔴Watch Video: Cutting Another Hole For CR Laurence Windows »

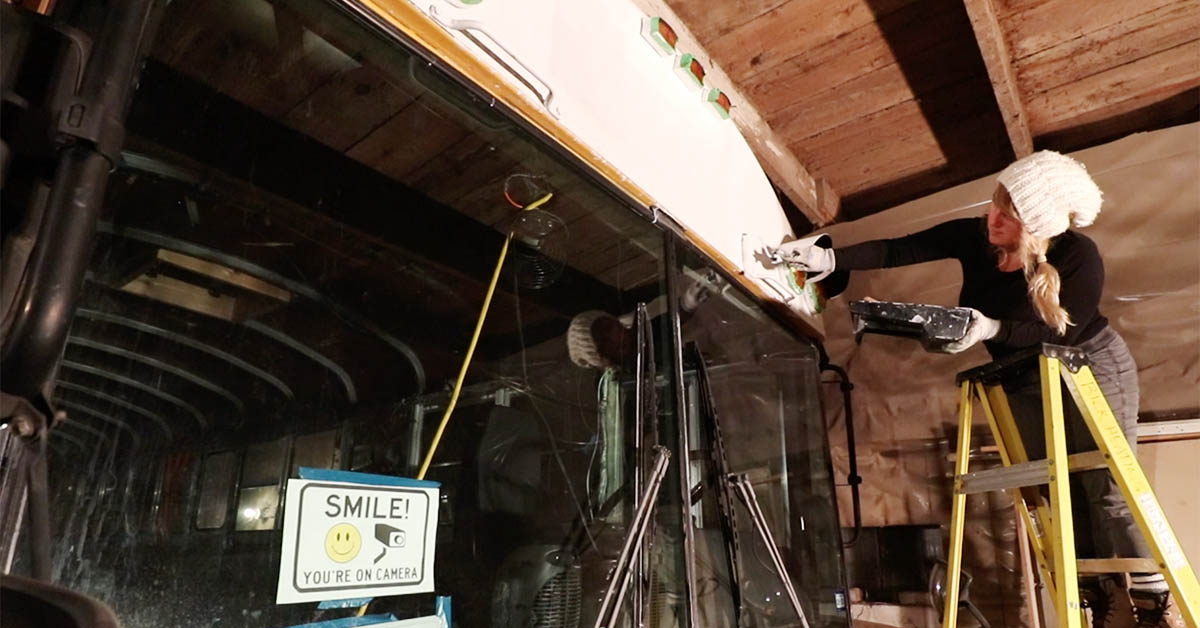
Exchanging Roof Emergency Exit Hatches With Skylights
With over 23 years of the sun beating down on the roof emergency hatches, the plastic was completely worn out, cracked and one had a leak.
Considering we need to have a roof that will shed water for our tiny home on wheels, we went ahead and removed the old school bus emergency exit hatches and built our own roof skylights.
We used polycarbonate as our glass, which is the same stuff that’s used for bulletproof glass. If it’s good enough to stop a bullet, it’ll be strong enough not to crack if hit by hail.
For the frame we used Western Red Cedar as part of it will be above the roofline of the skoolie. Cedar has a natural ability to resist rot, mold and repels insects, which is why it’s used frequently in closets, as well.
By installing some hinges, we were able to make these skylights openable from the interior with some latches to keep them shut while driving.
Installing Shoulder Skylights
One thing we had never seen before on a skoolie when we started building them are what we call “shoulder skylights.” These skylights are unique in that they curve with the roofline transition from the exterior wall up to the roof. This will provide scenic views of the sky along with more light in the kitchen & living room area.

After we installed them, we were getting comments on our 3-Part YouTube video series of people saying that they looked like the windows on scenic train cars.
We went ahead and used the same polycarbonate for the glass on these windows.
Check out the 3-Part Video Series Below
And/Or Read the blog post on DIY Polycarbonate Skylights For Tall Skoolie People »
Part 1
Part 2
Part 3
Want our detailed 45-page guide for building these curved scenic skylights? The guide comes with our online school bus conversion course called ‘Get Your Skoolie On‘ – Get it today!

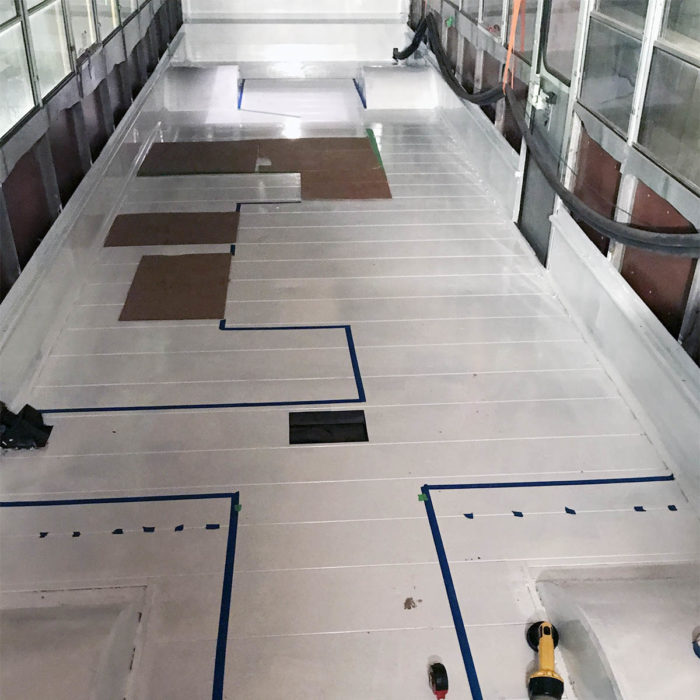
Creating Underbody Storage
While some skoolie owners have a garage in the back of their bus utilizing a rear emergency exit door, considering we have a rear-engine, this was not possible.
Instead, we’re going to build out underbody pass-through storage to house tools and some bus components we don’t want to install inside the bus.
Below is an image of our floor building in progress. It’s not quite complete, but it’s coming along!
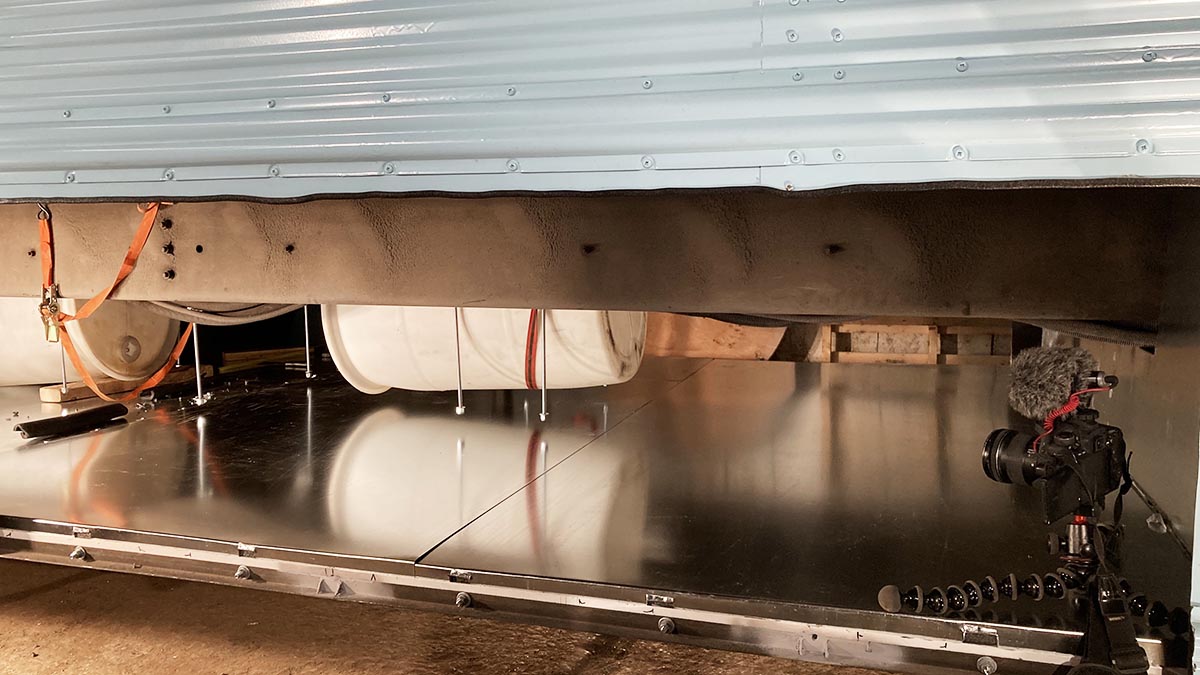
By insulating the walls and floor of the underbody storage, we’ll be able to keep things like the gray water tank, pumps, water filtration, lawn chairs, gardening tools and possibly a portable bonfire pit!
Installing Backup Camera
Our skoolie is 40’ long. Once we finish building out the interior, there will be no way to see out the back window while driving. Even now, the engine compartment is situated at a height that makes the rear window useless while driving.
The solution? A backup camera mounted above the rear window. My mom bought us this digital wireless backup camera as a Christmas present. What we like about it is that we can wire the camera into the rear marker lights to power it while the bus is on. The camera then transmits wirelessly up to the video monitor that it comes with at the front of the bus, which is powered by 12V either wired or plugged into an outlet.
One thing that we thought was cool is that this camera can be wired either to the marker lights to stay on full-time while the bus is on OR wired to the reverse lights, so that it powers up only when in reverse.
We plan on having this camera powered ON while we’re driving, so we can use it as a rearview mirror. This will certainly make driving safer.
Exterior Flood Lights
While out boondocking in the middle of nowhere, exterior floodlights will allow us to illuminate the immediate vicinity around our bus. Floodlights are useful for security, to work on the bus at night or even to light up an area while it’s dark out.
There are different types of floodlights that would be useful. Bulbs include halogen, incandescent, fluorescent and LED.
We’re going to install LED floodlights for the simple and smart reason that they don’t consume much energy. Although, we do not plan on keeping them on all night, having the ability to properly illuminate the immediate surroundings of our skoolie will allow us to feel safe and have fun during low light situations.
Ground Perimeter Lights
Lights that are commonly overlooked or not even thought about at all are ground perimeter lights. Back when I was a firefighter, driving the 42’ long fire truck at night in parking lots or on tight streets was difficult.
Having the ability to illuminate the area directly under the bus on the sides helps a ton! This increased light gives visual perspective to the edges of the bus and seeing where the rear wheels are for taking corner turns.
It’s also important to have a switch in the driver’s compartment to turn the perimeter lights on and off while driving so you don’t have to look like a space ship driving down the road if you don’t want to.
Plumbing A Skoolie
Setting up our plumbing system correctly is extremely important. Partly because once we put up interior walls, getting to the lines to fix them will be more difficult. Although, we plan on designing our plumbing so that every connection is accessible to inspect while out on the road.
Fresh Drinking Water Tank
One of the most important parts of our plumbing system is the ability to hold fresh potable water. We plan on carrying 100 gallons of water. Something to consider is the weight of water, which is approximately 8.25 lbs/gallon at sea level. Now there are a LOT of variables, which could make the weight of water more or less (mineral content, altitude, temperature, which of the 3 states water can be in). Just know that 100 gallons of water weighs approximately 825 lbs.
The weight of water is important because putting 100 gallons of water on your roof vs keeping it as low as possible will completely change how your skoolie drives. Lowering the center of gravity will help your skoolie drive smoother with fewer chances of it tumping over.
Tump Over
Texas term meaning to fall over accidentally.
We’re going to end up putting our freshwater as low as possible inside the underbody storage positioned from driver’s side to passenger side so that there will be equal weight distribution regardless of how full it is.
Gray Water
Where does the water go when it pours down the drain?
In a house, it goes out to either the septic tank or the municipal city sewage system.
In a skoolie, it drains into the gray water tank. This is the tank where anything from the kitchen sink, bathroom sink, and shower goes. Although some people just let it run off onto the ground, that is not necessarily legal in all places. The best thing to do is know the local laws for properly draining your gray water so that you don’t pollute or piss someone off. Also, use biodegradable soaps and shampoos to be eco-friendly.
Our plans for The BEAP Mobile’s gray water tank is to secure it underneath the skoolie positioned in the insulated underbody storage area. We are repurposing two 30-gallon HDPE thick-walled barrels that we’re going to plumb together. By positioning them in the center of the bus, between the chassis, regardless of how “full” they become, they will help to keep the mass of water, centered on the bus. Doing this will help with driving and balancing the load.
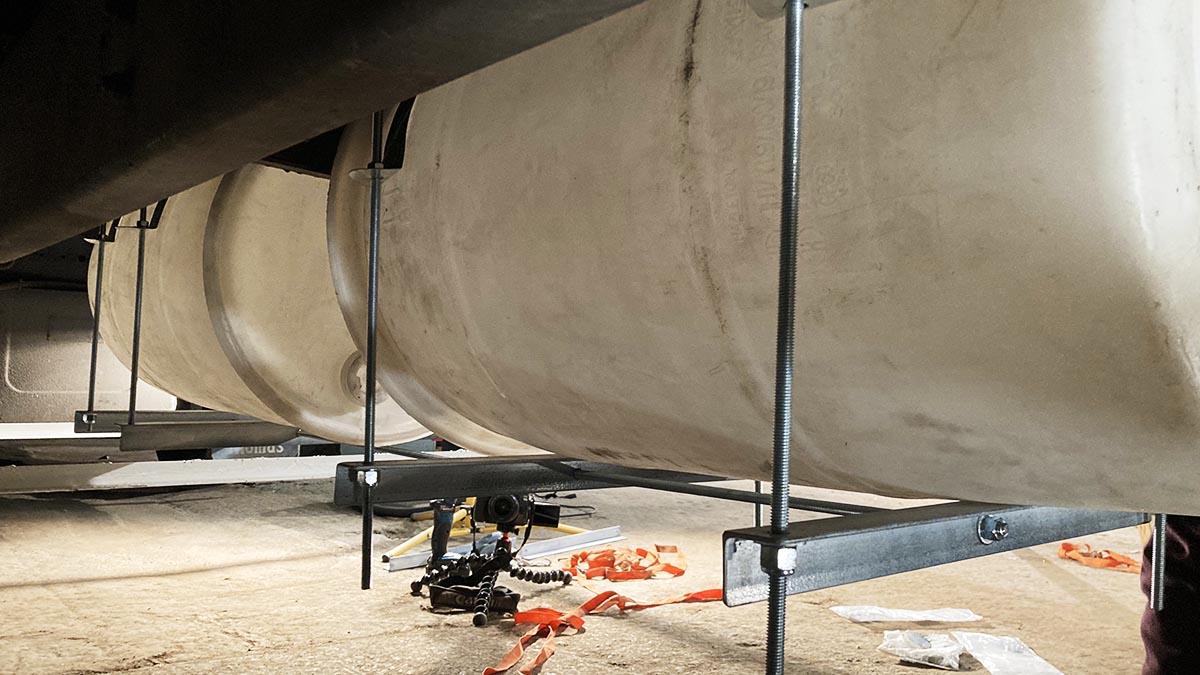
Above is a pic of our prototype for mounting the gray water tanks. They are going to end up being mounted by hanging from strut channel above with through the floor bolts to keep them from moving on any axis.
Installing the gray water tank in the insulated underbody storage area accomplishes two things.
The first is that it is not inside the living space inside the skoolie, resulting in more space for adventure gear.
The second is water flows to the lowest point on Earth. This means that all the drains will be directed to this lower point on the bus and we won’t have to worry about pumping drains sideways or uphill using sump pumps.
Fresh Water Pump
To get water flowing from the faucets, a water pump is used between the freshwater tank and the faucets. The size of our freshwater pump will be determined by the size of pipes, distances between the tank, pump, and faucets, and how much GPM (gallons per minute) will be needed if one or more faucets are flowing at the same time.
Once we get to this part in the build, we’ll go over how to figure all that out with formulas.
For now, the easiest way to illustrate what size of water pump will be required is to figure out how many gallons per minute each of the faucets will be and match a water pump rated to flow that much water.
As an example, if the shower flows at 2 GPM and the kitchen sink flows at 1.5 GPM, that equals 3.5 GPM. This results in the freshwater pump needing to be a minimum of 3.5 GPM. The problem with this is that we’re not taking into account friction loss inside the pipe, in each connection, and around each bend.
Another issue to think about is the water pump cycling on and off to keep the lines pressurized. To combat a water pump from erratically cycling, a pressure tank (also called an accumulator tank) is used to hold the water on the pressurized side of the pump at a certain pressure. Now the pump’s only job is to keep that pressure tank pressurized, which will save energy, reduce noise and increase the life of your pump.
Fresh Water Filtration
Depending on your water source, different levels of filtration will be necessary for safe drinking water.
- Where do we plan on filling up with water?
- Only from municipal water supplies?
- Or will freshwater streams and lakes be sufficient?
At a minimum, we plan on having a 5-micron particulate filter to eliminate any suspended solids floating in the water.
Next in line will be an activated charcoal filter, which is designed to remove toxins from the water.
Finally, the water will flow through a UV LED device, which is designed to eliminate pathogens within water effectively reducing the possibility of getting a dirty stomach bug like giardia.
Skoolie Water Heater Options
Hot water is not only nice for a shower, but washing dishes is more effective with hot water too. In order to do this, there are three common ways to heat water in a skoolie or motorhome.
The first way is to use solar hot water heaters. Water is heated, usually in tubes that are on the roof of the vehicle, which is then piped down into the skoolie’s plumbing system. The problem with this way is that if it’s dark out, the sun is not heating the water supply. Another issue is that it adds a significant amount of weight to the roof (remember how we talked about water weighing 8.25 lbs/gallon?)
The second way to heat water in a skoolie is in a tank water heater. These are usually heated with either electricity or propane. The problem with this method is that hot water tanks are usually around 5-10 gallons and that won’t last long if two or more people need to take a shower one after the other unless you have a unit that has a quick recovery rate. This way is also energy prohibitive in that the system has a thermostat that constantly wants to keep the water hot (unless you set it on a timer to only heat during certain time frames). However, with energy-efficient machines, cycling is reduced, which could result in less energy usage depending on the model.
The third way is to use on-demand water heaters. Heating water in this way is a pretty good idea because it only heats the water when the hot water line senses water movement in the line. Once movement is sensed, then the element, be it electric or propane flame will ignite and stay on only as long as movement is present. This could be economically beneficial unlike keeping a 5-gallon tank of water hot all the time. The problem with this way of heating water is that if the flow is not high enough, the on-demand water heater will NOT turn on.
Here’s an example: Let’s say you turn on the hot water tap in the kitchen only partially and the tap is rated to 1.75 GPM and the minimum flow rate for the water heater is .5 GPM. If you do not flow a MINIMUM of .5 GPM, then the water will NOT get hot. That tends to be a problem especially with mixing valves that combine hot and cold water.
BONUS! The fourth way is to heat water in a kettle on your wood-burning stove or stovetop. Although this is a great way to make coffee or tea, trying to take a shower in this way can become tedious.
Choosing The Right Toilet For Your Skoolie
You know it. We know it. Everyone poops.
The reason we put the toilet in the plumbing section is that most often toilets are connected to the plumbing system. They are supplied by fresh water (which is a waste of freshwater), then flushed into a sewer system (on a skoolie or RV they are flushed into what’s called the “Black Tank”)
Nowadays, there are a few of options for Skoolie toilets.
Option 1 is to go with the typical residential flushing throne. This will require a third tank to be installed called the dirty “Black Tank”.
Option 2 is to go with a cassette toilet. These were revolutionized in Europe as the cassette acts as the dirty black tank, which can be removed and carried into a public bathroom and poured down a toilet or down a dump station hole found on campgrounds or in national parks.
Option 3 is the less used, but growing in popularity composting toilet. In the crudest form, you basically poop in a bucket and top it with wood shavings, mulch or coconut husks. To pee, you do so in a separate container.
We’re going with Option 3, but we’re going to make our own custom composting throne. One fit for a king & queen with integrated urine diversion so business can still be done in the same spot.
You’ll definitely want to stay tuned to see how we put this composting toilet masterpiece together!
But for a sneak peek of our skoolie’s composting toilet, below is a pic of it being built.
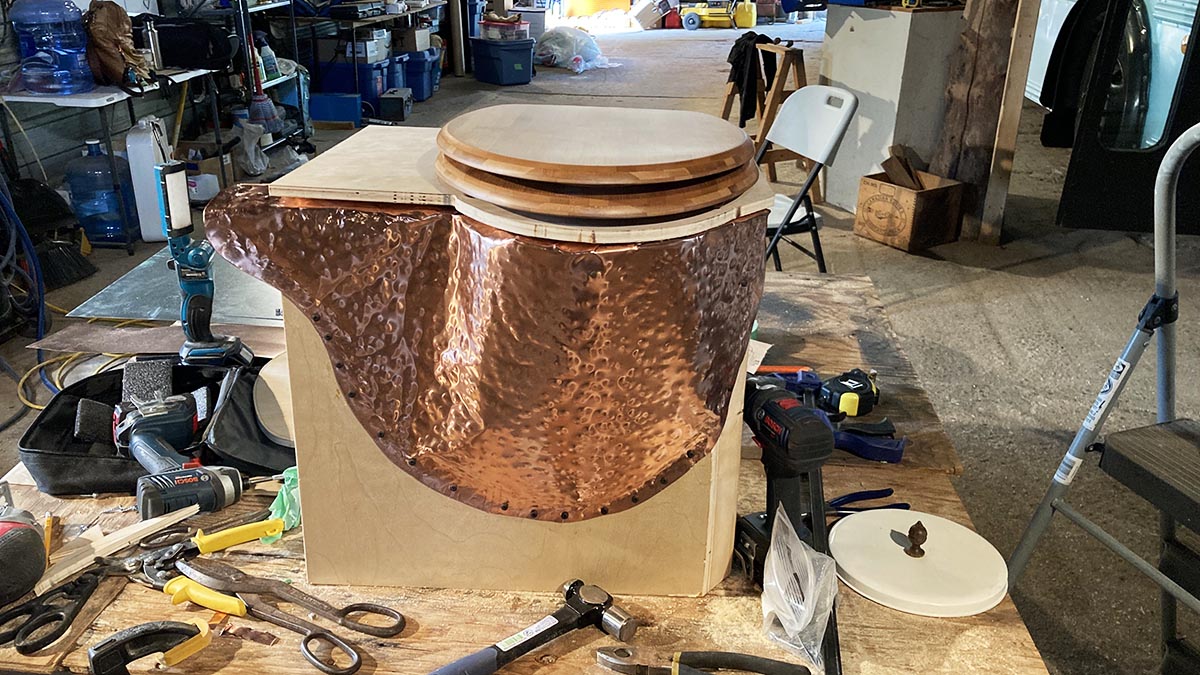
We’re including a urine diverter so that we can separate the wee from the poo. This throne is going to be so fine it’ll be fit for a King and will be dainty enough for a Queen (she poops too!)
The urine diverter is essential in keeping a composting toilet from smelling stinky. So we’re going to plumb it to flow down below into a holding tank in the skoolie underbody storage compartment. We’ll get into more details of that when we cross that road. But here’s a pic of how it’s coming along.
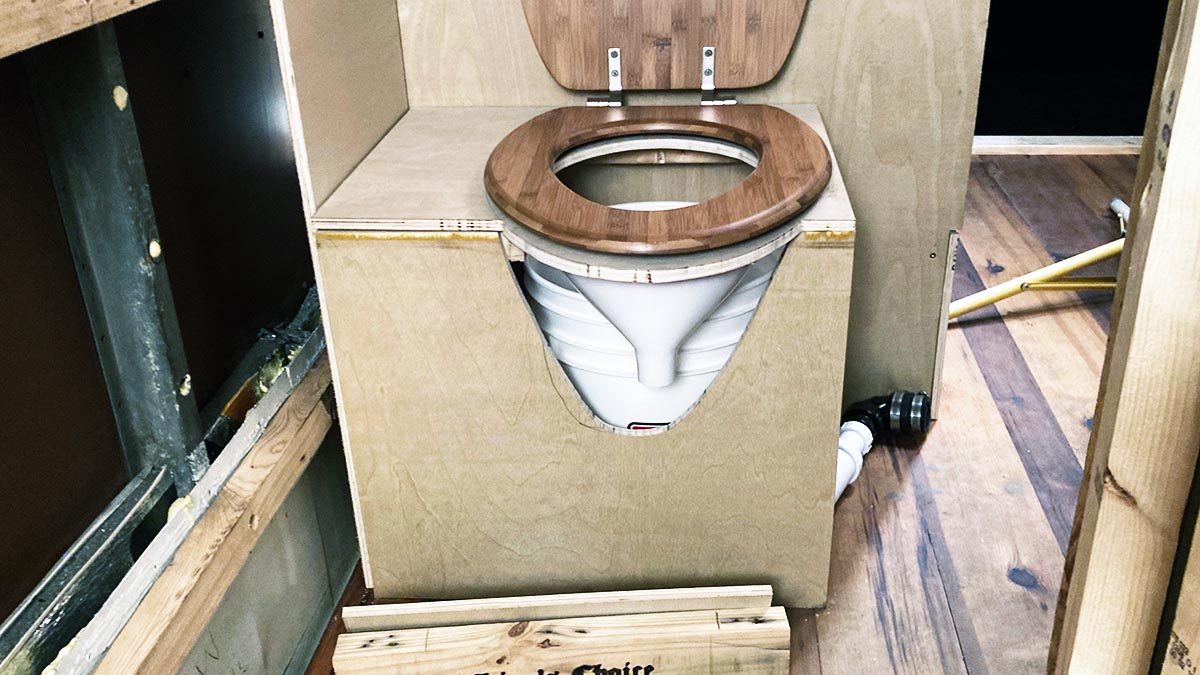
If buying a composting toilet already manufactured is more up your alley, there are a couple of composting toilet companies that are doing a good job collecting humanure (human + manure). One is Nature’s Head and the other is Air Head Composting Toilet.
If you’re not into building your own DIY composting toilet, then springing for a manufactured composting toilet may be a better option.
Skoolie Electrical
We as humans have become addicted to energy. Whether we’re getting a jolt from a coffee or tea, or needing to charge our neverending devices.
Both Erin and I are guilty of needing a substantial amount of electricity. Whether we are charging cameras, laptops, phones or juicing a delicious fresh juice, there needs to be a way to operate.
But that doesn’t mean that there are not ways to capture the energy around us.
Skoolies are versatile and if you’re creative, you can power up your devices a number of ways.
Below is a list of potential ways to charge your “house” batteries:
- Solar power (using the suns rays)
- Wind power (putting up a wind turbine when parked)
- Using a generator (gasoline, diesel or propane-powered)
- Shore power (hooking up to an outlet at a campground)
- Hydropower (throwing a turbine into a stream)
- Bicycle power (getting a stationary bike and peddling to charge your systems)
- Hamster power (put a wheel in your hamster cage and get that little guy to run! j/k we wouldn’t do that and don’t have a hamster)
As you can see, there are many ways to create electricity.
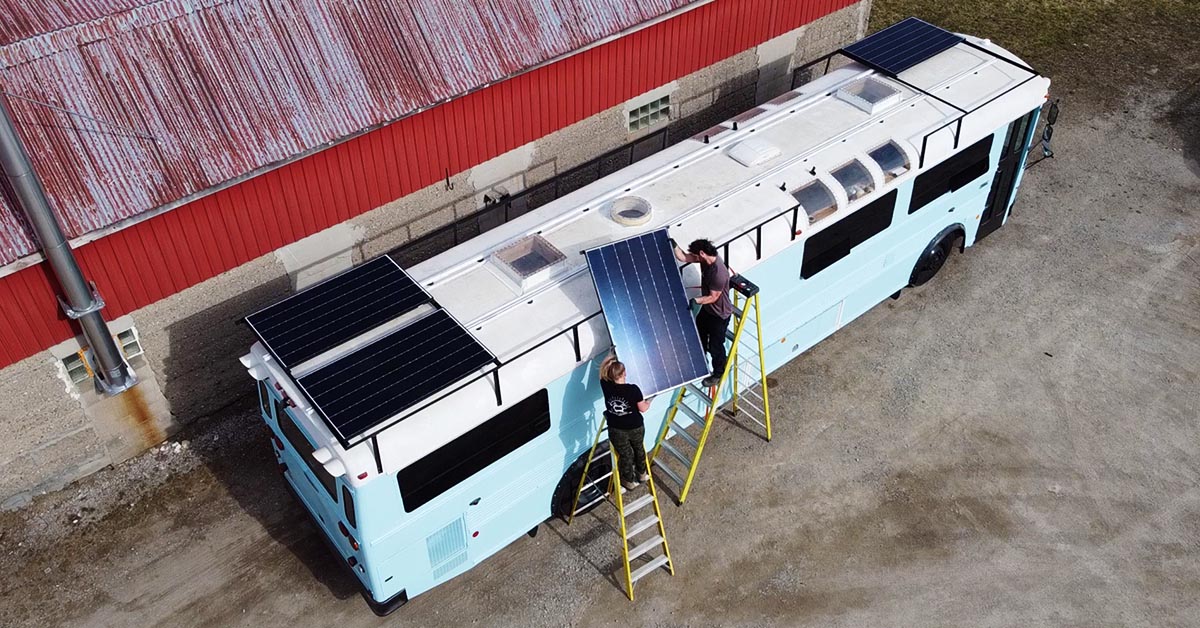
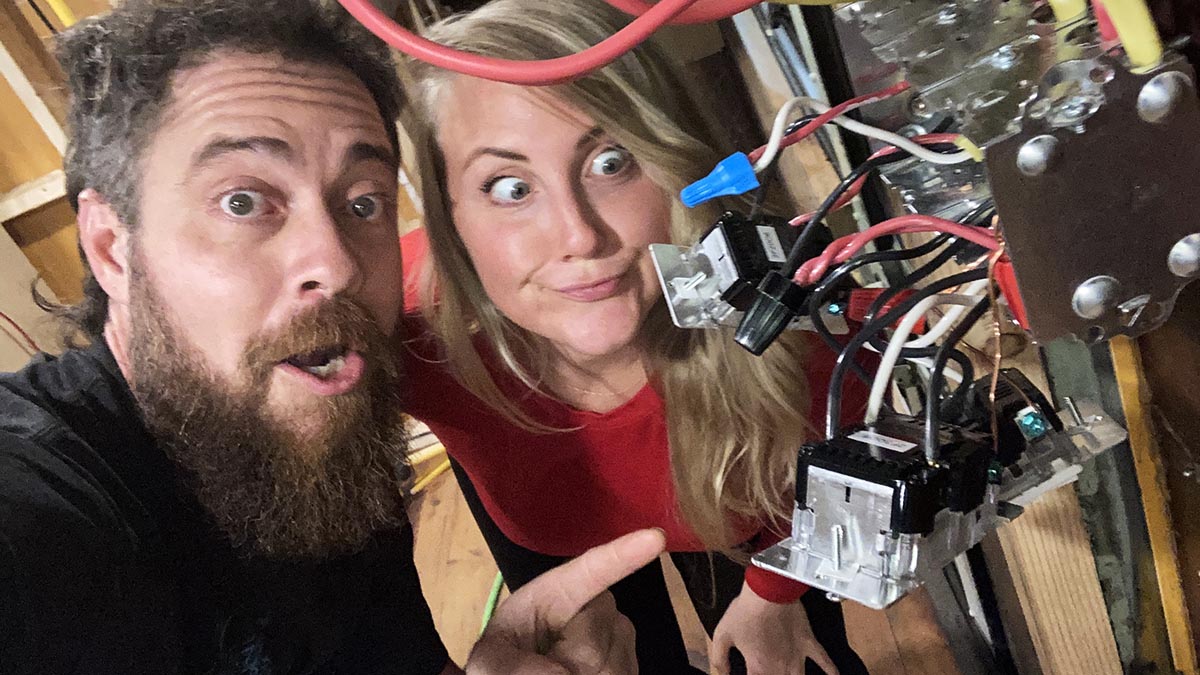
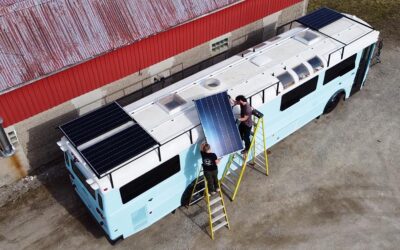
We installed our Skoolie Solar System, which has four massive solar panels on the roof, 6 Battle Born 100Ah 12V batteries, a Victron Energy SmartSolar Charge Controller, and a Victron Energy 3000 Watt inverter.
Propane and Propane Accessories
While electricity is nice for some appliances, propane is an option and sometimes is more efficient at doing a job.
Some components on the skoolie can use propane such as:
- Refrigerator
- Stove
- Oven
- Generator
- Hot water heater
- Furnace
- BBQ Grill Outside
With propane comes great responsibility. Hook it up professionally, friends! Have a professional either install or coach you on what to do and how to check for leaks before you’re on the road. Propane is one of those gases that can blow up a place or even cause asphyxiation.
However, when it’s installed correctly, it burns clean and can make a delicious meal.
Once we install our propane system, we’ll get into more details.
But if you’re itching to get going, one of the biggest tips we can give you is to install your propane cylinders in its own floor vented compartment to the exterior of your skoolie.
Propane has a specific gravity of 1.5 while air has a specific gravity of 1. This means that propane, in the gas state, is heavier than air by one and a half times.
Well, there’s the end of that science lesson. Let’s get on to more topics.
Major Appliance Purchases
Converting a school bus into a tiny home on wheels can be equated to building a house. The reason being is that there are quite a few similarities between a motorhome and a house-home.
With that, there will be some major appliances that are considered “big ticket” items. The more bells and whistles your skoolie has, the more appliances you’ll probably install.
Below is a list of the major appliances we’re considering for our skoolie build:
- Solar power, electrical systems, generator
- Refrigerator
- Induction Cooktop
- Electric Oven
- Washing machine
- Diesel Furnace Heater
- Air conditioner
There are quite a bit more appliances that one could consider when building a tiny home on wheels. The list above should give you a good idea that most appliances in brick & mortar houses will also be part of a Skoolie build.
How much does a School Bus Conversion Cost?
The cost to do a school bus conversion is different for everyone because there are soo many factors to take into consideration.
If two people can buy the exact same bus and those people come from different backgrounds and experiences, but they build the bus exactly the same, one will cost more than the other. Sounds strange, I know, however, we all come to the table with different skills. One person might have no idea what they are doing with tools, so the destruction of materials will be higher than a person who knows how to use a ton of tools.
If you have tools, you’ve probably already assumed that cost vs. if you don’t have tools, you’ll have to borrow, buy or rent them from somewhere.
If you don’t have skills and experience in building, construction, engineering or the drive to learn, there will be a cost to hire help.
Depending on where you live, there will be a difference in cost for materials.
Besides major appliances, all the little miscellaneous stuff will add up too! For instance, when we were installing the furring strips in the ceiling, we needed almost a thousand hex head self-drilling 2” screws. That set us back about $120 CAD (around $85 USD).
There is a cost to everything (even free stuff) and acquiring the bus.
When we bought our bus, here’s a list of the associated costs:
- Train ticket from two hours away to Toronto
- Plane tickets from Toronto to Phoenix
- Airbnb for four nights in Phoenix
- School bus price tag
- Bus Insurance
- Roadside assistance membership
- Fuel, oil, coolant
- Pre-conversion components (to qualify for motorhome title)
- Time to drive from Phoenix to San Antonio, TX to get inspection, title & registration
- Inspection, Title & Registration
- Time to drive from San Antonio to Ontario (where we’re doing the conversion)
- Meals, meals, meals and more meals
All of this was done even BEFORE we started doing the conversion. However, we got to sleep in our pre-converted skoolie for two weeks before we even started the conversion process, which was fun!
Once we’re done with the conversion, we’ll put together an article and detail the costs (because we’re saving all the receipts).
To keep updated, jump on our email list where we send out one weekly email called Week in a Nutshell where we are updating everyone of what we’re up to!
The one cost we stopped keeping track of is our TIME (it became tedious to do and we forgot half the time.)
School Bus Conversion Materials & Tool List
So far we’ve covered quite a bit. What’s cool is that we are archiving a list of the materials and tools we are using on our Amazon Skoolie Shopping List, which you can check out. As we do projects, we add more materials and tools to that list.
We do receive a small commission for any purchase you make after clicking our link at no additional cost to you. So if you’re going to shop on Amazon and want to support our project, click our link before buying your products (even if they are not on our list) because every penny counts!
Now it’s time to Get Your Skoolie On!
Enough of me rambling on about all the things it takes to do a school bus conversion. It’s time to get to work!
We hope this school bus conversion guide has shed some light on this exciting project!
Something we’re doing as we go is putting together more in-depth videos, guides and our detailed plans, which you can get access to, if that would help you.
We’re calling it Get Your Skoolie On. If you’re interested in our guides and plans, this will be a way you can get them all in one place as we create them. Check it out and see if it is a fit for you.
What’s included with Get Your Skoolie On:
- Conceptualization sketches
- Our complete skoolie project conversion guides & plans (We’re still building, so we’re adding more lessons as we go!)
- Detailed skoolie conversion build videos with details NOT published to our YouTube channel
- New guides and plans as we work on our school bus conversion
- And much more!

In Conclusion
Doing a school bus conversion is a ton of fun. This project has tested both Erin and I mentally and physically (at times, emotionally too…) However, we wouldn’t trade this project for anything!
We believe that anyone wanting to live smart and simple could make converting a school bus into a tiny home on wheels a reality. Why? Because you’re driven and won’t let anything stop you!
If you’re doing a school bus conversion or thinking of doing one in the future, drop a comment below and let us know if you have an Instagram, Facebook, or YouTube Channel so we can connect with you and follow your journey, too.
If you haven’t yet, Subscribe to our channel on YouTube called BE Adventure Partners! We appreciate you watching!

Until Next Time… Adventure On!
– Brian Garcia

Hey, we're Brian + Erin. Currently, we're workin' on our bug out bus. Lucky the proverbial $hit hadn't hit the fan yet when we picked up this 40-foot beauty in Phoenix AZ and drove it up to Canada to convert it. Hopefully, we all still have time...
Honestly, this bus conversion has been the only sane thing in this insane world lately. We can't tell you how good it feels to BE working on something that lights our souls up and has such potential for a life that is entwined with nature, love, and happiness.
Our main goal is to inspire people to get off-grid and become self-reliant. We are well on our way and are super excited to talk about solutions with others who are shooting for a similar way of living.
Did This Blog Post Help You? If so, we would greatly appreciate it if you comment below and share it with a friend.
18 Comments
Check out our must-read articles about Skoolie Conversion
Texas Couple Accidentally Won School Bus Auction | Registering & Building A Skoolie In DFW
Joeseph & Jennifer Davis from DFW, Texas accidentally won an online auction to buy a school...
DIY Skoolie Solar System To BE Off-Grid Longer
When designing & building a DIY skoolie solar system, there are quite a few considerations....
Steps To Import A Bus From The USA To Canada (Or Vice Versa)
Yvan & Sylvie from Québec have successfully imported not just one, but TWO buses from the USA...
A realy good article.Keep up the good work.
Thanks so much, Calvin! Glad you enjoyed it! More will be added to this article as we build and publish more articles. Stay tuned!
– Brian + Erin
Really enjoying keeping up with ya’lls conversion. We are in the planning stages right now and it seems that you have thought through a lot of aspects that it seems some folks gloss over or don’t care about; plus you give great instructions for those of us with no experience or history with building and fabrication.
Hey Jess! Erin and I are excited that you are in the planning stages right now! Have you bought your bus? I feel like we’re constantly in the planning stage (even as we’re building) because we think of something then, have to plan it through. That goes with the entire build so far!
If you haven’t bought your bus yet, check out our Skoolie Inspection Checklist which will help during the purchase process (and on-going visual inspections to ensure your Skoolie is running smooth!)
Thanks for reading and watching our videos! Feel free to drop a comment anytime y’all have questions.
Adventure on!
– Brian (+ Erin too)
A school bus conversion is no simple task; it requires planning, patience, and good chunk of money if you want it done right. Thanks for this useful information.
For sure, Lauren! Thanks for reading!
– Brian + Erin
Hi Brian & Erin.
I will be following your adventures in bus converting as it is something I hope to do in the future and I am currently trying to learn as much about it as possible. Thanks!
One question: Why did you choose a school bus specifically? Did you consider other types (used tour bus, municipal bus, greyhound) before making the final decision?
Hey there Scott! Thanks so much for following our build! Hopefully, our content helps to connect the dots for you in your future build. To answer your question, we chose an older school bus because the computerized mechanics of it is less than that of newer buses. They are easier to work on and have a simpler design. Newer busses use more computerized electronics that if they fail can leave you dead in your tracks without a diagnostic computer to help see what needs to be changed/fixed. School buses tend to have higher clearance than tour buses, municipal buses, MCI buses, and greyhounds. So it was important for us to have a decent amount of ground clearance so we could take our school on dirt roads with confidence (and minimal off-roading on public land).
Let us know if you have any other questions & thanks for reading!
– Brian + Erin
Hubby and I are so excited…we just purchased an old school bus and look forward to the challenge of converting it! We’ve been Googling and gleaning information here and there and came across your wonderful videos/blog. It’s a GREAT help!! One question that I have not seen addressed (yet anyways) is the idea of adding a ‘navigator’s seat’ up front so I can watch the road with hubby and help ‘back set drive’ lol. Do you have any ideas? Not sure how to work around the steps?
Hey hey Frances and Hubby (Peter)😉! Congrats on purchasing your bus to convert into your tiny home on wheels! Super stoked for y’all! Where are y’all at in the world?
As for a Navigator’s Seat or Co-Pilot’s Chair, YEP! We installed one in our rig and haven’t put up an article about it YET… However, you’re in luck because we filmed the entire thing and you can watch that episode on our YouTube Channel! Here’s the video link on YouTube and the title: Dual Skoolie Captains Chairs | Driver & Passenger Sitting Side-by-Side
Please let us know if this helps!
— Brian + Erin
Hey! Awesome article! My husband and I just had our first child and we will have to leave the house we’re staying at next year sometime. We’ve wanted to convert a bus for a few years now, but now that we’re parents, and packing up our life soon anyways, we’re super motivated to live this lifestyle. Your article helps a TON figuring out where to get started and bringing up some things we might have missed. I’m really only in the research/planning phase right now, and we may end up deciding its actually not for us, but as of right now it’s the “road” we’re on! I’ll be following your channel and bookmarking your articles! Once we research enough and actually get the conversion process started, I’ll be updating our YouTube channel: This House Be Bussin’. Thanks again for all the info!
Hey there Bekah! Thanks for following our content! We know a TON of people who have children and are giving those kiddos an amazing life on the road. So if the road is calling you, it’s possible to do 😉
Have fun and thanks again for watching & reading!
– B+E
Hey! Just want to say your articles, website, and youtube have been SO helpful in our initial stages of research towards converting a bus especially as fellow Canadians! Seems like a lot of the information that is shared is geared towards the US especially around product links and just the process of getting started which is very different here in Canada, and more specifically Ontario. So I just wanted to say thanks for openly sharing so much useful content about your process! It has helped ease the feeling of overwhelm that obviously happens when deciding to make such a drastic life change! Keep up the amazing work 🙂 Excited to follow along with your journey!
Hey there Jess,
We’re happy to hear that our articles are helping out our fellow Canadians! There are some differences up here in Canada, however, in the grand scheme of things, a ton of similarities. Please leave us a comment any time you have questions and if you want our detailed build videos (more detailed than our YouTube videos), check out Get Your Skoolie On where we share all that and have a growing community of other Skoolie builders!
Chat soon,
– Brian + Erin
Great information here. I am just in the process of planning out my skoolie build. My biggest issue currently is where to build it. My driveway is way too small, and I have no friends with properties big enough to do it. Any suggestions?
Hey there Mike, great question on where to build. Try calling around to RV storage lots. Some places have indoor or outdoor storage. Ask if they’d be cool if you work on the bus while it’s being “stored” there. Another option is to search for small commercial properties or warehouse space that have a roll-up door that you could drive the bus inside to work on. Renting a location may be your only option.
Thanks so much for following!
– Brian + Erin
Hi Brian & Erin, I’ve been following your your tube, website and postings. I have to admit, I love the spirit and what you have built. I’m starting my Skoolie project and I’m having hard time finding a good customs broker for the importing to canada. I’m in Ontario. I called Tony at AAABus, as you recommended. He’s great and wants to help, but he was concerned about borders. He referred me back to you, since you had a successful import. He warned against any alterations before crossing the borders; any alterations (even commissioning). And now it seems like in a hand of a good custom broker who who can help selecting the right bus first that can be imported. What do you advise? The current challenge is importing to Ontario! Thank you🙏
Hey there Michael! Yes, you are correct. Importing a bus into Canada as a school bus should not be done… It should already have the title switched over to RV/Motorhome in the US. Once the title is switched over, then use a customs broker to do the hoop jumping to bring it across into Canada. We did not import our bus as I, Brian, am a US citizen. So all we did was change the title over to “Motorhome” in Texas and then we drove the empty bus (no bench seats) into Ontario over the Blue Water Bridge.
So your first move will be to find a bus that qualifies for importation (engine/emissions…) and the second hurdle will be to find someone who can help you register the bus somewhere in the US as a “motorhome.” The easiest way to do this will be to have someone in the US purchase the bus themselves, get the license plate and registration switched from “school bus” to “motorhome” and then you purchase the bus from them and have a customs broker bring it across. You may want to do a little Googling to find a customs broker who has experience bringing across motorhomes as they know what needs to be done to bring one across.
Happy bus hunting!