
Century-Old Reclaimed Barn Wood Turned Into Stunning Skoolie Floor

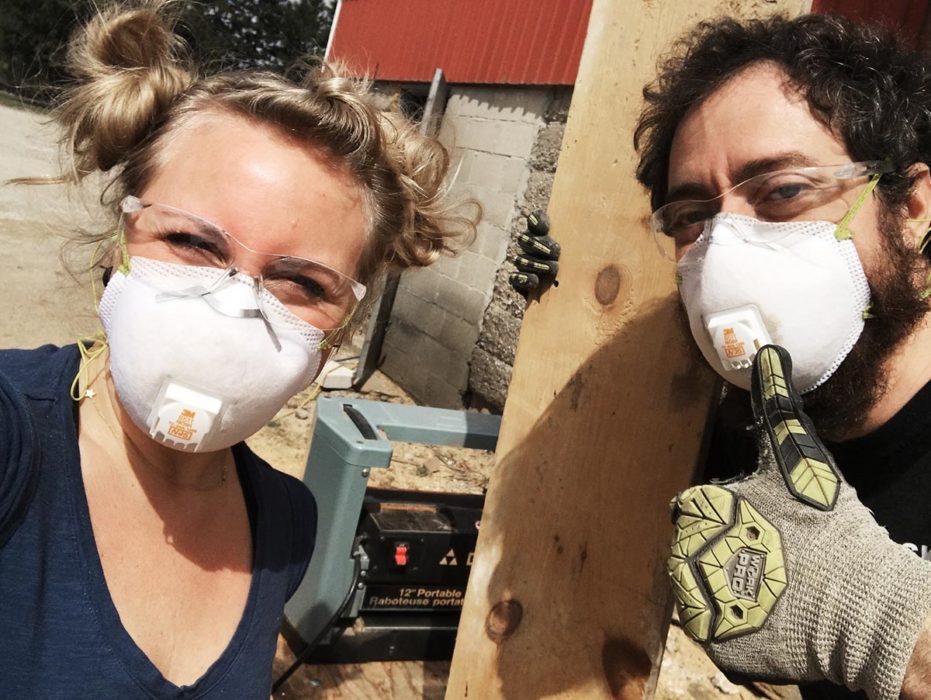
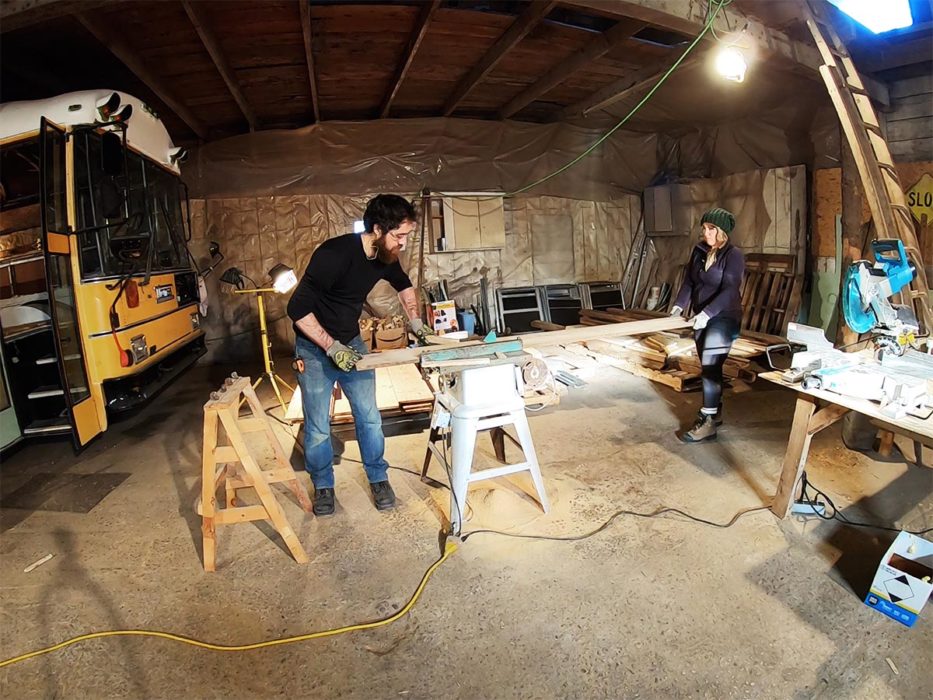
We took century-old reclaimed barn wood and milled it ourselves into a beautiful reclaimed wood floor for our skoolie. Someone asked us on Reddit, “Why would you put that much effort into a skoolie floor?” To be honest, we want to repurpose as many materials as we can during our old school bus conversion, so the labor is worth it to us.
In this article, we’re going to walk you through how we went from full-sized reclaimed barn wood to perfectly sized and finished reclaimed wood flooring.
Reclaimed barn wood is a great way to repurpose something old into something new.
Jump To:
- Removing Old Nails From Reclaimed Barn Wood
- What Size Should Reclaimed Wood Flooring Be?
- What Direction Should Reclaimed Wood Floor Be Laid?
- Preparing Reclaimed Wood With A Planer
- Ripping Reclaimed Barn Wood Into Floor Boards
- Sanding Smooth Reclaimed Wood Floor Planks
- Creating Tongue and Groove Reclaimed Barn Wood Flooring
- How To Install Reclaimed Wood Flooring
- Preparing The Floor For The Finish
- 3 Simple Steps To Applying An Eco-Friendly Wood Finish Oil
- In Conclusion
Not a reader? Watch this on the BEAP YouTube Channel!
AFFILIATE DISCLOSURE: Note that we are affiliated with products and services we use and trust. If you click a link and make a purchase, we’ll earn a small commission at not extra cost to you. This helps us to continue producing content and we hope that you use our links if our blog posts or videos have helped you in any way!
Removing Old Nails From Reclaimed Barn Wood
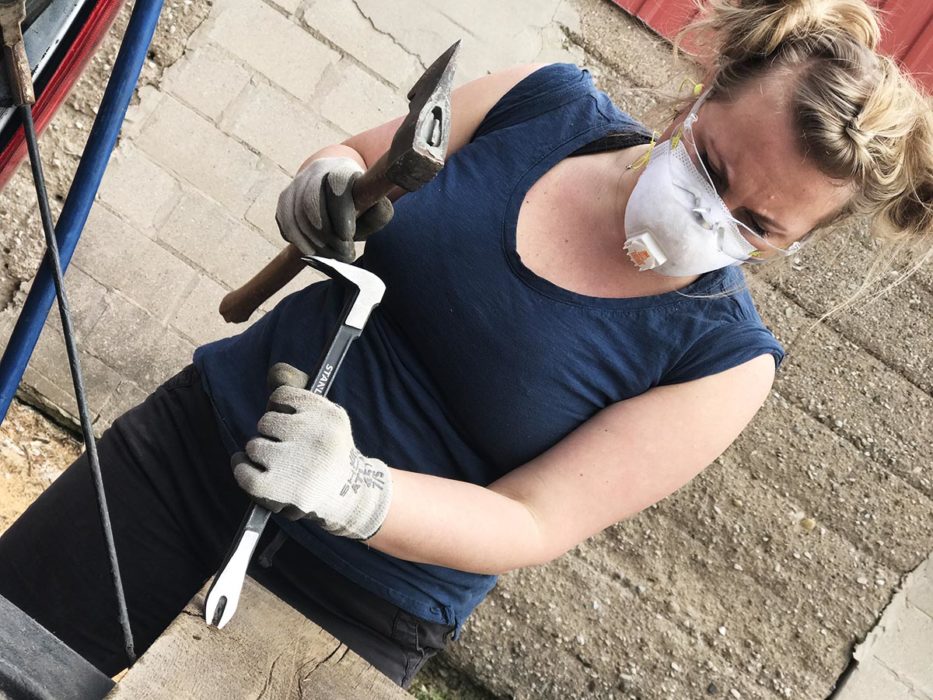
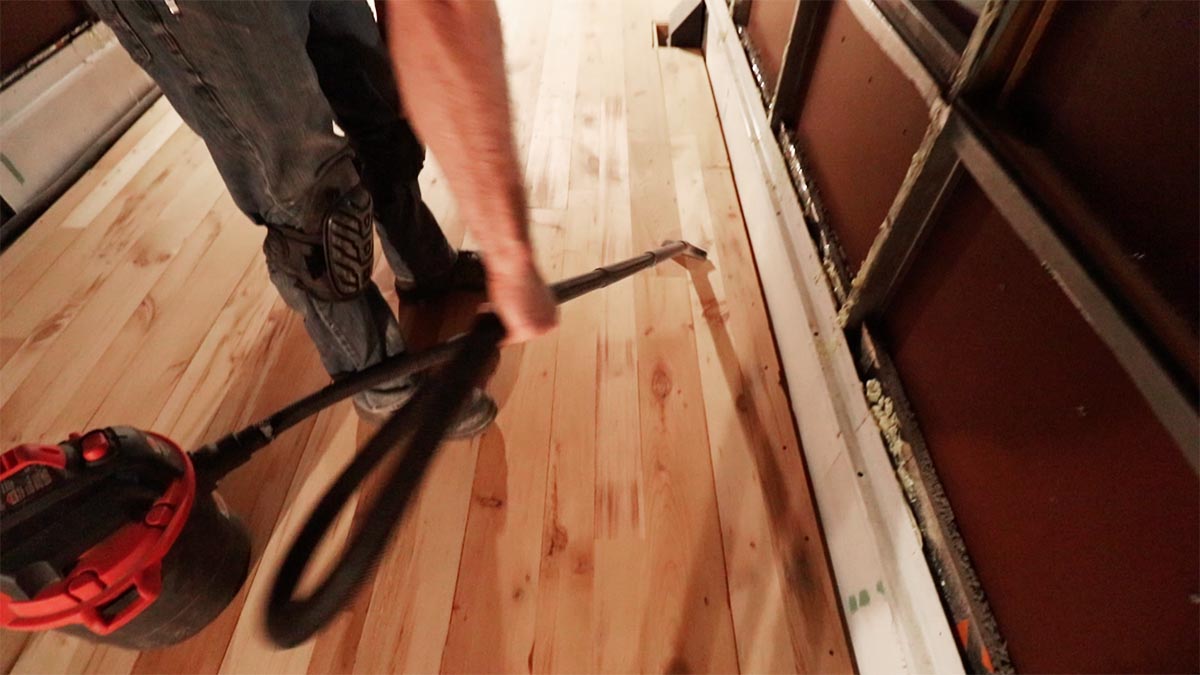
After acquiring our reclaimed barn wood, one of the first things we did was remove any nails we could find. Considering this reclaimed wood is over 100 years old, this job took quite a bit of time because not all the nails were easy to find.
Laying out each board, we would blow off the old barn dust using compressed air. Doing this helped us to see where the old square blacksmith nails were buried.
To dig out the nails, we used a combination of a screwdriver, hammer, needle nose pliers, and best of all, the claw bar which did a great job!
If we were to do this project all over again, we would get a metal detector like this one to detect any metallic pieces in the wood. The reason being is that even though both Erin and I did a GREAT job locating old nails, we still missed some which the planer didn’t like so much. More on that in a minute.
After removing all the old nails, it’s time to figure out the width of each board.
What Size Should Reclaimed Wood Flooring Be?
It can be difficult to determine what size of wood floor planks should be. Lucky for you, we’re going to take the guesswork out of it and share with you how we came up with the sizes we used.
Historically, classic wood strip floors were originally 2-1/4” wide and could be up to 3-6” wide (and in some cases even wider).

When it comes to deciding on the size for DIY milled reclaimed wood flooring, what we did was start off with figuring out the dimensions of our standard full-size boards. All of our reclaimed barn wood was rough sawn between 10-12” wide and 1 to 1-1/8” thick.
One thing to consider is something called “cupping”. Cupping happens when the wood bends with the grain of the wood in a U shape. Before cutting our boards, we learned from a wood flooring pro that the wider the board, the more it could cup. This is why using plank face widths less than 6” is a great idea.
Another thing to do is alternate the direction of the grain so that each board can help the boards beside it stay flat.
We ended up deciding to make the widths either 3” or 6” plus 1/4” for the tongue side of the board. To ultimately decide on how wide to make boards, we needed to make sure we had enough of a certain width to make an entire row. By alternating face widths, we were able to use multiple different board widths but made sure each row was exactly the same width. Doing this helps ensure all the rows fit together smoothly.
What Direction Should Reclaimed Wood Floor Be Laid?
That’s for you to decide! Every floor is different in that every owner’s taste is unique.
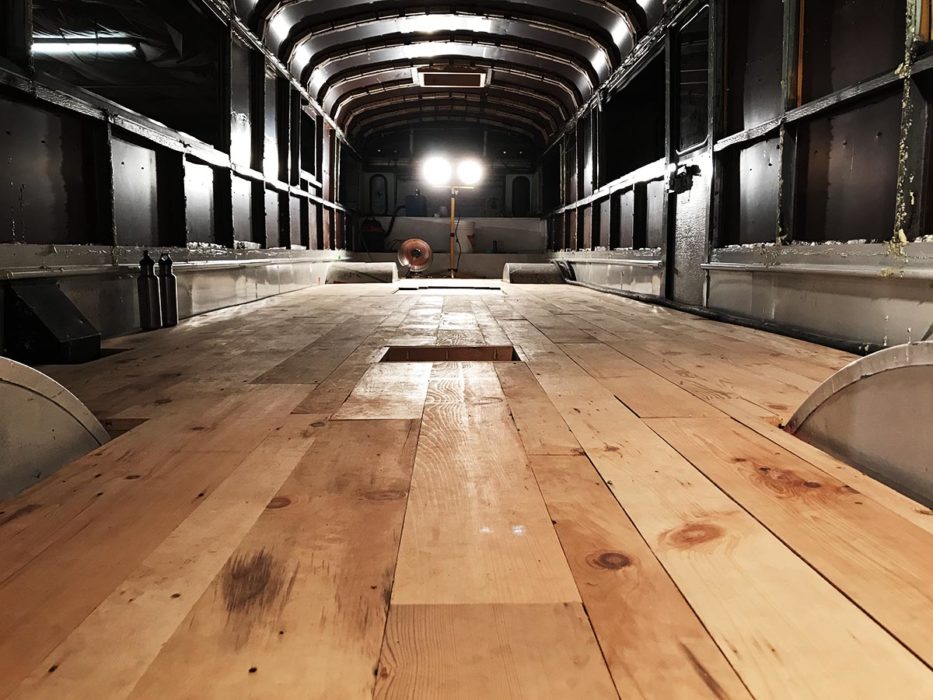
We decided to lay our reclaimed wood floor going the length of the bus from front to back. This will give the illusion that the bus feels longer because the lines go the long way of the bus.
Going perpendicular to the front of the bus could be another option, but the boards might have to be cut super short to prevent the ends from looking like they were perfectly laid bricks.
Using diagonally placed boards would look cool, but you would have to decide on the angle of the diagonal (maybe 45 degrees for simplicity sake), which would result in more lost wood to drop cuts.
Herringbone floor pattern is also a cool idea. However, more grooves would have to be routed in the ends of the boards.
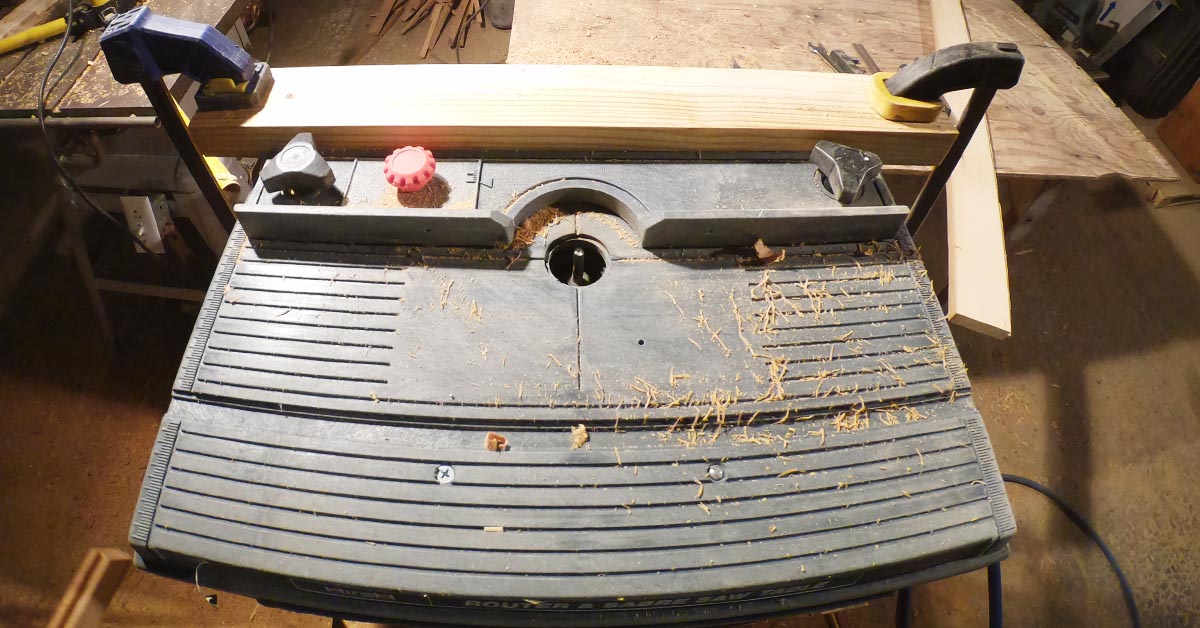
Preparing Reclaimed Wood With A Planer
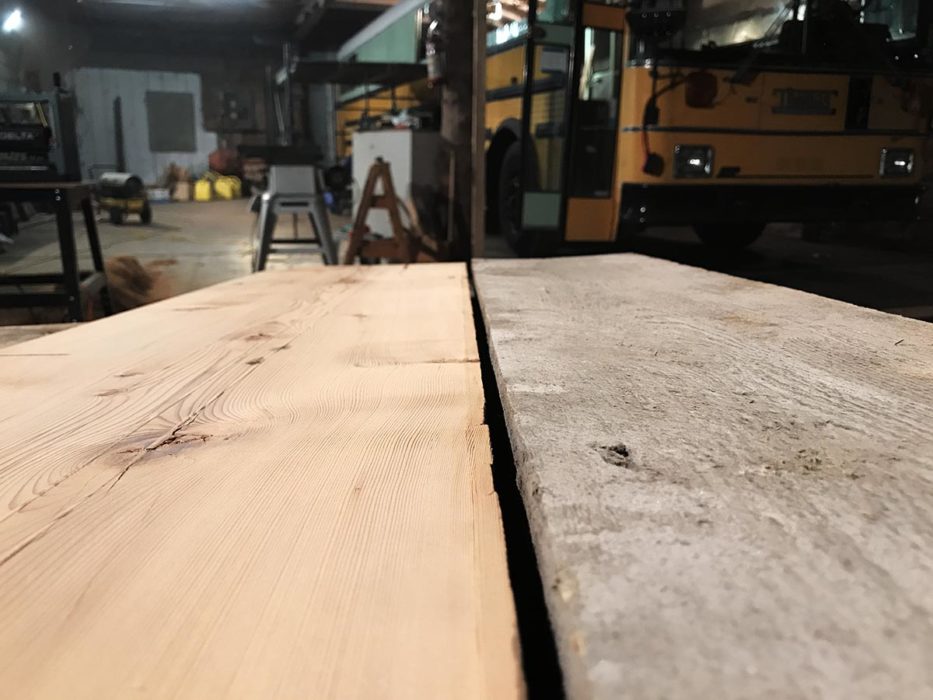
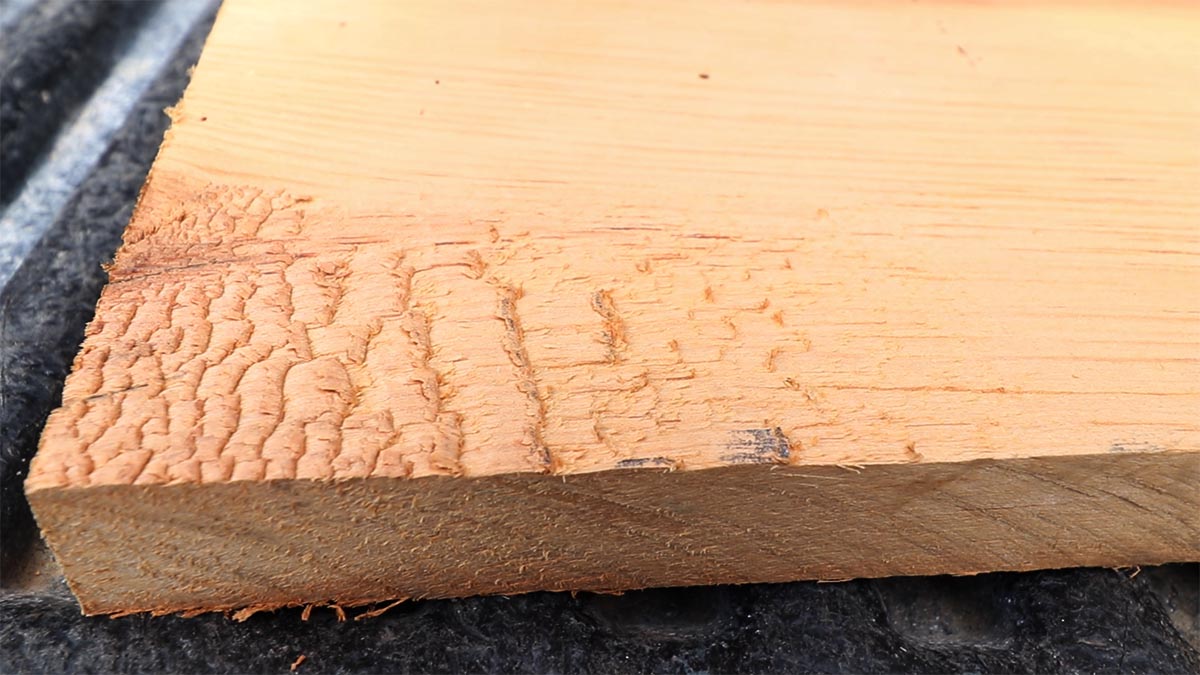
Now that we have our board sizes loosely decided upon, the next step is to make the boards flat. To do this, we used this 12” thickness planer that made planning super easy, without too much trouble. The only real trouble we had was that there were broken nails a few times that the planer blade found. Having the blade dinged caused a little raised edge where the nail took a chunk out of the blade.
Going slow, we guided each board into the opening. Each pass we would lower the planner height by 1/4 turn of the crank. Slowly lowering the height allowed the wood to easily be planned.
Here’s a before (on the right) and after (on the left) picture. The planer did a GREAT job!
We didn’t really know what species of reclaimed wood we were putting through the planer. However, considering what old barns in Ontario were built with in the past, we deduced that various varieties of cedar, pine, and maple were probably used.
Overall, it took about 15 minutes to plane one board, alternating sides, from 1-1/8” thick down to 3/4″ thick. Each board was between 4-6’ resulting in about 540 linear feet of boards to cover approximately 243 square feet (probably a bit less…) This resulted in about 22.5 hours of planning the reclaimed wood alone.
Ripping Reclaimed Barn Wood Into Floor Boards
By planning the wood before ripping them into boards gave our antique table saw a break because it had less material to saw through.
Ripping the boards is important because this is where all of our accuracy counts! Each row needs a certain length of boards. This is because there are obstacles that have to be cut around, like wheel wells, the driver cockpit, stairwell and diesel tank access hatches. A row with an obstacle (or multiple obstacles) needs LESS wood than a row that runs the entire length of the bus, unobstructed.
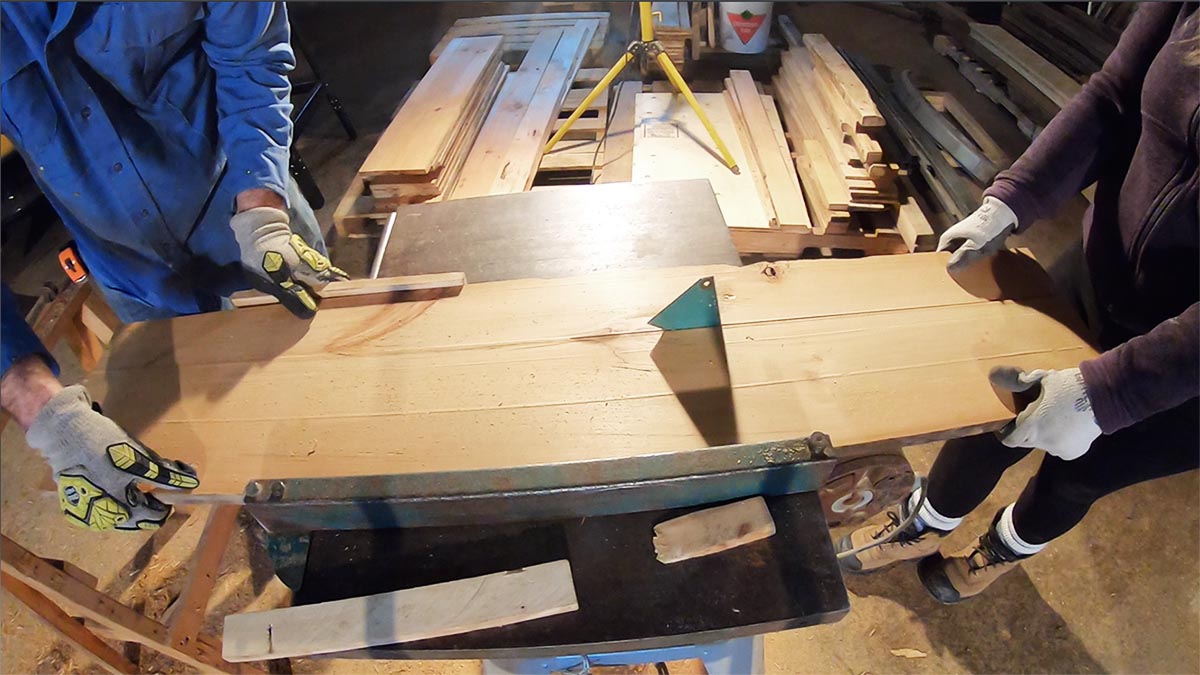
🔥Hot Tip! Be sure to factor in the width of the table saw blade when cutting wood. Some blades can drop as much as 1/8” which could throw off measurements.
As we ripped our boards, we laid them out in their respective row to ensure we had cut enough lengthwise.
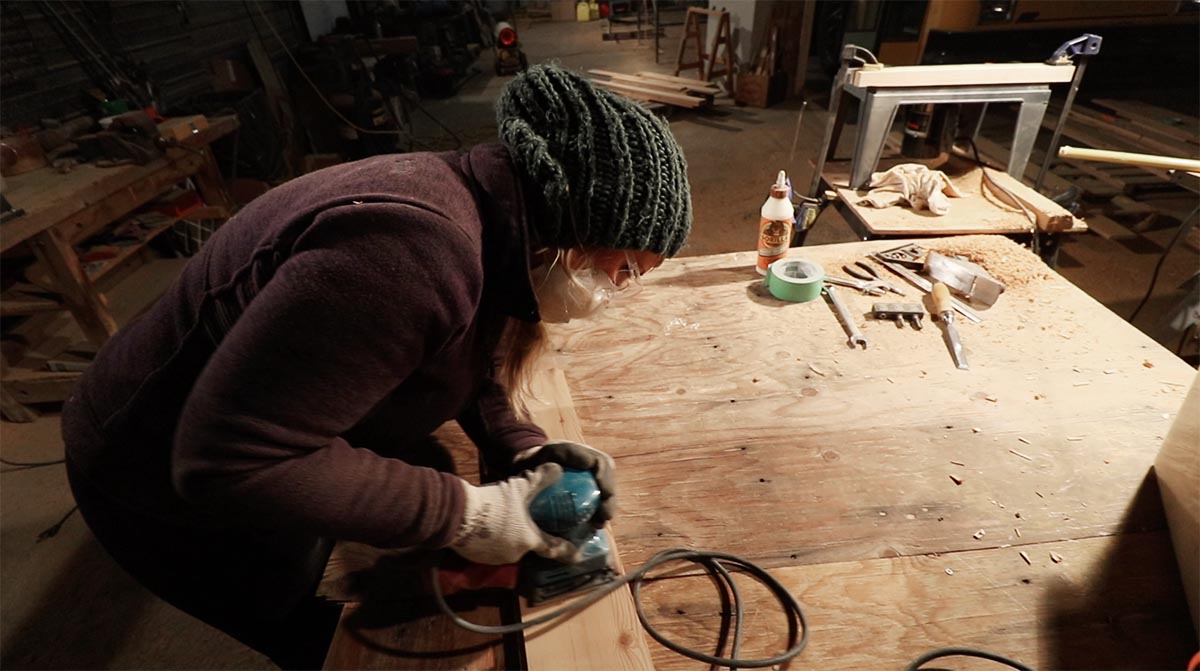
Sanding Smooth Reclaimed Wood Floor Planks
Once all the boards are ripped, it’s time to sand each board’s face smooth. Don’t get too aggressive with this part as once they are installed, sanding again with a floor drum sander will help. More on that in just a bit.
Erin used a palm sander with 60 grit sandpaper for the initial face sanding. Although planning the reclaimed wood floor planks did a great job during the initial smoothing and leveling out of the planks, sanding took off any chatter that the planner left.
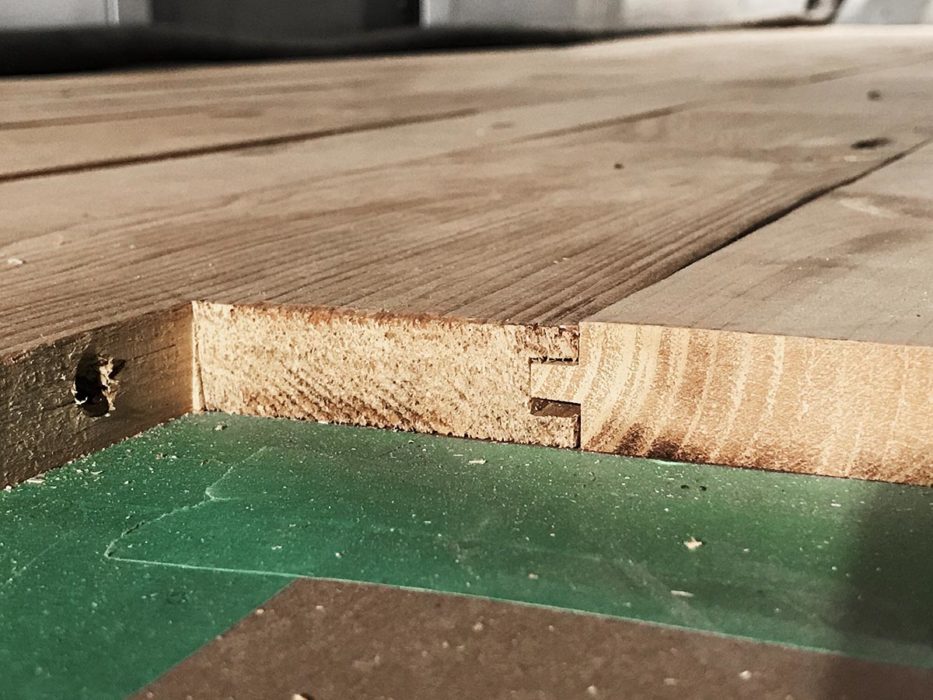
Creating Tongue and Groove Reclaimed Barn Wood Flooring
In order for the floorboards to fit together, we ended up making the old barn wood boards into tongue and groove real wood flooring. By adding tongues and grooves to the boards will allow the floor planks to fit together and become a solid unit to expand and contract together during changes in temperature and humidity fluctuations.
Each board will have a tongue on one long edge and a groove on the opposing long edge. If you want to get really crazy with your grooves, the ends could also have a groove, but we decided against this for ease of installation. Adding the end grooves to the boards would just add another step to the tongue and groove milling process and we didn’t see too much more benefit in adding these. We decided to just keep it simple.
Routing Tongues Into Reclaimed Wood
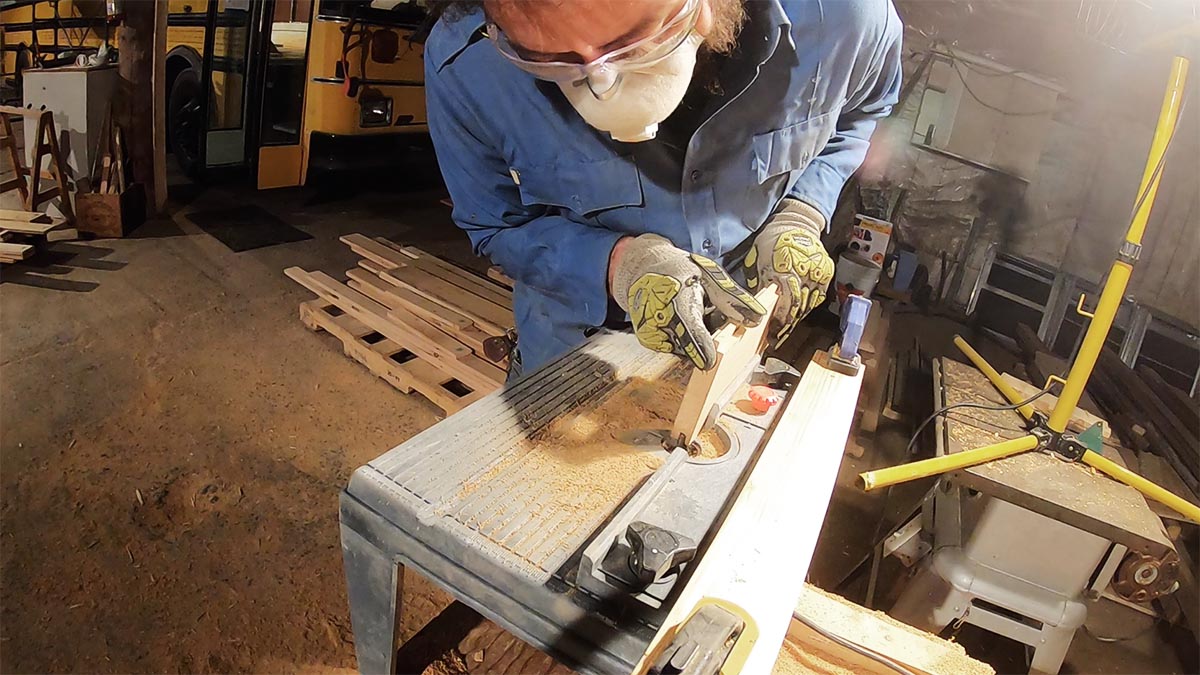
As Erin finished sanding the boards, I began routing in the tongues using a router and table similar to this one with a 3/8” carbide edged router bit. Considering our board’s finished thickness is 3/4″ thick, we decided that having a 1/4″ tongue would be the easiest to measure and route.
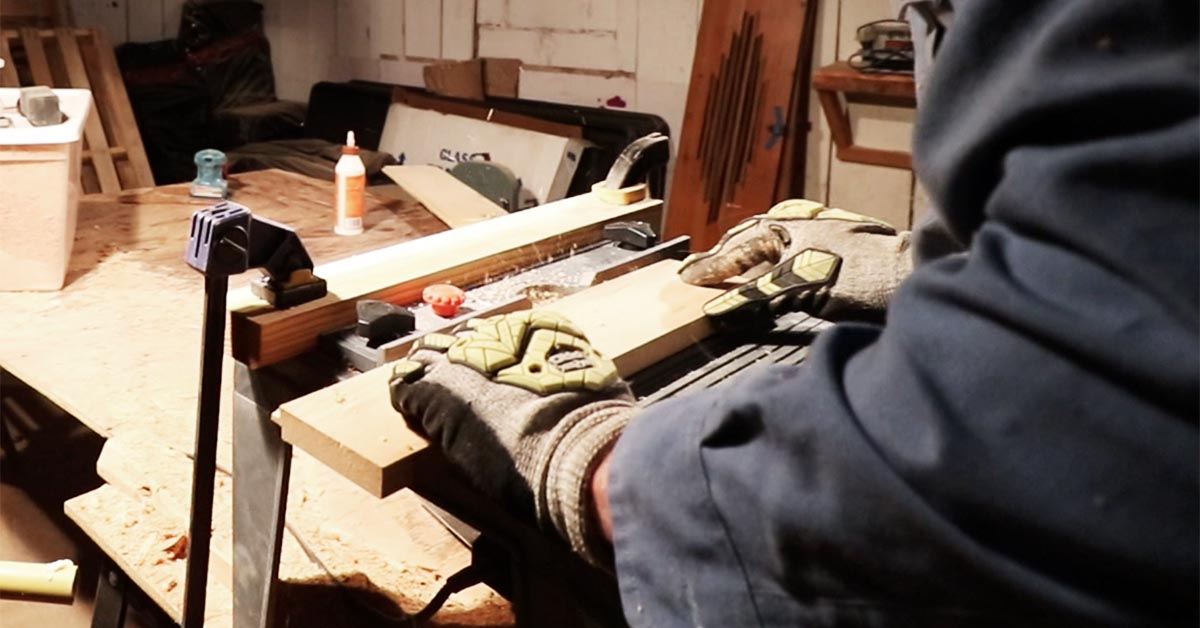
Attaching the router to a little router table, we set the bit depth to 1/4″ with a 1/4″ protrusion from the fence.
Each board received two passes. The first pass was on the board’s face and the second pass was on the back of the plank.
🔥Hot Tip! The last row will not receive a tongue because it faces the wall. This should save you a ton of time!
Routing Grooves Into Reclaimed Barn Wood
The groove side of the board is opposite to the tongue side. We didn’t start routing grooves until ALL of the tongues were done so that we didn’t have to reset our router table each time and so that we would have consistency in the tongue size and groove size.
By setting the fence 1/4″ away from the 3/8” router bit, we could run each board on edge against the fence and route in a 3/8” groove into the board.
Now I can hear your brain thinking right now, “But Brian… Why did you route a 3/8” groove instead of a 1/4″ groove?”
Well, dear reader… Because we started with a 1/4″ groove and then upgraded to the 3/8” so that the boards would fit better together without forcing them too much with a block and hammer. Because the boards have flex to them and the metal pan of the school bus isn’t 100% flat, we needed to have 1/16” of space for the planks above and below the tongue inside the groove.
🔥Hot Tip! The first row will not receive a groove because it faces the wall. This should save you a ton of time!
Another thing we did was set the groove depth to 3/8” which allows room for the 1/4″ tongue to expand and contract without obstruction. Doing this will theoretically reduce the possibility of the boards buckling or cupping.
How To Install Reclaimed Wood Flooring
Installing reclaimed wood flooring is a ton of fun if you like crawling around on your knees. For this step, we started by putting on knee pads. Or in Erin’s case, shin pads because her knee pads wouldn’t stay up!

First, we put a 5/8” plywood spacer against the passenger side wall so that the floor would have room for expansion and contraction along the edge (later after the first few rows are installed, we then remove the spacer to leave an expansion gap).
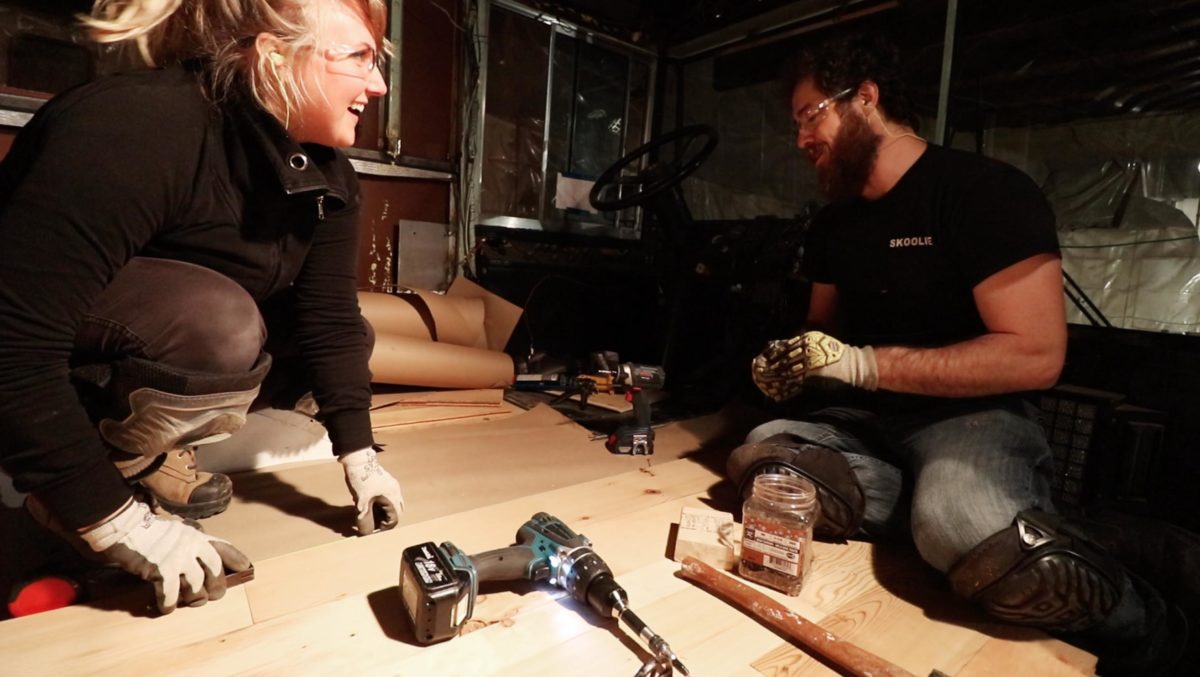
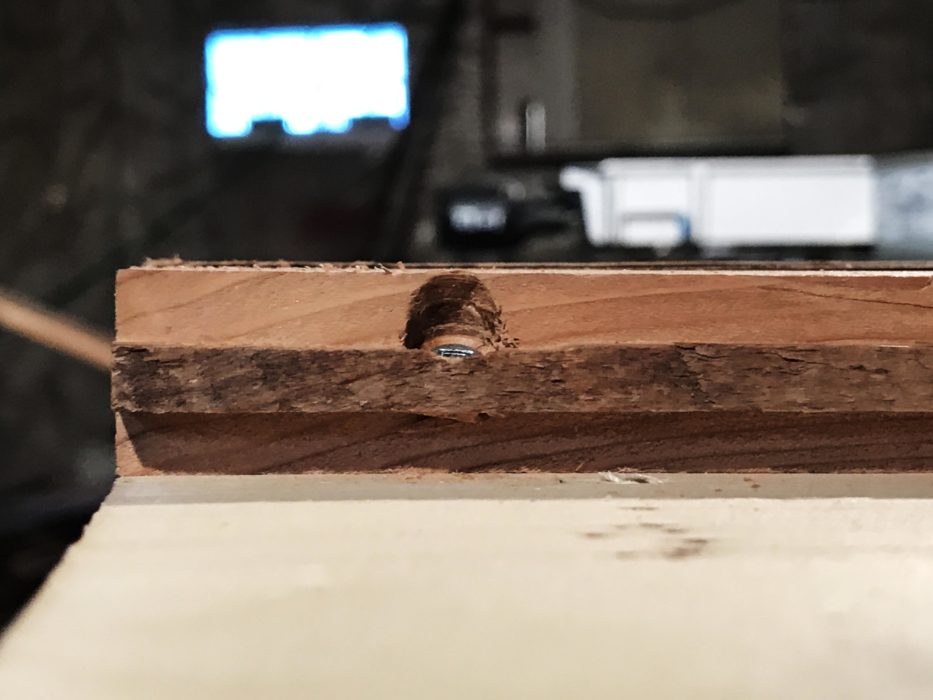
Then we placed down the first row by using both the blind screw technique through the tongue followed by face screwing the edge closest to the wall.
🔥Hot Tip! The first and last rows are the only rows we face screwed. The last row has no room to blind screw, so that row will only get a countersunk face screw.
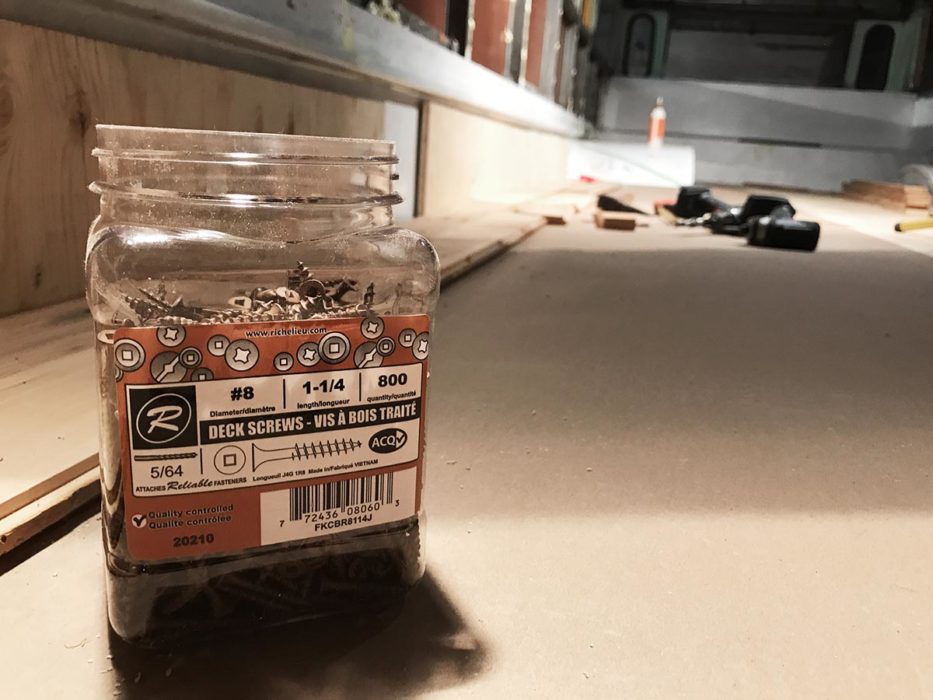
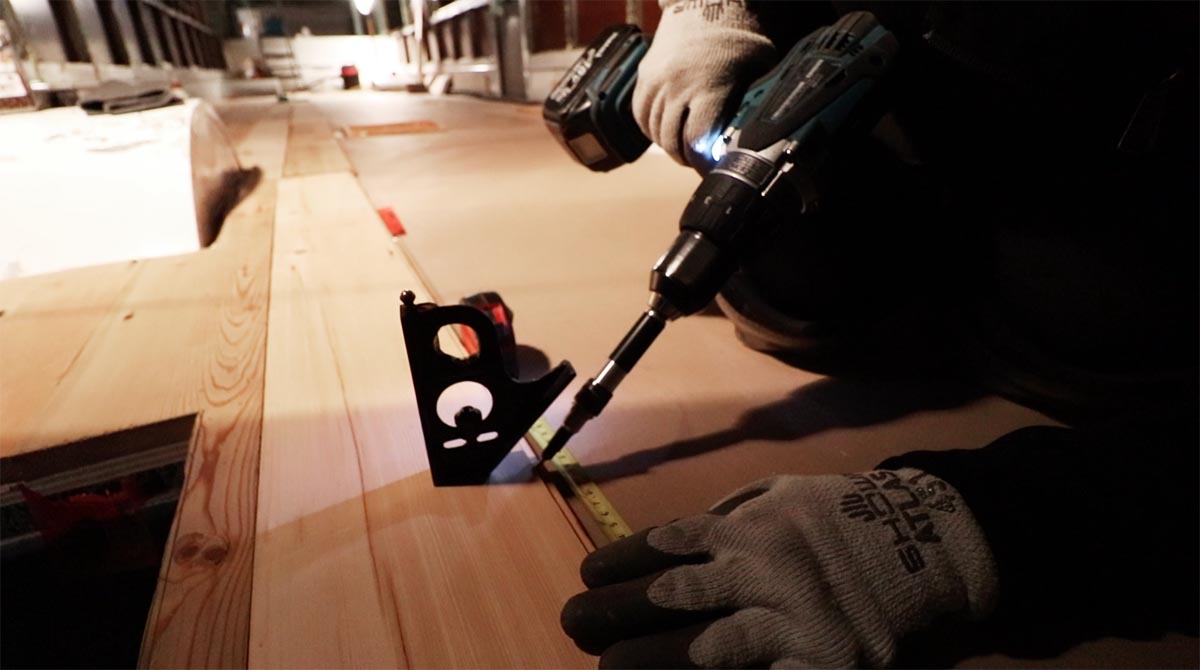
For every spot a screw went in, we pre-drilled a pilot hole, which was also countersunk using a countersinking bit.
Using 1-1/4” #8 exterior grade deck screws, we secured each board down to the plywood subfloor, which we previously installed.
After installing the first row, every other row is staggered so that the ends of the boards do not line up and overlap the previous row by at least a few inches. Not using a particular length allows the finished floor to have a completely random pattern.
🔥Hot Tip! Make sure the shortest length of boards are at least 10-12” long so that there is enough room to put at least 2-3 screws in it.
As we placed each board, we tapped them in with a wood block and hammer to ensure a tight fit between the boards. So we do not break the tongues on accident, we switched from using a 2×4 tapping block to using a 12” piece of grooved plywood, which worked out very well.
What we did was placed the grove over the tongue so that the tongue would be protected and the striking force would be better distributed across the edge of the floor plank.
Blind Screw Technique (Similar To Blind Nailing, but with a screw)
To blind screw the reclaimed barn wood floor planks, after placing the floor plank in its final installed position, we drilled a pilot hole into the top edge of the floor plank tongue at a 45-degree angle to the subfloor. While doing this, we had to ensure that the countersinking collar would clear the face of the floor plank and sink in deeper than the edge of the tongue.
Countersinking in this manner would allow the tongue edge of the board to accept the next row’s grooved edge without running into the head of the screw.
Preparing The Floor For The Finish
Considering it has taken quite a bit of work and a month’s worth of time to prepare the floor up until this point, it’s important to continue practicing patience so that the floor is prepared to accept the eco-friendly wood finish oil.
Now that the entire floor is affixed to the subfloor, remember all of those holes created by pulling a bucket full of old nails?
Yep! Now time to putty those holes so that they are sealed and can accept the floor oil.
From all the sanding, we collected the fine sanding dust in a bucket and made a DIY wood filler paste that has a history of working well in other finishing projects we’ve done throughout life.
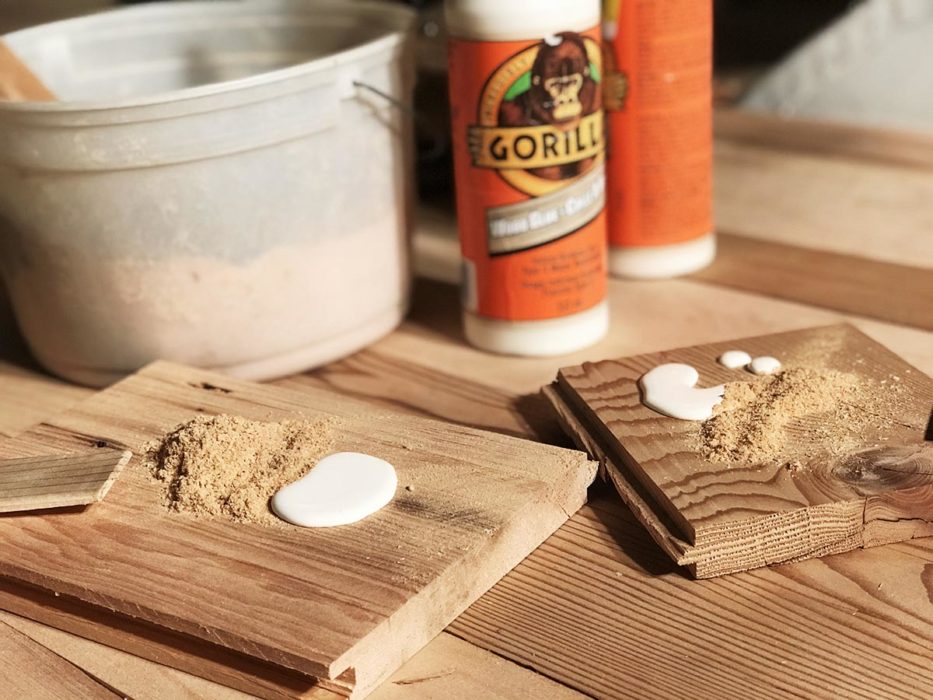
DIY Wood Filler Recipe
Ingredients
- Fine sander dust or sawdust
- Wood glue
Instructions:
- Squirt about 5 tablespoons of wood glue, like this wood glue, onto a piece of wood or into a plastic bowl.
- Then stir in approximately the same amount of fine sander dust from the previous sanding step of this project.
The paste should be nice and smooth.
Then work in the putty into all the little holes with a plastic or metal putty knife.
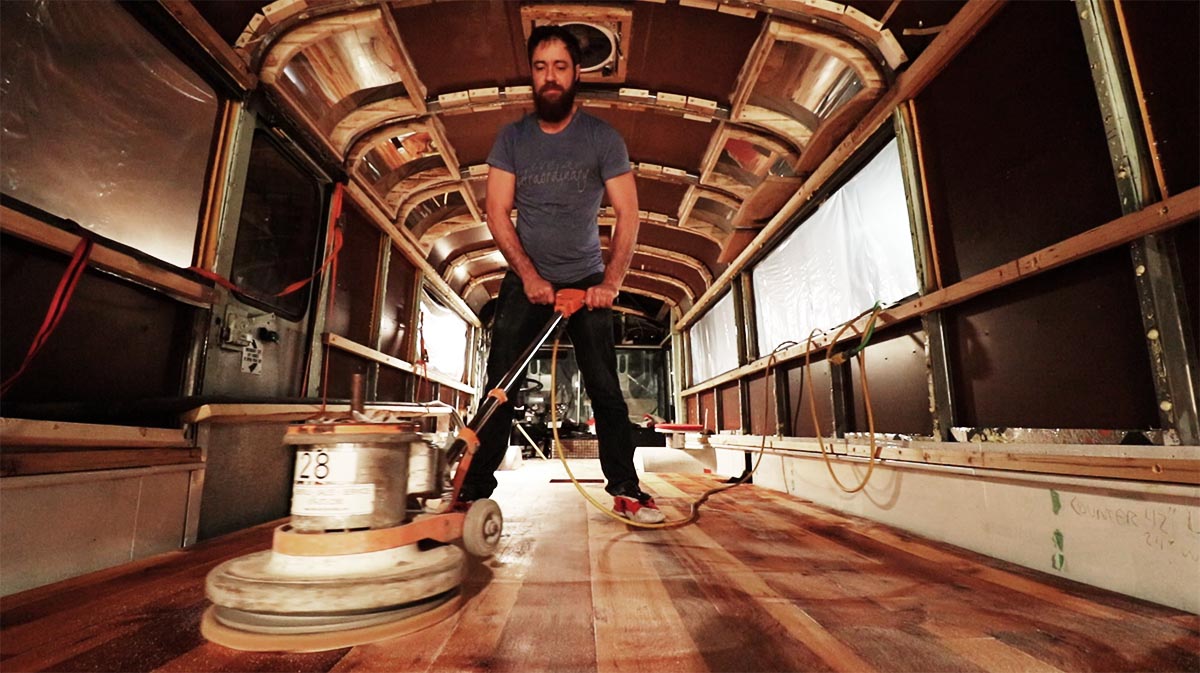
Drum Sanding The Floor
After the putty dries in a couple of hours, it’s good to go to do the final floor sanding.
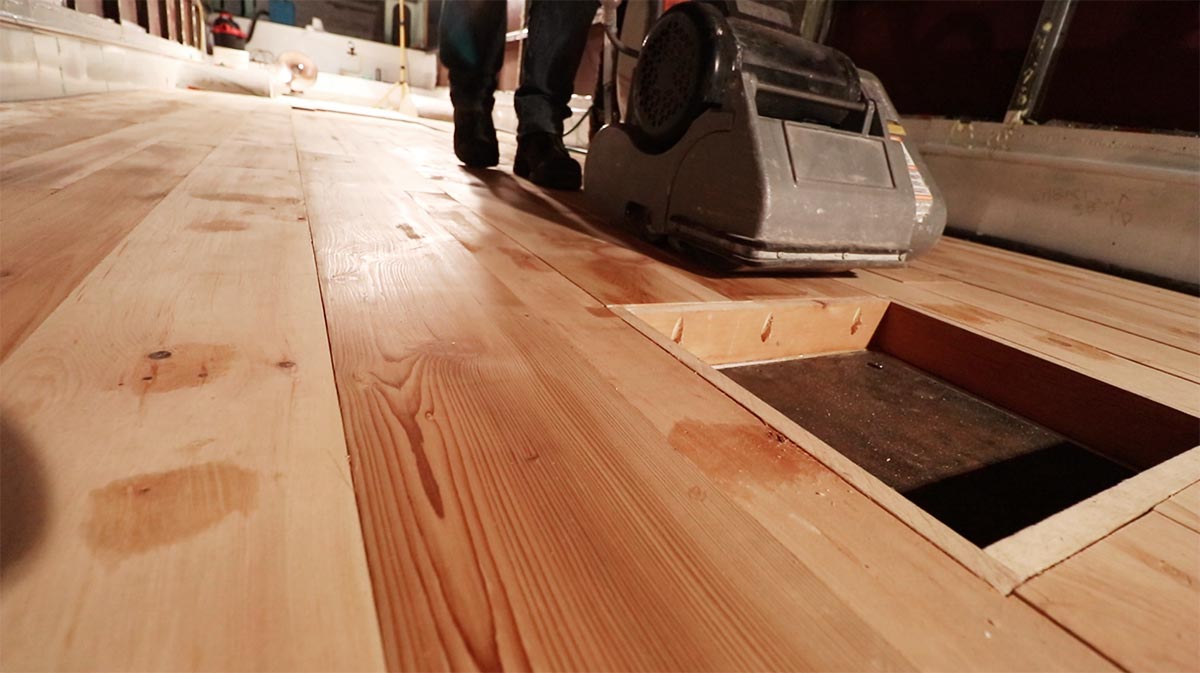
We started with 80 grit on the drum sander, then finished the floor with 100 grit. Doing this will even out the edges of the floor planks so that they all line up beautifully.
3 Simple Steps To Applying An Eco-Friendly Wood Finish Oil
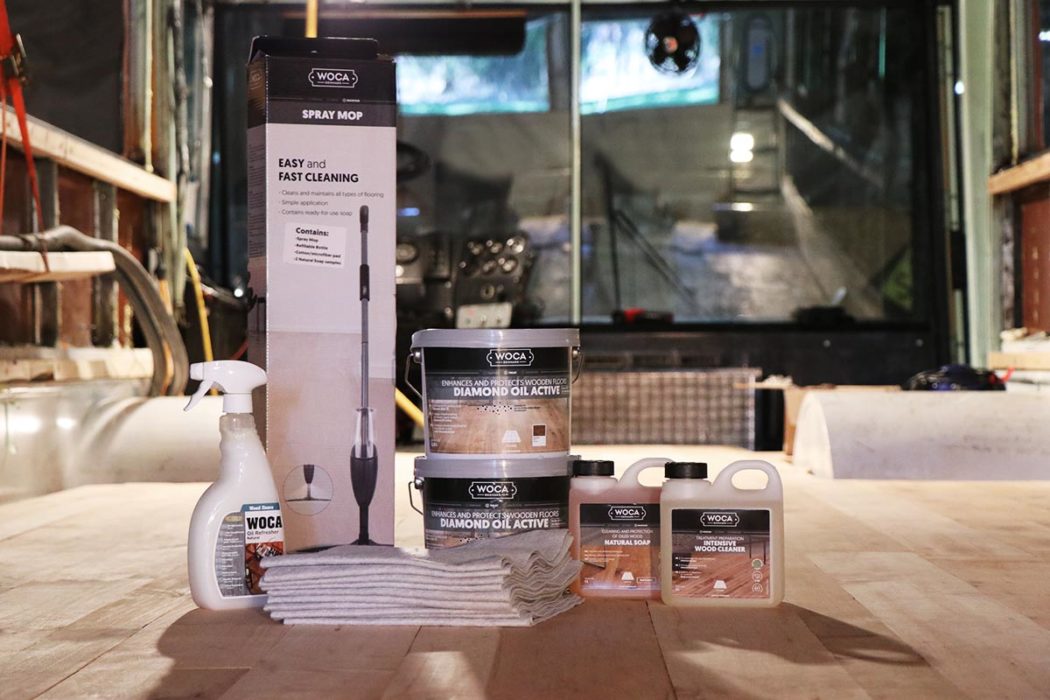
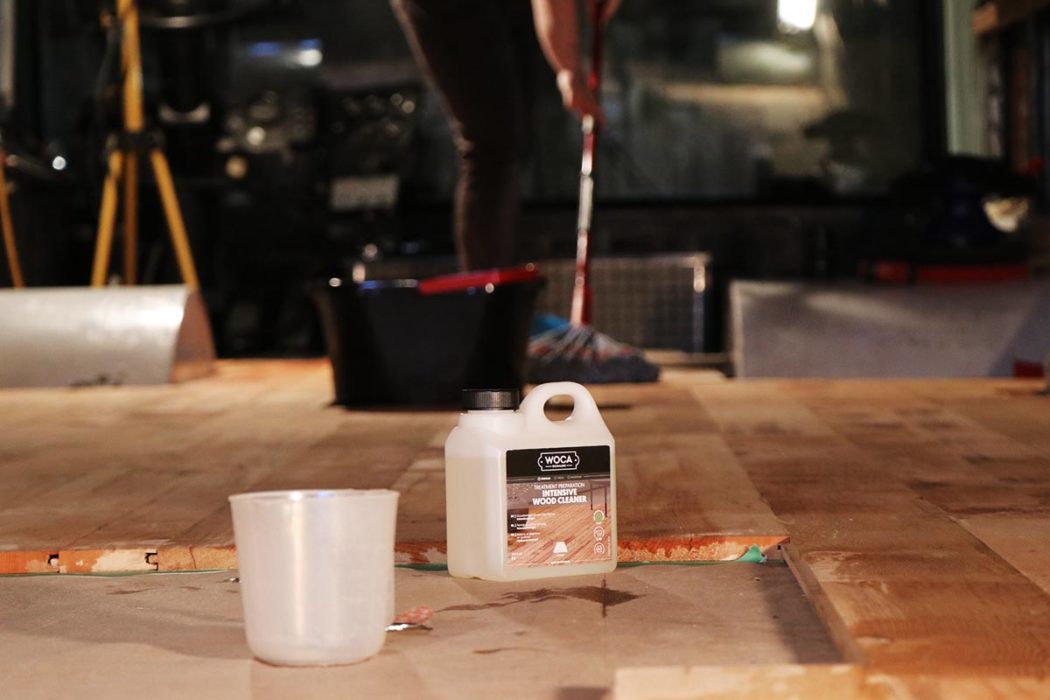
Now’s the time we have all been waiting for! It’s time to apply finish to the floor! After searching the internet and researching various ways to finish a reclaimed barn wood floor in an eco-friendly way, we ran across WOCA Denmark.
WOCA Denmark provides wood finishing products that are environmentally friendly, which is exactly what we wanted in a floor finish.
First – Treat The Floor
Before applying the WOCA Diamond Oil to the floor, we needed to clean the floor with the WOCA Intensive Cleaner. This step would allow us to remove any contaminants or grease from the floor. This would also help to pop the wood grain to allow for maximum absorption of the oil in the next step.
Using a mop, we had a bucket of the WOCA Intensive Cleaner solution and a bucket of fresh water. After mopping on the WOCA Intensive Cleaner, we then went over the entire floor with a fresh water mop.
We then let the floor dry for several hours before moving to the second step.
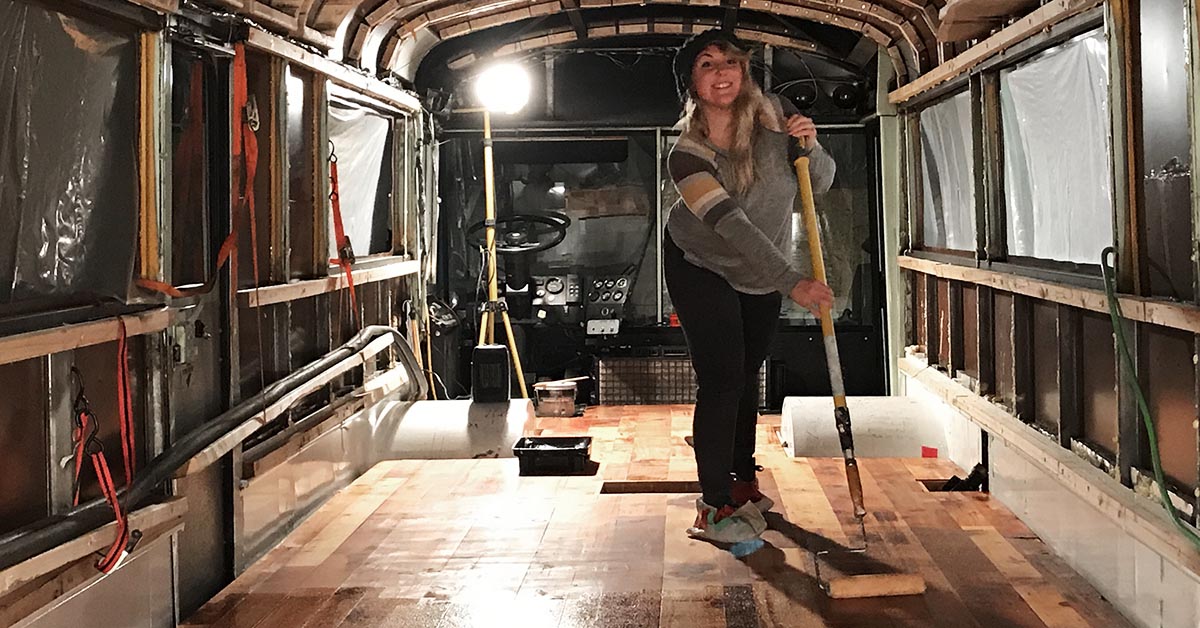
Second – Apply Wood Finish Oil
After the floor was thoroughly dried, we applied WOCA Diamond Oil Natural to the floor using a tight nap paint roller. While Erin was rolling on the oil, I was following along with a red floor buffing pad to work the oil into the wood.
Considering our reclaimed barn wood is over a century-old, we ended up putting down three coats of oil separated by 6+ hours between coats.
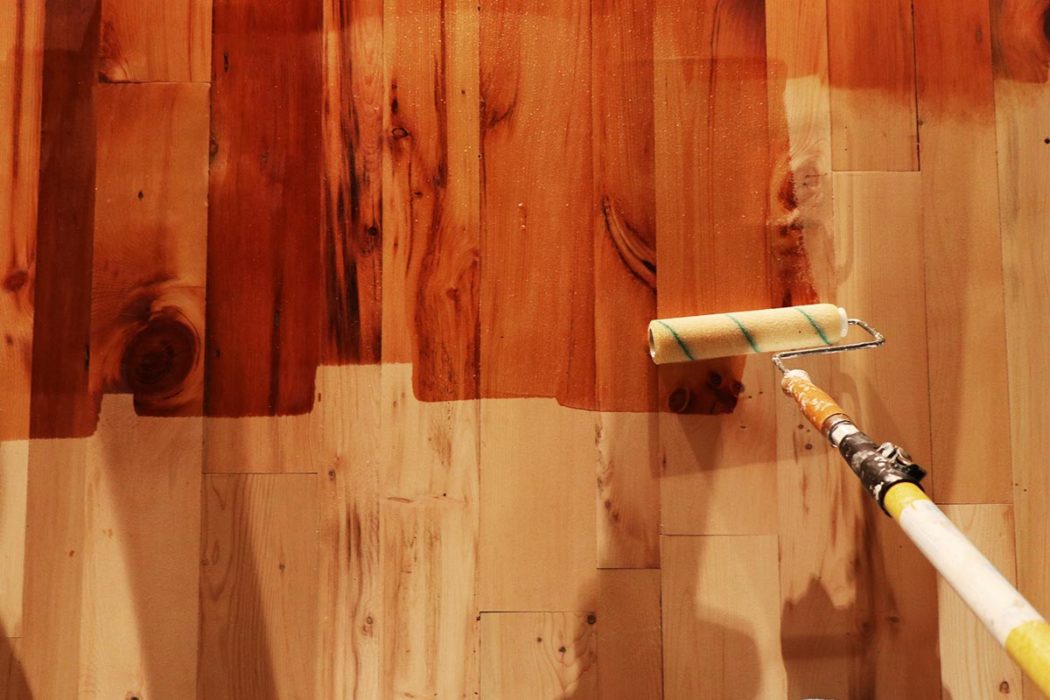
We knew we had full-saturation of oil when the oil stopped absorbing into the wood, and a shiny sheen appeared on the surface. While the oil was still wet, we buffed in the oil with a red buffing pad.
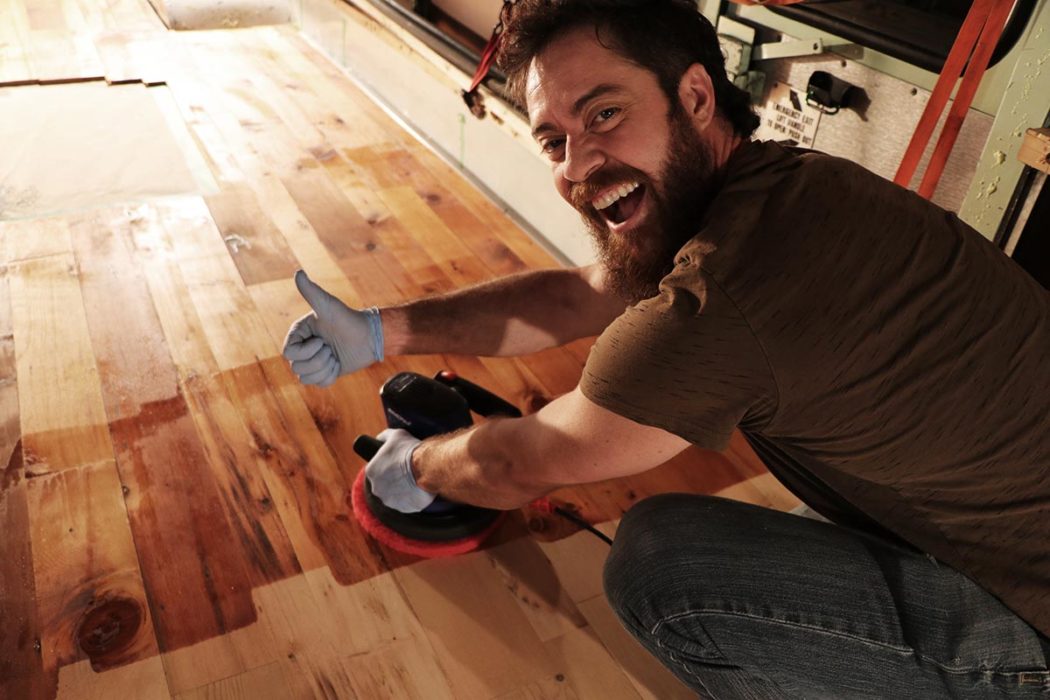
After we reached full-saturation, we rented a floor buffer to remove the excess oil from the surface using a brown buffing pad.
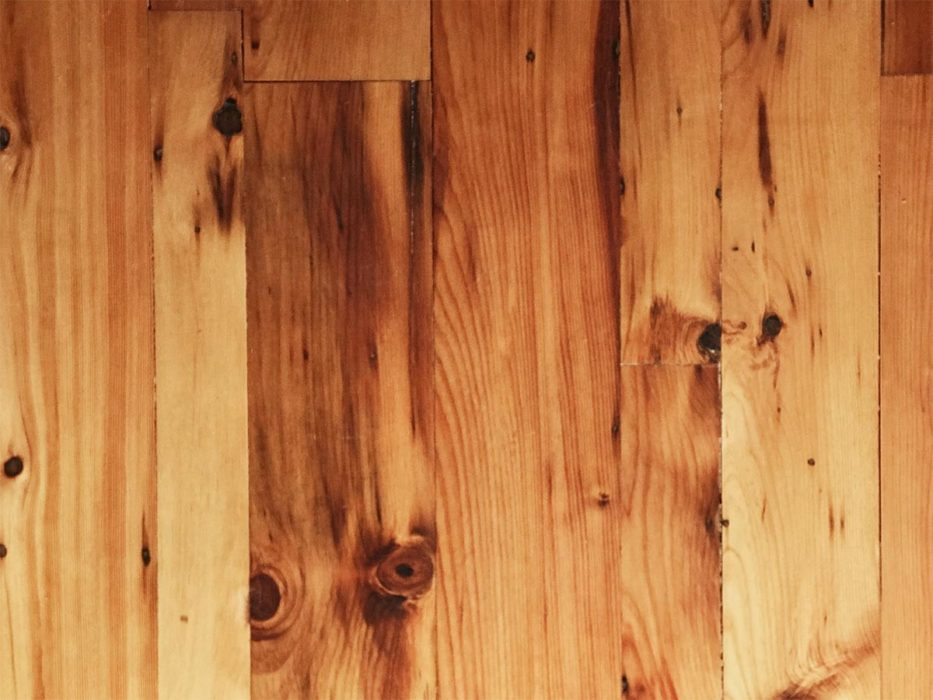
The finish ended up looking like matte natural wood that is smooth to the touch, water-resistant, and slip-resistant. The reclaimed barn wood floor is absolutely gorgeous!
Third – Ongoing Care and Maintenance
As we travel in the skoolie, we will use the WOCA Spray Mop with WOCA Natural Soap as needed for normal cleaning.
About 3-4 times per year, we’ll use the WOCA Oil Refresher to keep the surface like new. This step will revitalize the floor and will extend its life for years of enjoyment.
In Conclusion
Turning old reclaimed barn wood into a beautiful wood floor in your skoolie, van or tiny home is definitely possible. This project was intense because we were doing all the milling ourselves. I imagine we could have paid a milling company to mill the reclaimed wood into floorboards for us, but we were wanting to do it ourselves, so we did!
Please let us know if you have any questions about this project in the comments below. Feel free to share this with anyone you know who is looking for a way to turn old reclaimed barn wood into a beautiful eco-friendly finished wood floor.
We’d like to give WOCA Denmark a huge “THANK YOU” for sponsoring this project by supplying us with the floor finishing products we used. Gratitude!
To learn more about WOCA Denmark, below are links to their sites and social media:
www.wocawoodcare.com
www.wocadirect.com
Instagram:
@wocadirect
@wocadeckoil
@wocawoodcare
#woca
Be sure to use the following promo code at checkout: BEAP

Until Next Time… Adventure On!
– Brian Garcia

Hey, we're Brian + Erin. Currently, we're workin' on our bug out bus. Lucky the proverbial $hit hadn't hit the fan yet when we picked up this 40-foot beauty in Phoenix AZ and drove it up to Canada to convert it. Hopefully, we all still have time...
Honestly, this bus conversion has been the only sane thing in this insane world lately. We can't tell you how good it feels to BE working on something that lights our souls up and has such potential for a life that is entwined with nature, love, and happiness.
Our main goal is to inspire people to get off-grid and become self-reliant. We are well on our way and are super excited to talk about solutions with others who are shooting for a similar way of living.
Did This Blog Post Help You? If so, we would greatly appreciate it if you comment below and share it with a friend.
Check out our must-read articles about Skoolie Conversion

Texas Couple Accidentally Won School Bus Auction | Registering & Building A Skoolie In DFW
Joeseph & Jennifer Davis from DFW, Texas accidentally won an online auction to buy a school...
DIY Skoolie Solar System To BE Off-Grid Longer
When designing & building a DIY skoolie solar system, there are quite a few considerations....

Steps To Import A Bus From The USA To Canada (Or Vice Versa)
Yvan & Sylvie from Québec have successfully imported not just one, but TWO buses from the USA...
0 Comments