
Insulating & Installing Skoolie Subfloor | Smart & Simple Flooring Method

Insulating & installing a skoolie subfloor can provide a solid foundation for building the interior for your tiny home on wheels.
Not a reader? Watch this on the BEAP YouTube Channel!
AFFILIATE DISCLOSURE: Note that we are affiliated with products and services we use and trust. If you click a link and make a purchase, we’ll earn a small commission at not extra cost to you. This helps us to continue producing content and we hope that you use our links if our blog posts or videos have helped you in any way!
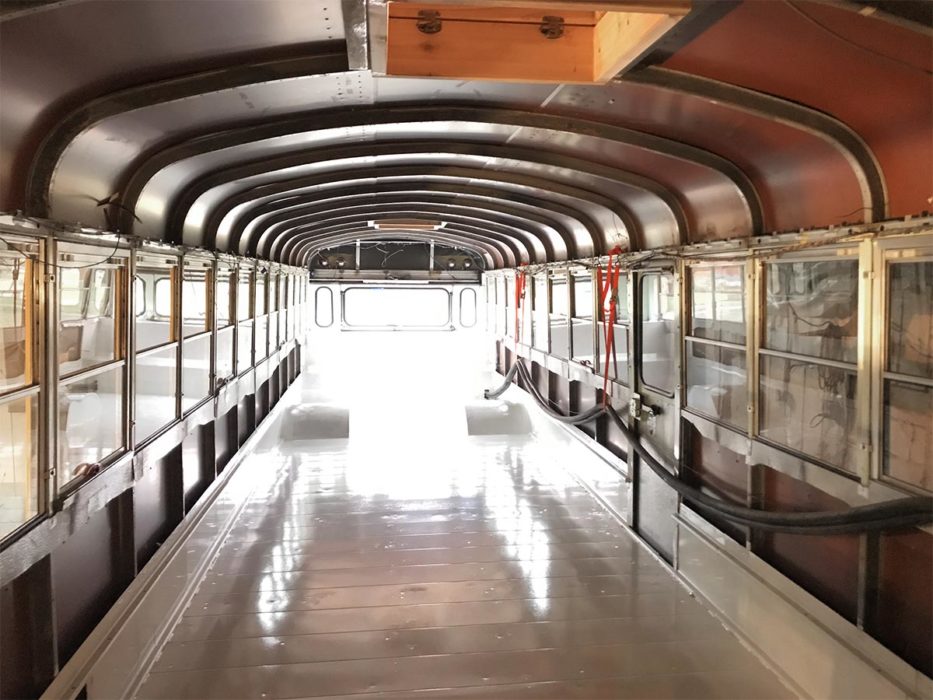
Preparing The Metal Floor Pan
Before building out and layering subfloor materials, there are a few things we did to ensure a long-term solid subfloor.
First, we cleaned the floor with a vacuum and mopped with Simple Green, an eco-friendly, non-toxic degreaser.
After that, if you haven’t already, get rid of any rust & paint the floor with a rust-inhibiting paint like Rust-Oleum (we used Rust Coat, which is the Canadian equivalent). Once the paint has dried, you’re now ready to start insulating the subfloor.
However, considering we already painted the floor a couple of months ago, we simply swept and used a shop vacuum on the floor to clean up any dirt and accumulation.
Want our used school bus visual inspection form? Get It Free
Choosing Subfloor Insulation
Skoolie subfloor insulation is of personal preference as there are not any industry standards that we’ve found for insulating a school bus floor. Because of this, we decided to look at the different ways to install subfloor insulation to see what would work best for our application.
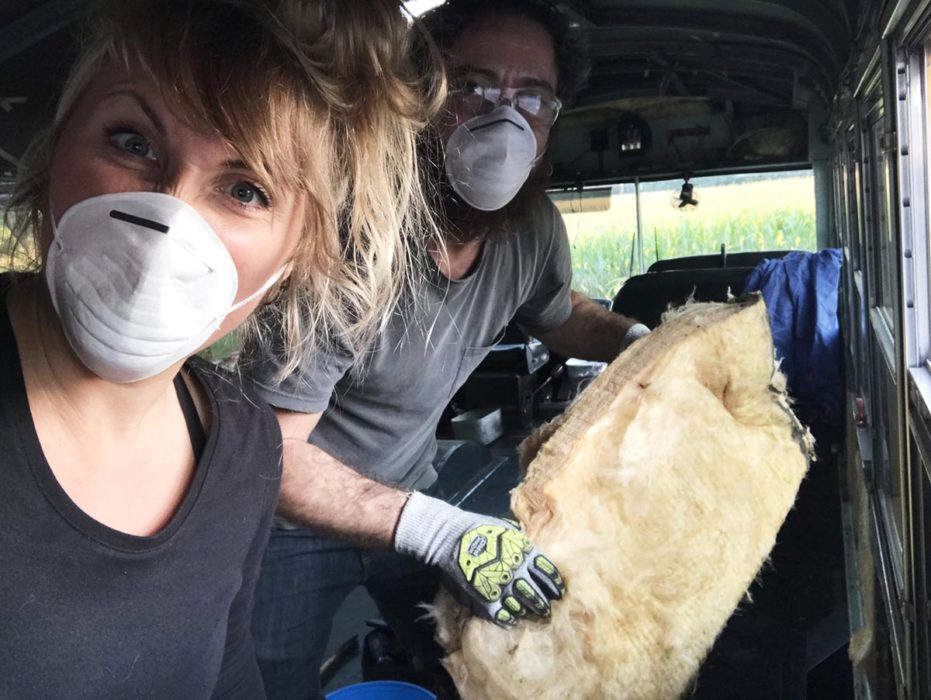
Fiberglass Subfloor Insulation
The first option, which is not the best option in our opinion, is the standard yellow, pink or white fiberglass insulation.
Fiberglass insulation is straight-up dangerous. As you work with fiberglass insulation, the particles of glass can cause skin, eye and respiratory irritations. For this reason alone, it was quickly marked off our list of skoolie subfloor insulation possibilities.
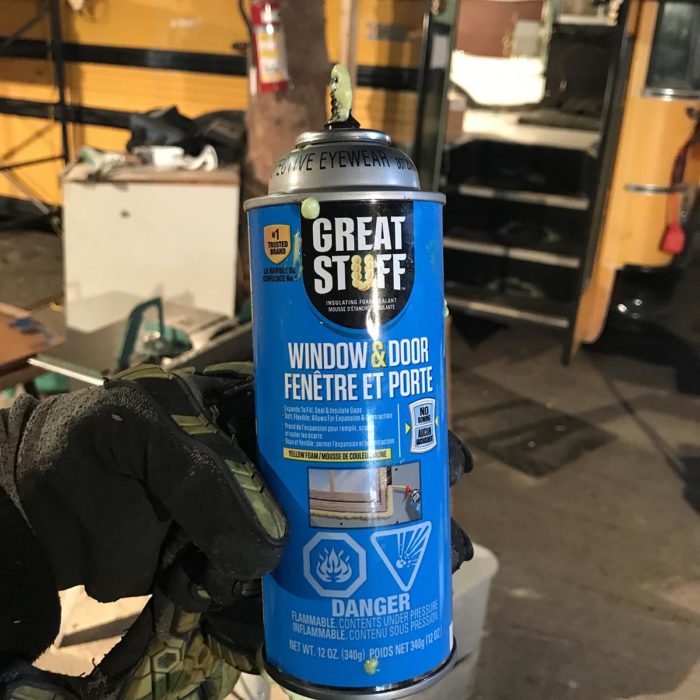
Spray Foam Subfloor Insulation
Searching some more, we found that spray foam is commonly used in subfloor installation. Spray foam was high up on our list because it adds rigidity to the structure of the bus and acts as a vapor barrier and insulation all in one.
To use spray foam, first 1×4 or 2×4 furring strips would be attached every 16” to the metal floor pan of the old school bus.
After the furring strips are installed, a Tyvek suit & heavy-duty respirator would be worn while spraying the area between the furring strips.
If there are any overspray situations, after the spray foam has cured, then you would go in with a saw and trim off the excess spray foam to the height of the furring strips.
This method was going to be more complicated than we wanted to tackle. Another issue we learned about is that spray foam is not necessarily the most eco-friendly choice when it comes to encapsulating a tiny home on wheels.
We only know what we know when we’re researching. After already having insulated the hat channel void space in the walls and ceiling with spray foam when we found out that the interior air quality of a skoolie can be compromised by the off-gassing of spray foam for years down the road.
Luckily, we didn’t use too much spray foam in the hat channel that we should be OK.
We live. We learn. We’re not perfect humans and we’re doing the best we can with what we have.
On to more options!
Sheep’s Wool Subfloor Insulation
Sheep’s wool is an excellent option for subfloor insulation. Come to find out, the sheep in New Zealand are amongst the best in the world! When it comes to insulation, sheep’s wool has an R-value of R-7 per 2”. To use sheep wool on the floor would be awesome if we were doing a roof raise. But because I’m 6’2” it quickly lost its place in our subfloor insulation project due to height restrictions.
However, we’re going to use sheep’s wool to insulate the walls and ceiling. Sheep’s wool insulation batts naturally improves air quality, manages moisture, absorbs sound, suppresses mold & mildew and is naturally fire resistive. (If only we did a roof raise, we would have used this for the floor insulation!)
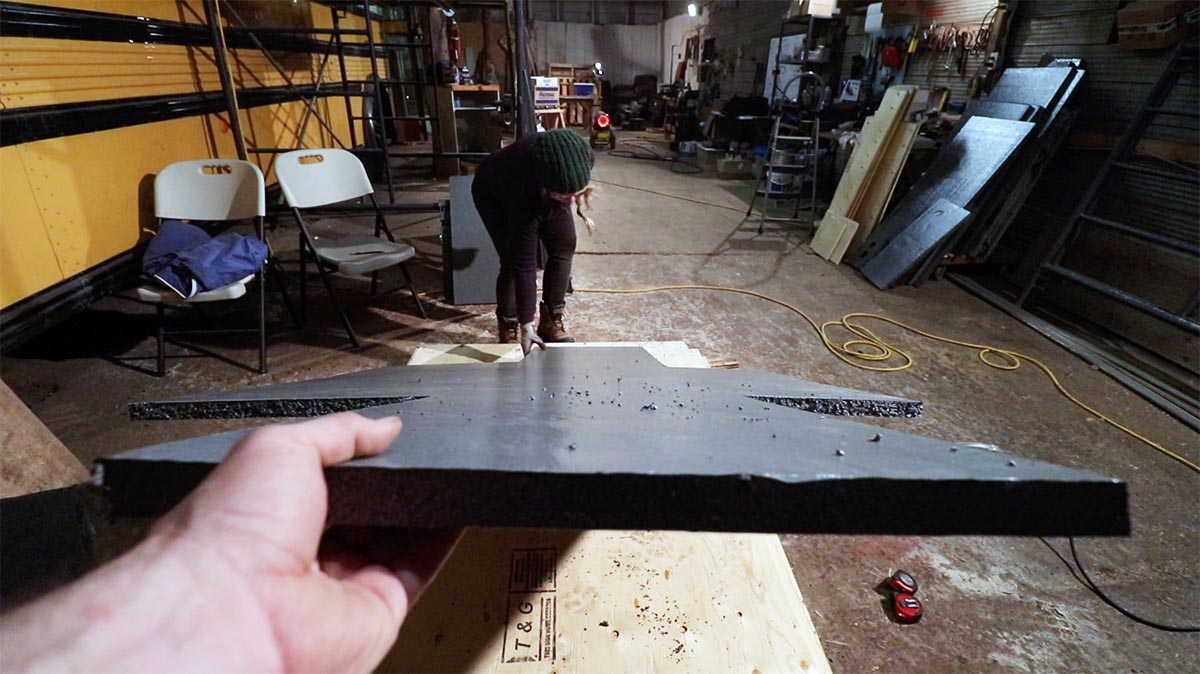
Rigid Board Subfloor Insulation
Rigid board insulation is the last option we considered. We ended up going with 1-1/16” rigid board insulation that has a vapor barrier attached to both sides of the board. Considering the rigid board has a 10psi compressive resistance means it can withstand 10 pounds of pressure per square inch.
Building the skoolie subfloor with a layer of plywood will increase the compressive resistance giving us a strong skoolie subfloor to build upon without having to use furring strips.
Wood Subfloor Type Considerations
After picking the skoolie subfloor insulation, we then started researching different wood subfloor types available.
Particle Board Subfloor
Particle board is probably the least effective subfloor because of how it responds to moisture and construction. By gluing a ton of sawdust together, particleboard is created. This creates a dense composite that is popular in “cheap” building materials from big box commercial stores.
Building with particle board has its issues because fasteners like nails and screws do not hold well in the board, especially when rolling down the street. Also, particleboard attracts moisture resulting in it swelling & weakening.
OSB Subfloor
OSB or Oriented Strand Board subfloor is a step up from particle board in that large swaths of wood strands are laminated or glued together resulting in a sheet.
While OSB is stronger than particle board, it uses a considerable amount of glue to hold together. The resistance to breaking is greater than the particle board due to the bigger pieces of wood but still has the tendency to fail sooner than that of plywood.
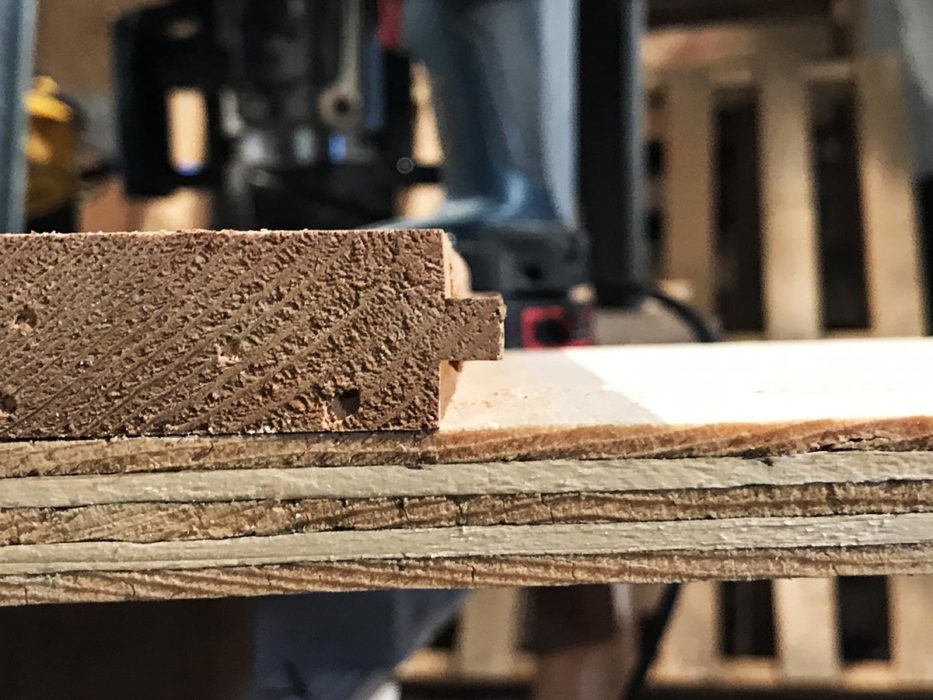
Tongue & Groove Plywood Subfloor
QUESTION: What’s the difference between plywood subfloor and tongue & groove plywood subfloor?
ANSWER: It’s the tongue & the groove (T&G)
Other than a tongue being routed on one edge and a groove on the opposite edge of the plywood, they are both the same.
Plywood is created by attaching long thin sheets of wood together in layers. The more layers, the thicker & stronger the plywood.
However, tongue & groove plywood subfloor has an advantage over regular square edge plywood. When the square-edged plywood is screwed down to the floor, there is a tendency of the wood shifting while the skoolie is moving. This shift could cause the plywood to move independently of each other.
Using tongue & groove plywood subfloor is preferable because the tongues and grooves slide into and lock together causing the floor to become one unit. Any fluctuations in humidity, vibrations and traffic is dispersed across the entire floor reducing the possibility of a board edge popping up above the height of the adjacent board it is up against.
We decided to go with 5/8” tongue & groove pine plywood subfloor so that we could have the combination of lighter weight than 3/4″ plywood, functionality to build upon and durability for long-lasting performance.
Gluing Rigid Board Subfloor Insulation
Now that the metal floor pan is clean and the subfloor insulation and plywood subfloor materials are all picked out, it’s time to install the subfloor system.
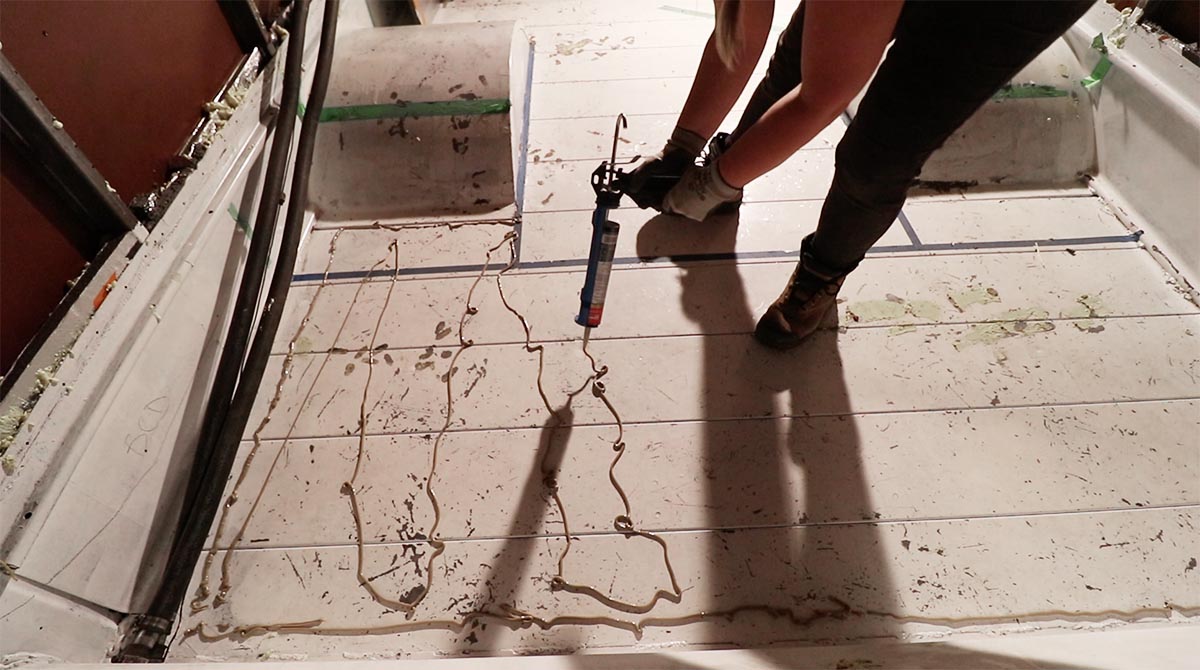
First, we grabbed some PL Premium construction adhesive to glue down our rigid board insulation. LePage PL Premium in Canada and Loctite PL Premium in the US are basically the same stuff.
Something to keep in mind is that not all foam board is made the same and construction adhesive can react to some foams causing a chain reaction of bubbles kind of like when you mix baking soda and vinegar together for the volcano science project.
PL Premium is designed to work with the GPS rigid board we’re using. GPS is graphite polystyrene and has better insulation value than normal XPS (expanded polystyrene) due to the graphite used in creating the board.
Erin’s technique for applying the PL Premium to the metal floor is to place a nice bead around the perimeter area where the board will lay and then zig-zag a creative pattern in the middle.
Then we walked (or steam rolled) around on it until it felt like it wasn’t coming up any longer.
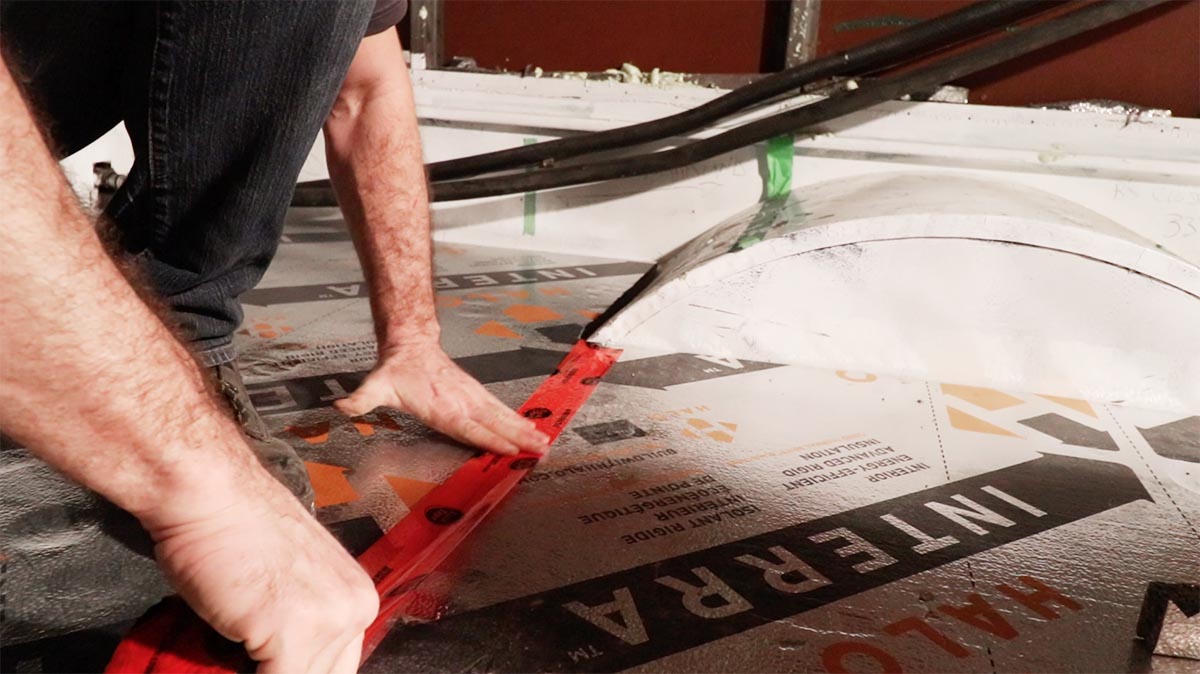
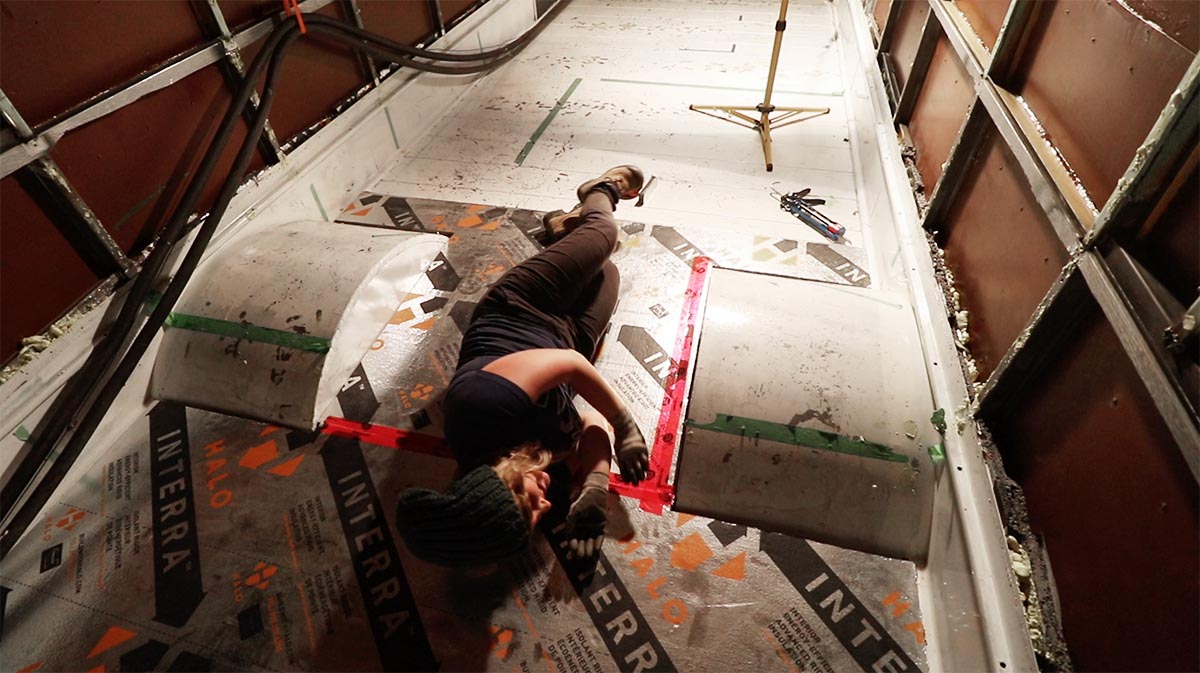
Taping Skoolie Subfloor Rigid Board Insulation Seams
After gluing two boards down, end to end, we would tape the seems to create a vapor barrier. The GPS rigid board has a membrane on it, which acts as a vapor barrier.
We ended up using Tuck Tape, which is a vapor barrier sheathing tape commonly used in sealing the seams of house wraps. It is extremely sticky, which effectively seals the seam between the skoolie subfloor rigid board insulation pieces.
Gluing Skoolie Subfloor Plywood
While the first two pieces of rigid board are still drying, it’s important to get the first sheet of plywood glued & screwed down as well.
Using Erin’s strategic gluing pattern, she put another bead of PL Premium around the perimeter edge and a creative zig-zag in the middle. We then lowered the piece of plywood down onto the rigid board insulation being sure not to gouge it.
Something to note is that when putting down both the rigid board and plywood, there were areas that we had to cut out.
- Wheel wells
- Diesel fill access on the wall and floor
- Driver compartment
- Stairwell
The rigid board is easy to cut with a heavy-duty utility knife. While the plywood was cut using a circular saw.
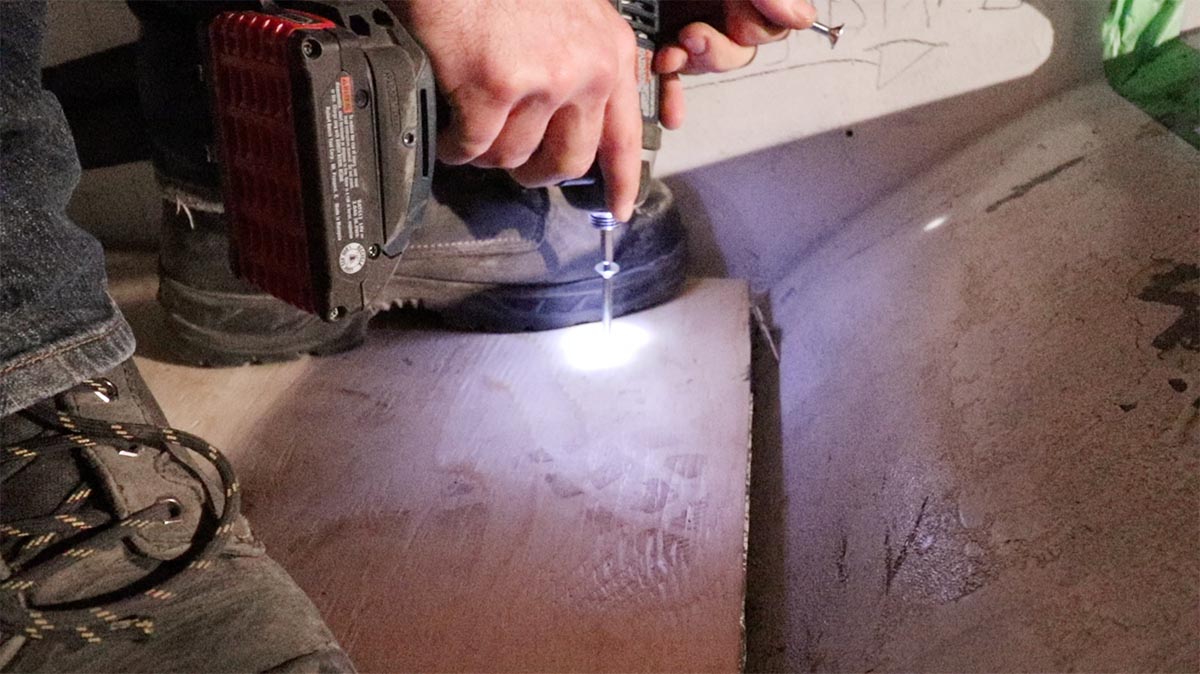
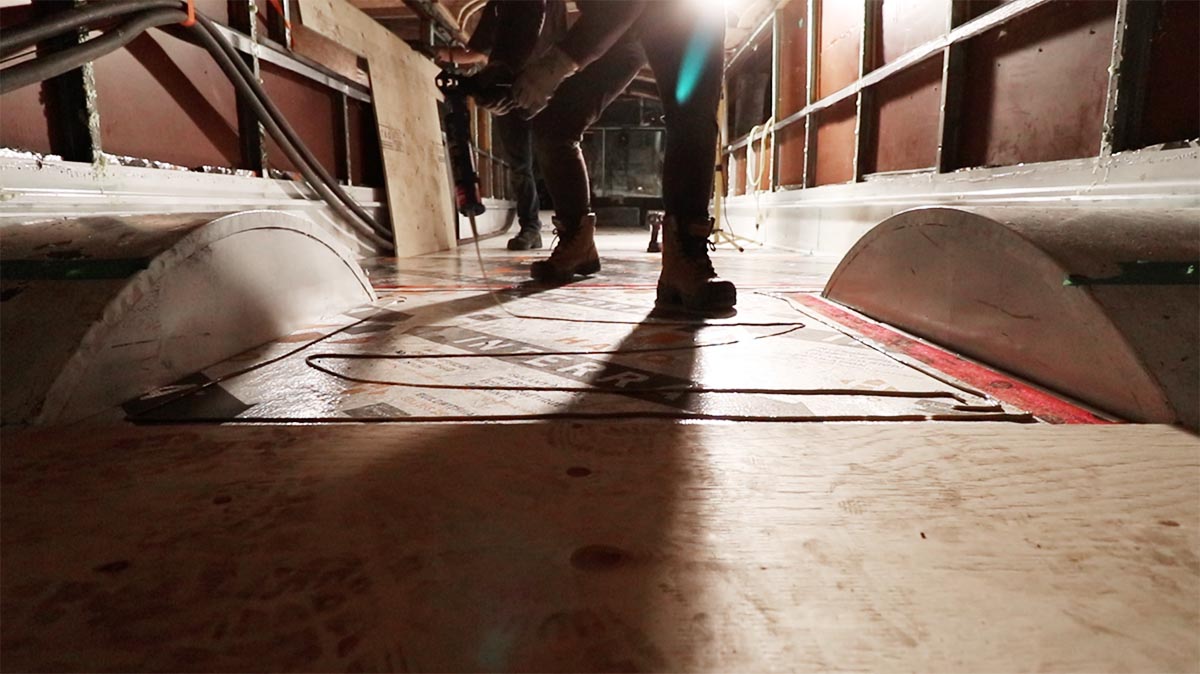
Securing Wood Subfloor To Metal Floor
Now that the tongue and groove plywood subfloor piece has been laid down, we then screwed in self-tapping 2” metal screws through all the layers and into the floor pan. If we were to do this again, we would have bought 2-1/2″ self-tapping metal screws because we didn’t take into account that the tip of the screw, which has no threads but has a drill bit tip instead, is included in the overall measurement.
By screwing each piece of T&G plywood through the GPS insulation board and into the metal floor pan, we are preventing the possibility of the layers from shifting.
We placed one screw in every corner and one screw between the corner screws on the longest edge. On any piece that had a cutout, we placed a screw on each of the resulting corners.
Once the first two pieces of rigid board and one sheet of T&G plywood subfloor are secured, add one more piece of the rigid board followed by taping the seam then installing the next piece of T&G plywood. Continue alternating this process until the entire skoolie subfloor is built out.
But what about thermal bridging?
Since we’ve screwed all our layers down, people have been chirping us on social media about thermal bridging from the screws.
First off, thermal bridging happens when the transfer of cold or hot energy passes through any substance. Being that a skoolie is a metal bus, the entire bus is a thermal bridge. Our goal is to slow the bridge through insulation. A window on the side of the bus or a skylight has more energy transfer than a screw in the shade on the bottom of the bus.
Also, most of the screws through the metal floor pan are going to be located in the insulated underbody storage. However, we have not done the underbody storage as of this writing but will get to it soon.
One other thing to consider is that any puncture, or screw through, to the exterior of the bus needs to be sealed. We (I, Brian) plan on going under the bus with a wire wheel on the drill to clean every screw protrusion and put a fat dab of polyurethane caulking on the screw up against the metal floor pan so that the area is sealed around each screw.
What do you think about creating a skoolie subfloor? Let us know in the comments below!

Conclusion
Insulating & Installing a skoolie subfloor is a necessity for building out the interior of an old school bus into a tiny home on wheels. This project took us one afternoon to complete and is well worth the investment of installing it correctly so that our future projects will be secured safely while driving our bug out skoolie vehicle out into the wild!

Until Next Time… Adventure On!
– Brian Garcia

Hey, we're Brian + Erin. Currently, we're workin' on our bug out bus. Lucky the proverbial $hit hadn't hit the fan yet when we picked up this 40-foot beauty in Phoenix AZ and drove it up to Canada to convert it. Hopefully, we all still have time...
Honestly, this bus conversion has been the only sane thing in this insane world lately. We can't tell you how good it feels to BE working on something that lights our souls up and has such potential for a life that is entwined with nature, love, and happiness.
Our main goal is to inspire people to get off-grid and become self-reliant. We are well on our way and are super excited to talk about solutions with others who are shooting for a similar way of living.
Did This Blog Post Help You? If so, we would greatly appreciate it if you comment below and share it with a friend.
4 Comments
Check out our must-read articles about Skoolie Conversion
Texas Couple Accidentally Won School Bus Auction | Registering & Building A Skoolie In DFW
Joeseph & Jennifer Davis from DFW, Texas accidentally won an online auction to buy a school...
DIY Skoolie Solar System To BE Off-Grid Longer
When designing & building a DIY skoolie solar system, there are quite a few considerations....

Steps To Import A Bus From The USA To Canada (Or Vice Versa)
Yvan & Sylvie from Québec have successfully imported not just one, but TWO buses from the USA...
Thanks for the thorough coverage of all your decisions and methods. The floor method makes sense for your height limitations. It will be a durable and tight floor with that tongue and groove plywood! You probably need more screws though. Minimum for a subfloor is usually a screw every 6″ on the long edges and every 12″ in lines that are 16″ apart. Here’s a quick This Old House video that demonstrates: https://www.youtube.com/watch?v=OQn_IspcwJI
Hey Jerry! What a great comment! If only we knew to screw more frequently when we put in the floor originally. We do have quite a few screws through the metal floor pan, but not as frequent as the This Old House video you shared. Thanks for the input! We’ll monitor our floor and if we need to screw more, we could always put in plugs after countersinking the additional screws through the finished barn wood floor applied on top of the subfloor. Adventure on! – Brian
Hello, love this article and plan to use this process for my subfloor! However when I bought my bus, it came with wool insulation so I will be using that. I’ve done research and can’t seem to figure out how i will secure that to the metal (I know you used special adhesive because you used rigid foam) because I’ve read not to use adhesive for wool. Any ideas? 🙂
Hey there Bailey! If you’re using wool for your floor insulation, you may have to install furring strips to suspend the subfloor off the metal floor pan or it will just squish the wool flat. In that case, staple the wool to the furring strips and it’ll stay in place without having to use adhesives.
Happy building!